Billing Screen
Invoice screen
Discussed below are various sections from the billing screen. This screen can be divided into four main parts (see figure 1):
1. Billing cart
2. Item List
3. Product category pane
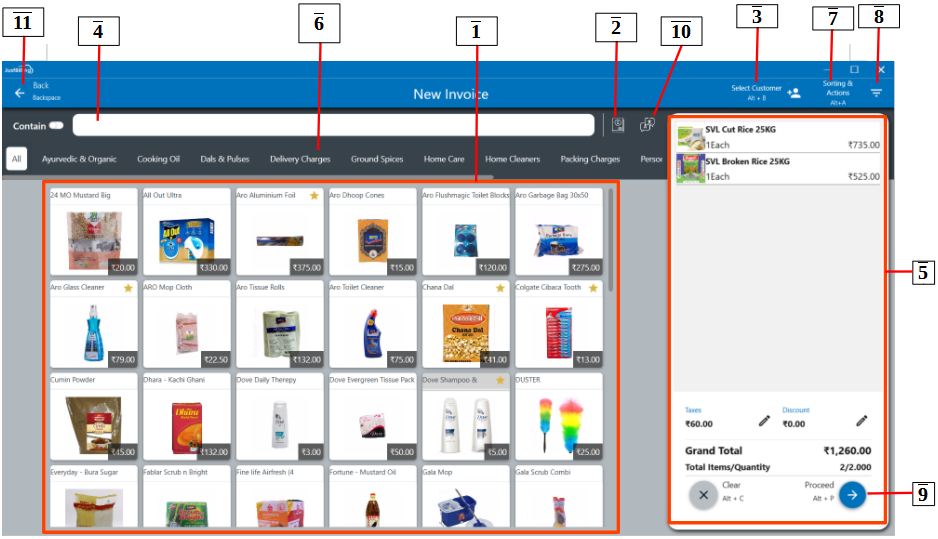
(Figure 1 - Billing screen and the sections)
1. Billing Cart
To add items to cart simply select the item name from the products list.
2. To change the sales order type, select the sales order type from the drop down (see figure 2).
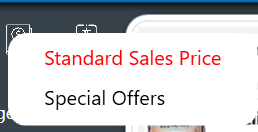
(Figure 2 - Sales order type)
3. To select an existing customer, enter the customer's phone number/name in the below field (see figure 3).

(Figure 3 - Select customer)
3.1. After clicking on the select customer, a screen is poped-up to select the existing customer, search the customer by name and can create a new customer or business (see figure 4).
(Figure 4 - Select customer)
3.3 To add a new customer, enter the customer's phone no and press enter. This will open the Add Customer window where the Customer Name, Phone Number and more information of a customer can be entered. And also can add the business by selecting the business option in the pop-up screen, add company name, phone number and more information about the business. (see figure 5).

(figure 5 -Add new customer)
To change product quantity and add discount, click on the product name in the cart and specify the quantity of item and proceed. (see figure 5&6).
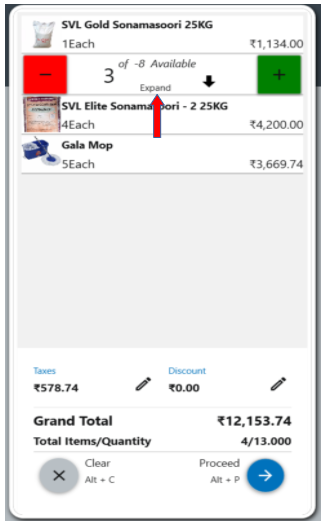
( figure 5- edit cart)
To apply discount on the product or item, click on more information where you can apply promo code, discount rules and taxes mapped with the item and click Update (see figure 6).
(Figure 6 - edit Product quantity, Price, Discount edit sections)
To delete a product from cart, select the product and click on the delete icon - 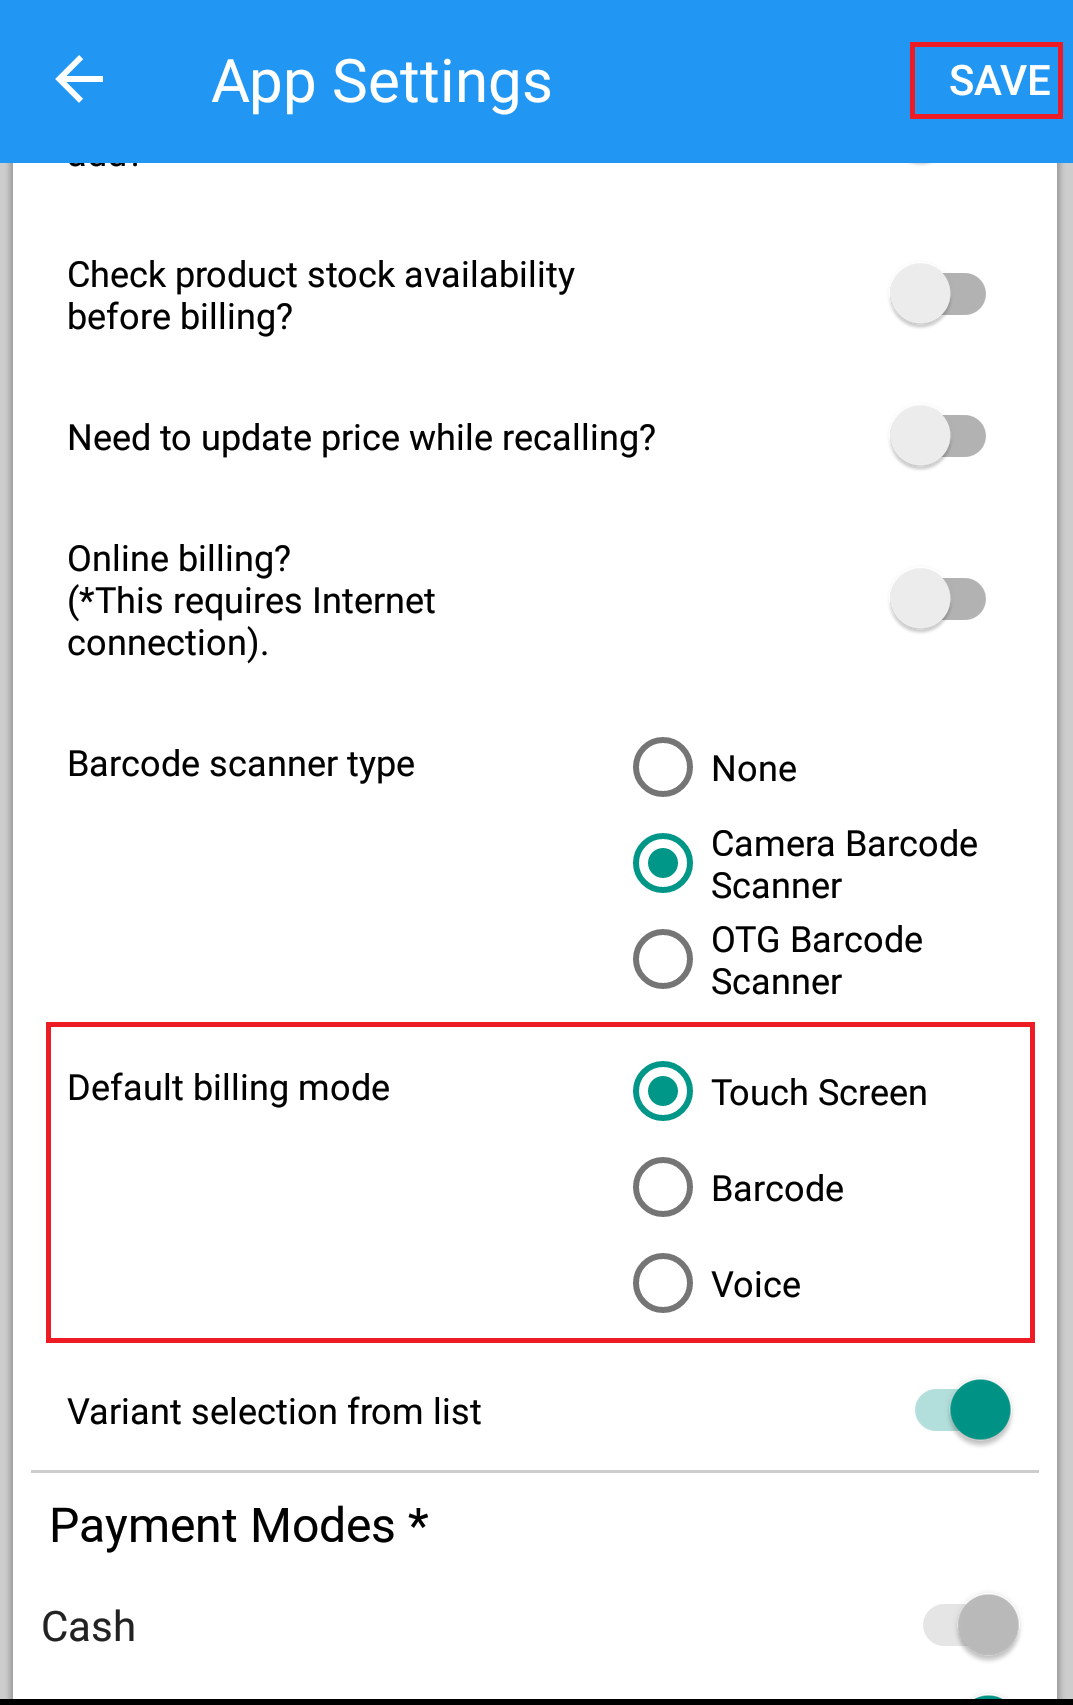 .
.
To add products to the cart through bar-code scanner, Plug the bar-code scanner to billing screen and scan the bar-code on the products.
4. You can search for a particular item item from the search bar. Type the item name in the search box to view the items in the product pane.
Set product alias names in different languages -  . To know how you can set alias name for an item, refer Product Alias page.
5. Switch between different price catalogs/lists -  . To know how you can switch between price catalogs, refer Price Catalog page.
Check product details. To know how you can check product details, refer Products master page.
6. From the Categories section, select a category to view products under that category. For example, if you select rice category, it will show all the type of rice in the list of products (see figure 6).

(Figure 7 - Product categories sections)
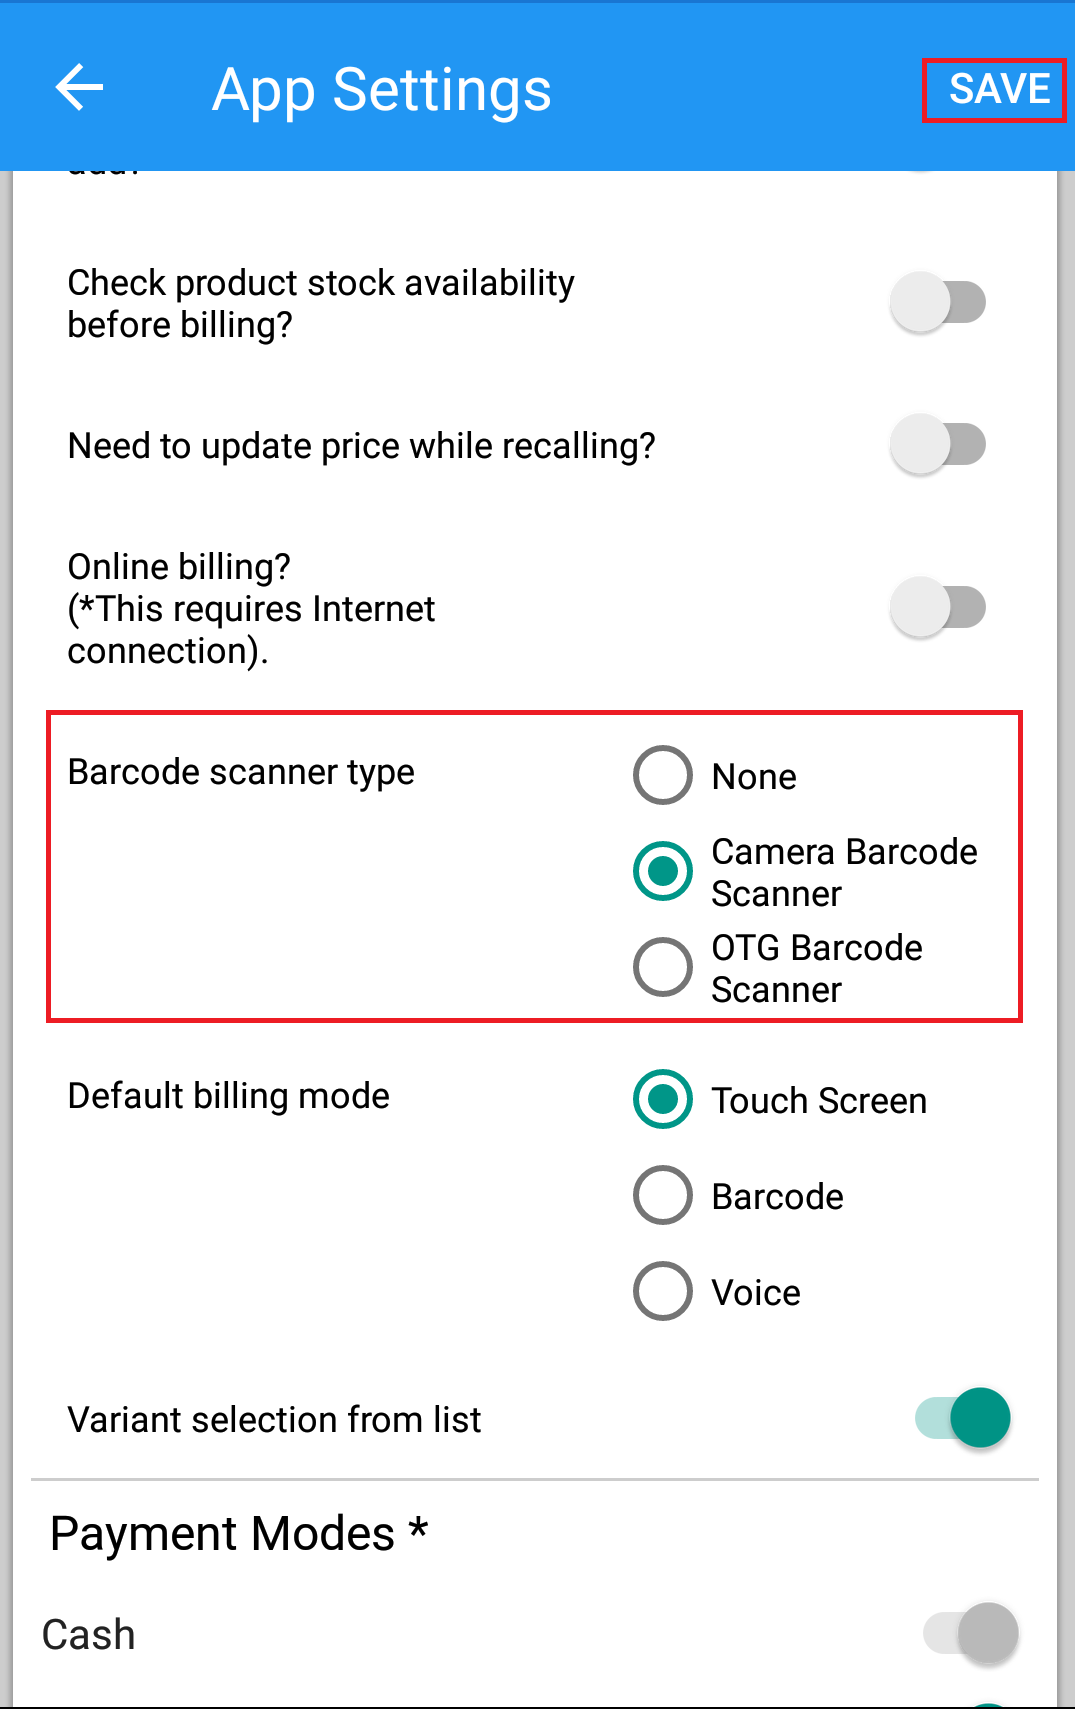
4. The billing screen has many buttons available towards the bottom of the screen. Based on the Sales Flow Mode selected under Settings > Application Settings, below are the buttons available:
(Figure 7 - Button sections)
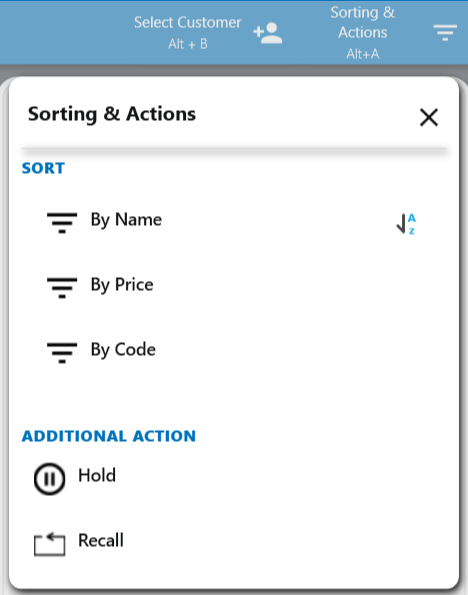
- Recall - You can recall bills that were put on hold and the ones on which orders were taken. For more details on how to recall a bill, please refer Recall page.
- Hold - You can put a bill on hold from this button. To put a bill on hold, please refer Hold page.
- Sort - You can sort the products by name, price and code.