Sales Quotations
Sales Quotations
Sometimes buyers would ask for an estimated price for the goods/services they are interested to buy. From the Quotation page, you can generate quotation for the products/services you sell. The requirement can be conveyed by the customer verbally or in the form of a Requisition Order (see figure 1).

(Figure 1 - sales quotation page)
In addition to creating a quotation, you view receipt for a quotation and create a Sales Order corresponding to the quotation
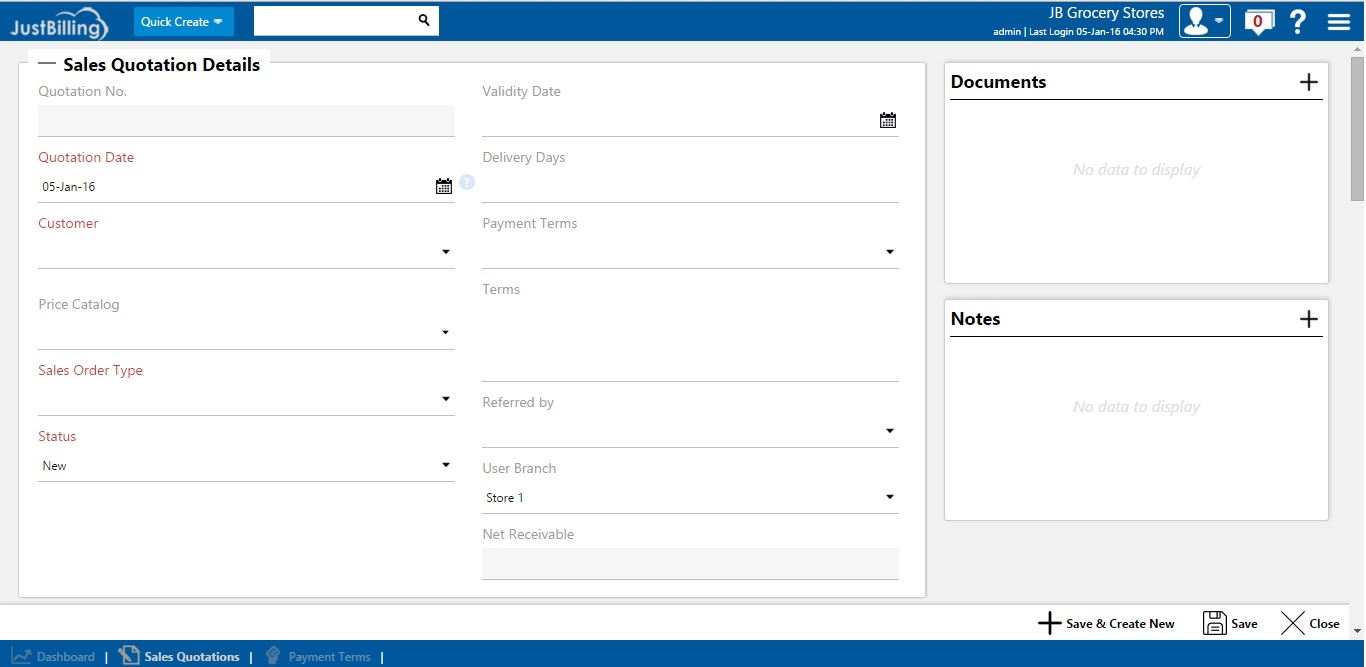
(Figure 2 - sales quotation entry page)
How to create Sales quotation ?
1. Navigate to Sales quotation page
2. To create a sales quotation, click on (+) New and enter the following details and save the record (see figure 2).
Different fields in this page are:
- Quotation Number : this field is disabled and the information shows up automatically, which gets generated by the system, only after you save the entry
- Quotation Date : although the date gets added automatically, you can change the quotation date (only to previous date)
- Customer : enter the customer name from the drop down
- Price Catalog : enter the price catalog from the drop down [This is an optional field. If you have any price catalog for the selected customer, only then select the same. On doing this, product will get filtered in the product field for Line Item (defined under Line Details). And on selecting the product, details like that of the product price, tax & discount will show up automatically, which then becomes un editable.]
- Sales Order Type : the sales order type gets added by default as Standard, which can be changed as per the requirement
- Status : the sales order type gets added by default as New, which can be changed as per the requirement
- Validity Date : enter the validity date for the quotation [The quotation will be valid till this date and sales orders can be generate based on this.]
- Delivery Date : enter the delivery date [It defines the date by which the customer wants the delivery of products.]
- Payment Terms : enter the payment terms of the quotation
- Terms : enter the general terms of the quotation
- Referred By : enter the reference details of the quotation
- User Branch : data gets added automatically based on the customer against which the sales quotation is being added
- Net Receivable : here you can check information regarding the net receivable amount, but the field is un editable
Address:-
Shipping Address
- Shipping Branch Name : enter the name of the shipping branch. [This will come only in case of corporate customers who have defined the branch.]
- Shipping Address : enter the shipping address
- Shipping Country : enter the shipping country
- Shipping State : enter the shipping state
- Shipping City : enter the shipping city
- Shipping Zip Code : enter the zip code of the shipping address
Billing Address
- Billing Branch Name : enter the name of the billing branch. [This will come only in case of corporate customers who have defined the branch.]
- Billing Address : enter the billing address
- Billing Country : enter the billing country
- Billing State : enter the billing state
- Billing City : enter the billing city
- Billing Zip Code : enter the zip code of the billing address
[Note: Click the Same as Shipping Address check box if address for shipping and billing is same]
Amount Details:-
- Subtotal : this is a disabled field and data gets added on the basis of details in the Line Item section
- Item Tax : this is a disabled field and data gets added on the basis of details in the Line Item section
- Item Discount : this is a disabled field and data gets added on the basis of details in the Line Item section
- Total Taxable : this is a disabled field and data gets added on the basis of details in the Line Item section
- Delivery Charges : enter the delivery charges if applicable
- Adjustment : enter the adjustment details
- Discount on Total : this is a disabled field and data gets added on the basis of discount defined in sales order type or loyalty
- Tax 1 : enter tax type 1
- Tax 2 : enter tax type 2
- Tax 3 : enter tax type 3
- Rounding Method : enter the rounding method
Line Details:-
- Download Template box : click on this box to download product details template.
- Import from Excel : click this box to import the product list excel.
Line Item
- Product Code : enter the product code from the drop down
- Variant : enter the variant code from drop down
- Unit Price : data gets filtered here automatically after selecting the product code, on basis of the price catalog selected. If no price catalog has been selected, you need to enter the unit price
- Quantity : data gets filtered here automatically after selecting the product code, and by default it shows up as one. You can change the same if necessary
- Line Price : data gets added automatically on entering the product code (results from multiplication of quantity & unit price)
- Line Tax : here data gets added based on the entries done against the product
- Line Discount : here data gets added based on the entries done against the product
- Extended Price : data gets added in this field on the basis of unit price, discount and tax
- Add button : clicking this button adds the product line information
- Reset button : clicking this button helps you reset all the information