Requisition Order
Requisition Order
From this screen, you can create a Requisition order from the app. Requisition order is created in a branch against to other branch for which stock transfer out will be done by other branch against the requisition order. Requisition order can be done from Android as well as Back Office.
Note : Requisition order feature is only available in Just Billing Professional subscription where in an organisation connected with more than one branch in different locations.
In this guide we will show you how to do requisition order from Android App.
- How to create Requisition order?
To generate a Requisition order, navigate to Menu > Transaction > Requisition Order.
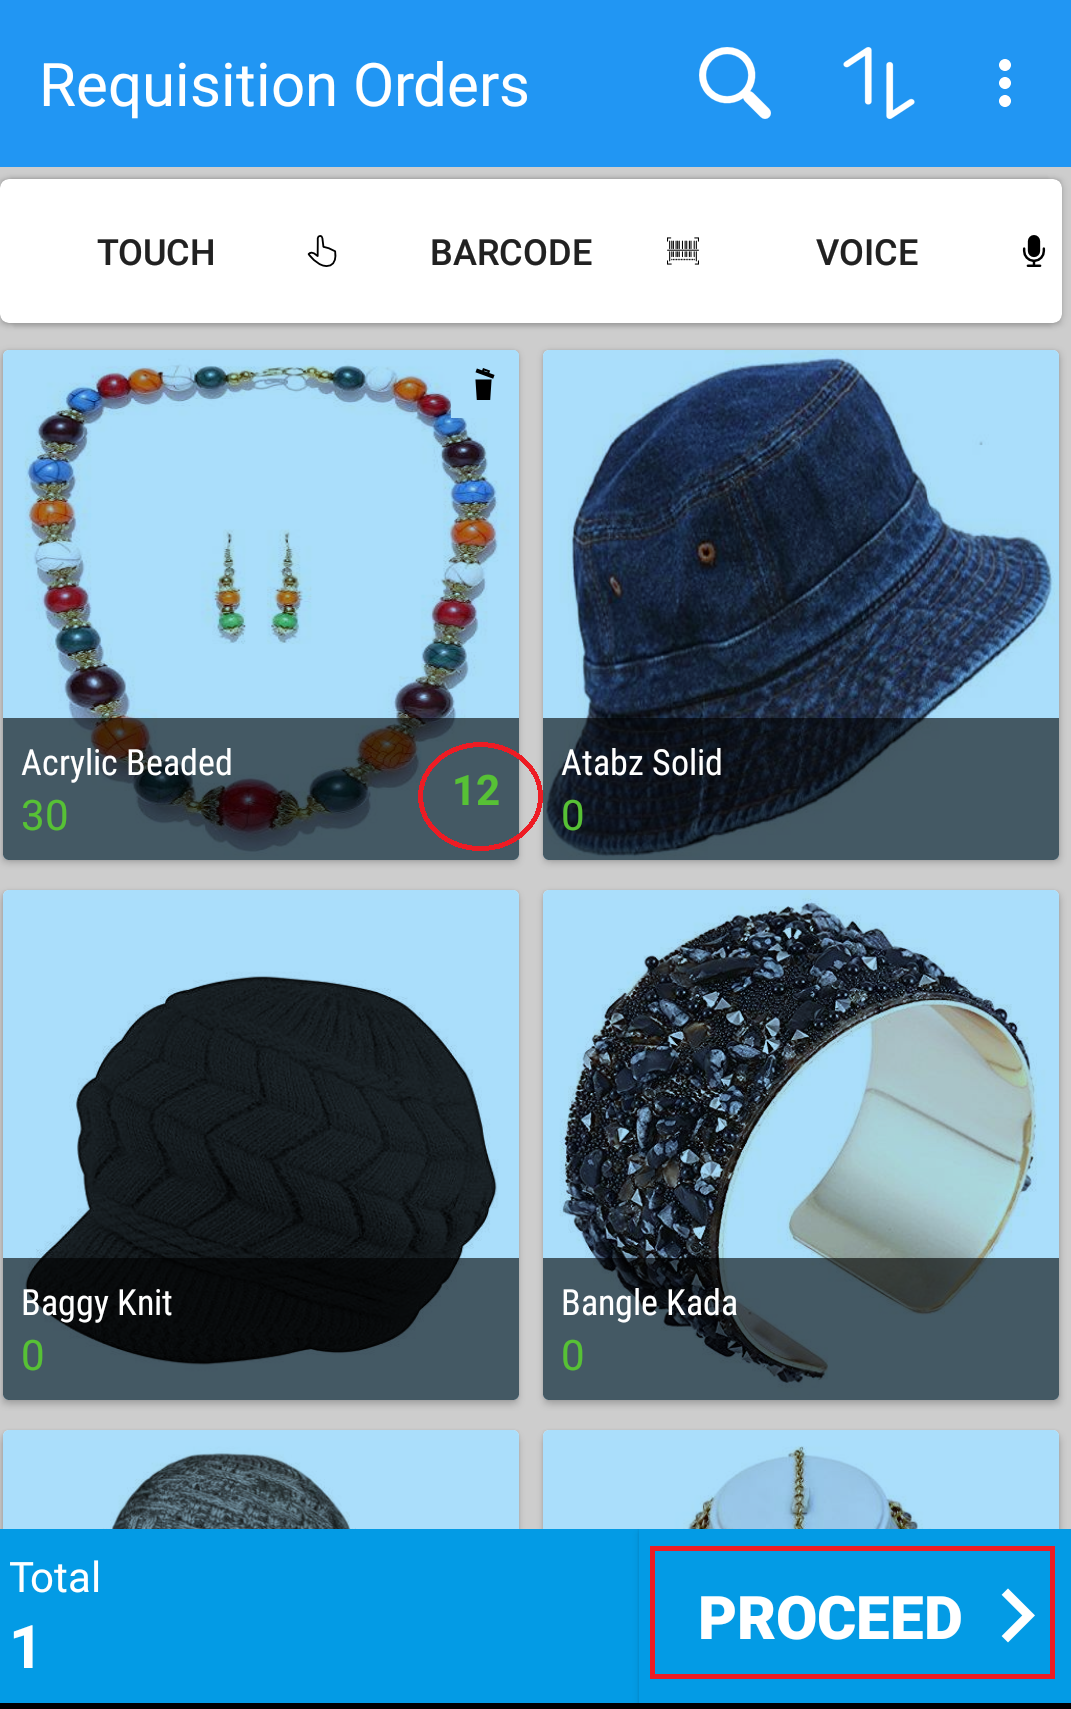
- Tap on Requisition Orders and then click on
 . (see figure 1)
 - Tap on the product name to add products to the cart. (see figure 2)
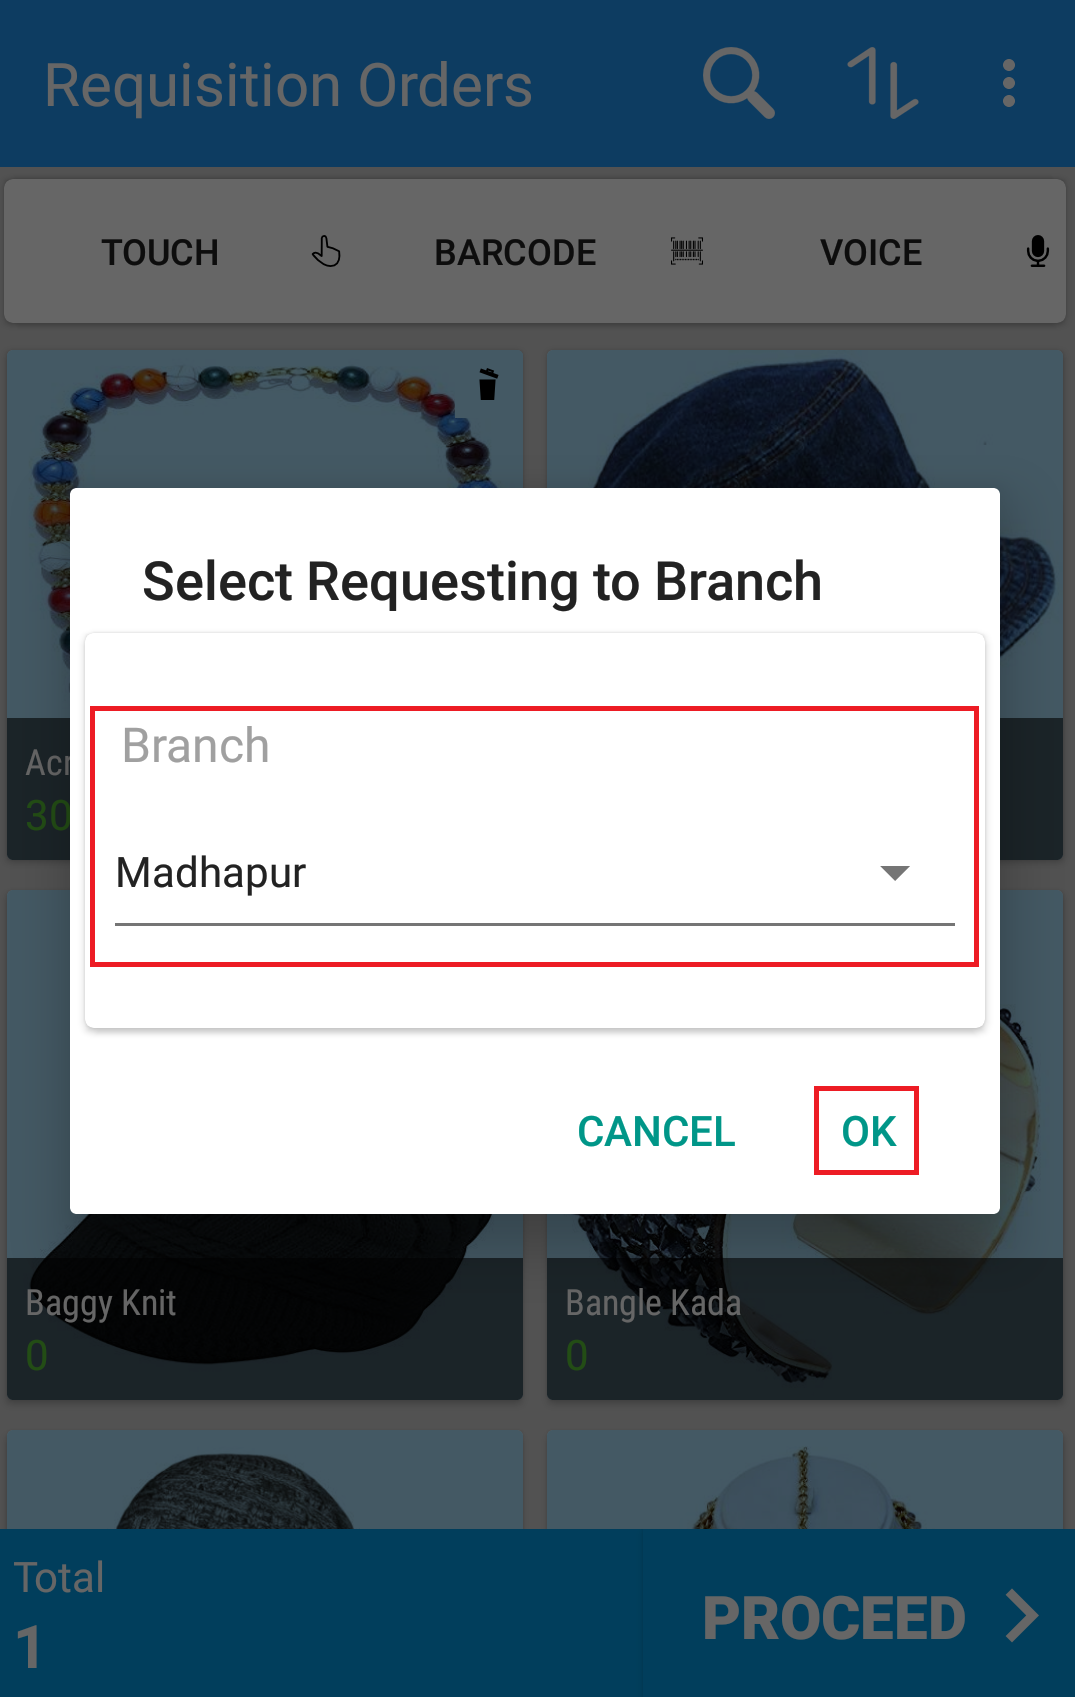
- Select User Branch (from where the stock transfer out will happen) and Ship to Branch (where the stock will be received) from drop down. (see figure 3)
- Then click on OK
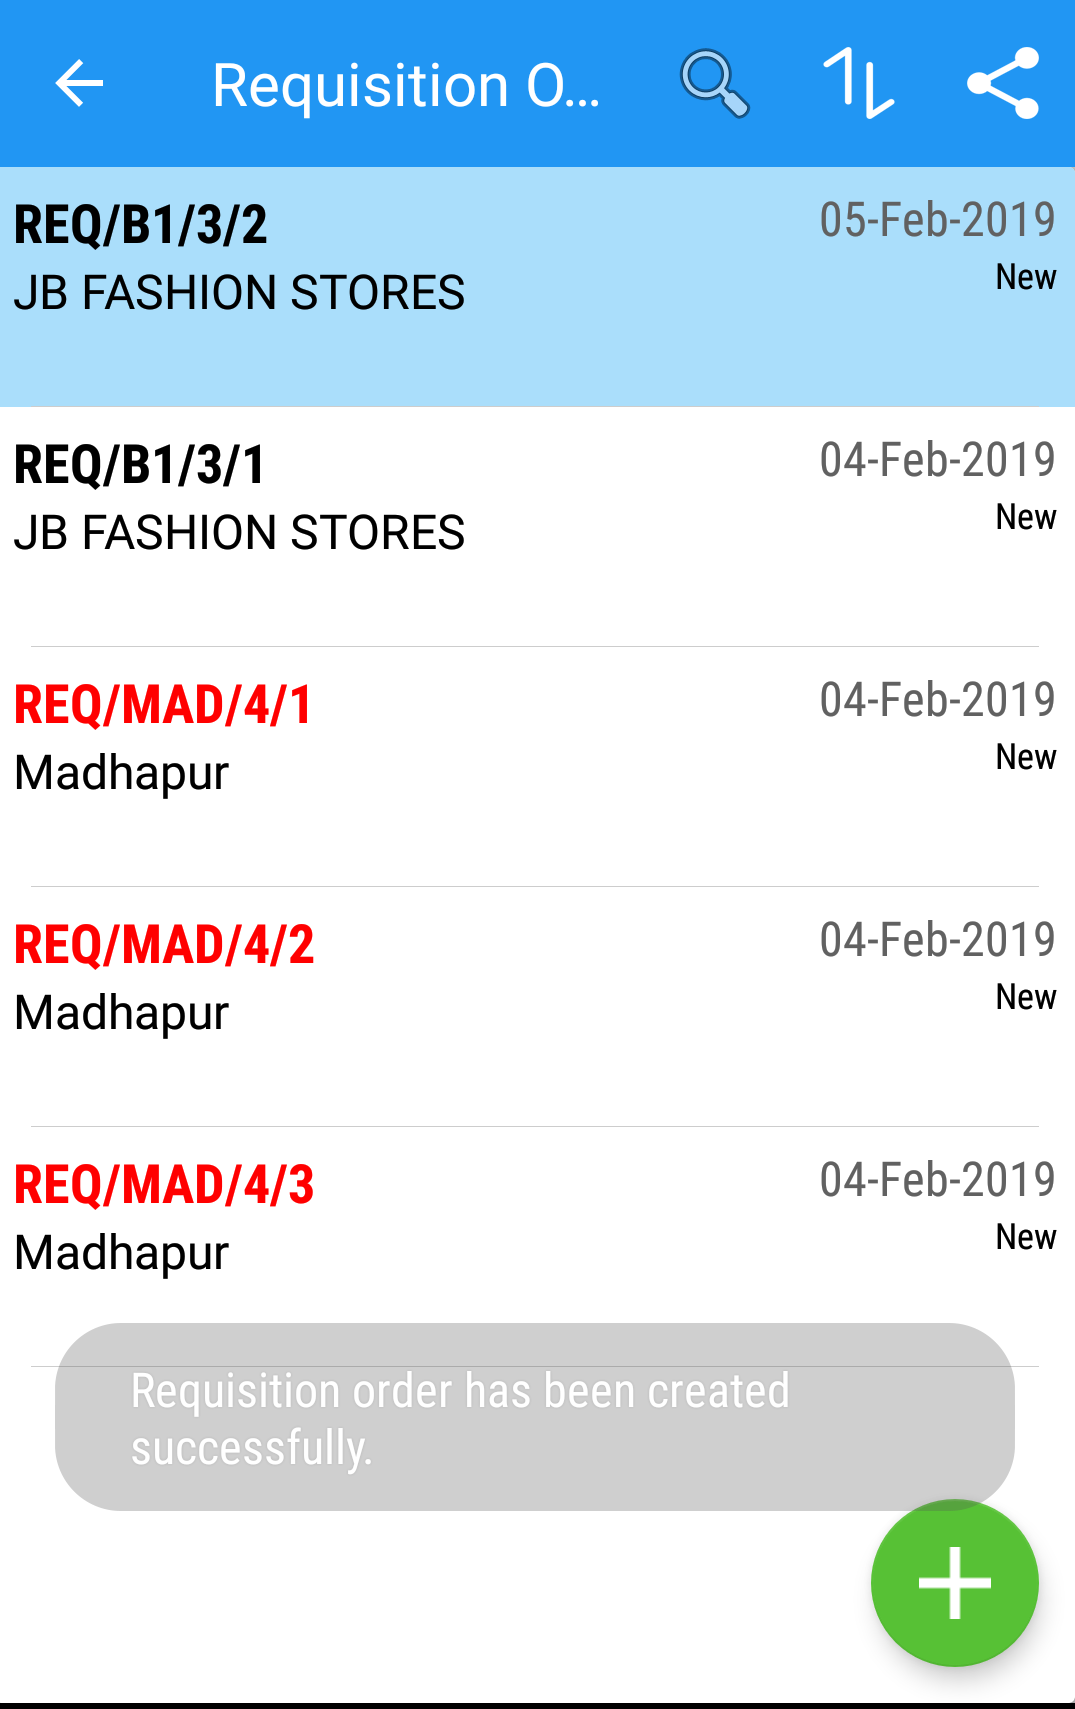
- Requisition order has been created with assigned requisition order number. (see figure 4)

(Figure 1 - Requisition Order Screen)
(Figure 2 - Product selection cart for requisition order Screen)
(Figure 3 - Branch Selection Screen)
(Figure 4 - Requisition order created Screen)
2. How to print or share the Requisition Order ?
To print requisition order print option is not available however you can export it as PDF, tap the export icon ![]() and select an option. (see figure 5)
and select an option. (see figure 5)
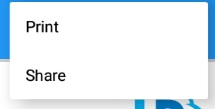
(Figure 5 - Print or Share Screen)
3. How to check Requisition Order history ?
To check Requisition order history, navigate to Menu> Transaction > Requisition orders.
This will open the Requisition orders History page, with the list of all the Requisition orders generated.