Products
Products
The left section of the product page shows the list of the products and the section on the right shows the details of the selected product, and lets you add or edit product details (see figure 1).
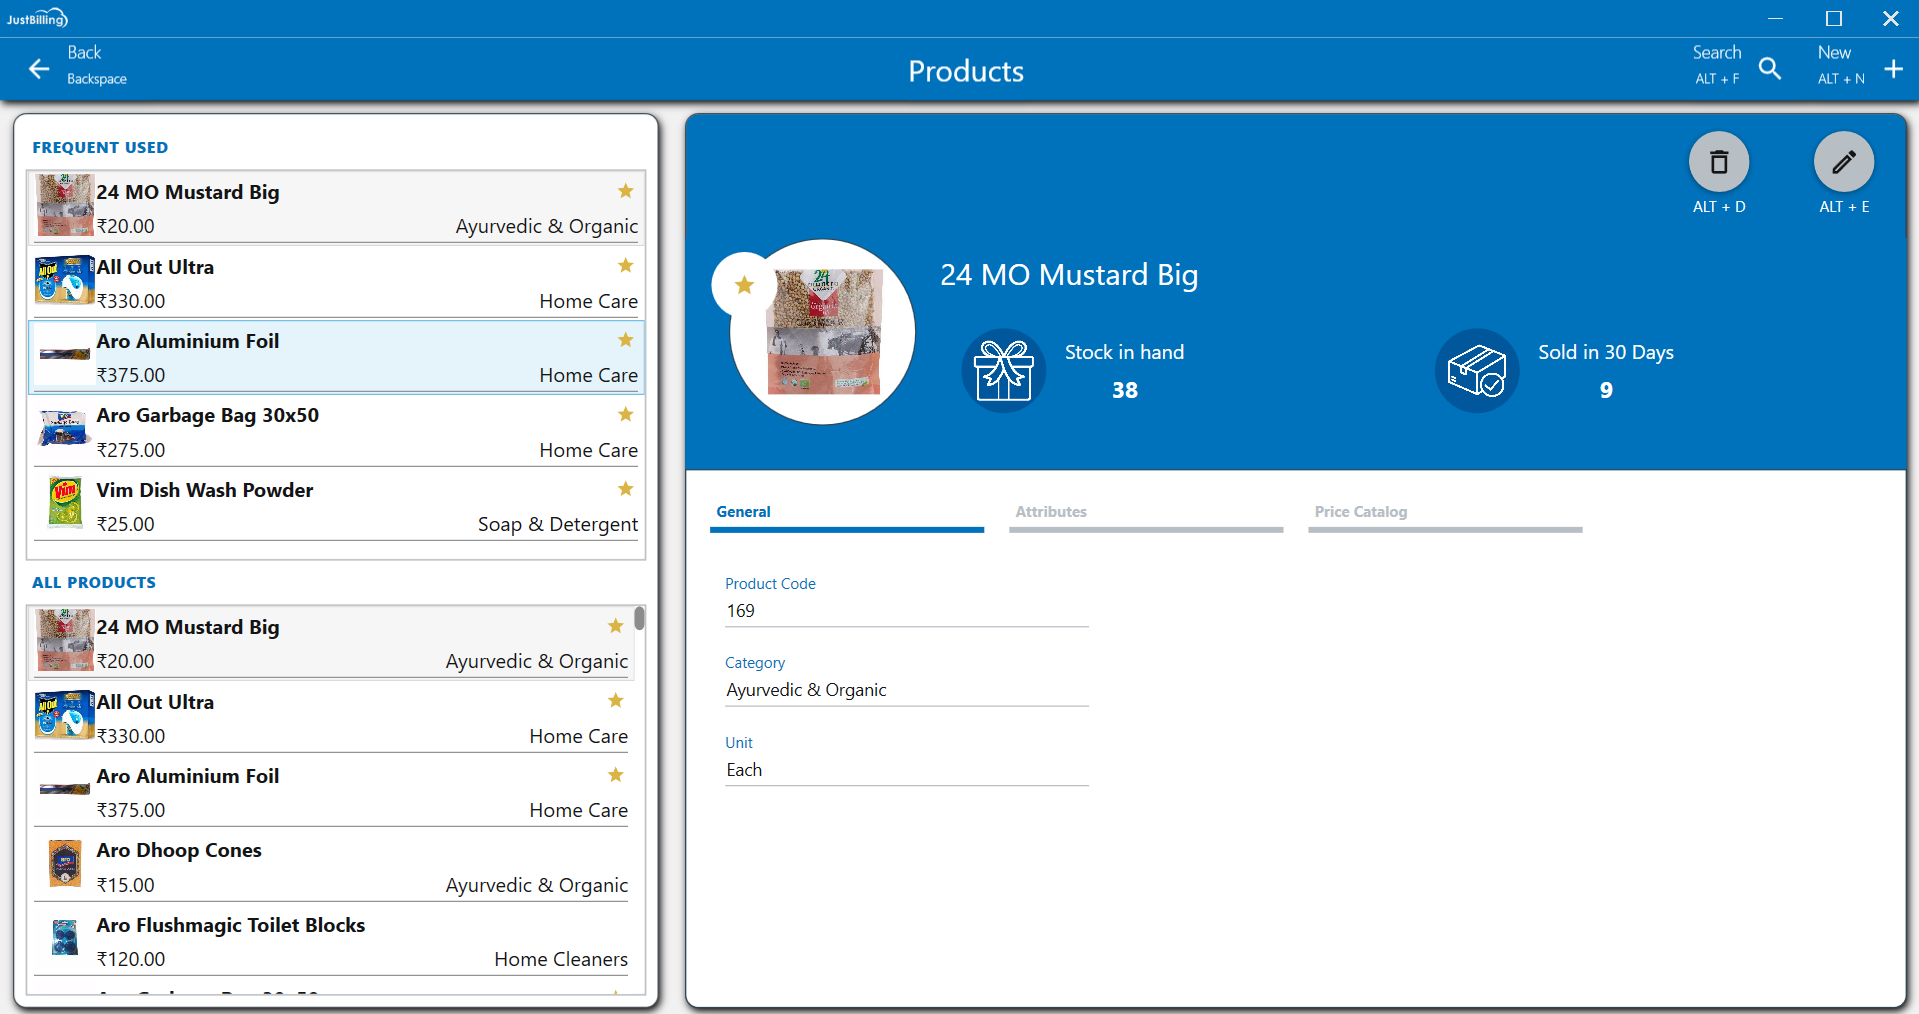
(Figure 1 - Products page)
From this page, users can View, Add and Edit the list of products.
In this section you can see how to Add, Edit and Map a products.
After referring to this document, users should be able to do the below mentioned processes
- How to create products in JB Windows application
- How edit Product to update its pricing details.
Description:
Products play the main role in the entire Just billing Windows software. Every process/transaction in Just Billing Windows is related to the available products.
Creating products in JB Windows
There are 2 ways of creating products in JB Windows
- From Masters (see figure 2A)
- From Dashboard(see figure 2B)
Another option to create the product is from Menu → Masters → Products as shown in the below screen (see figure 2A).
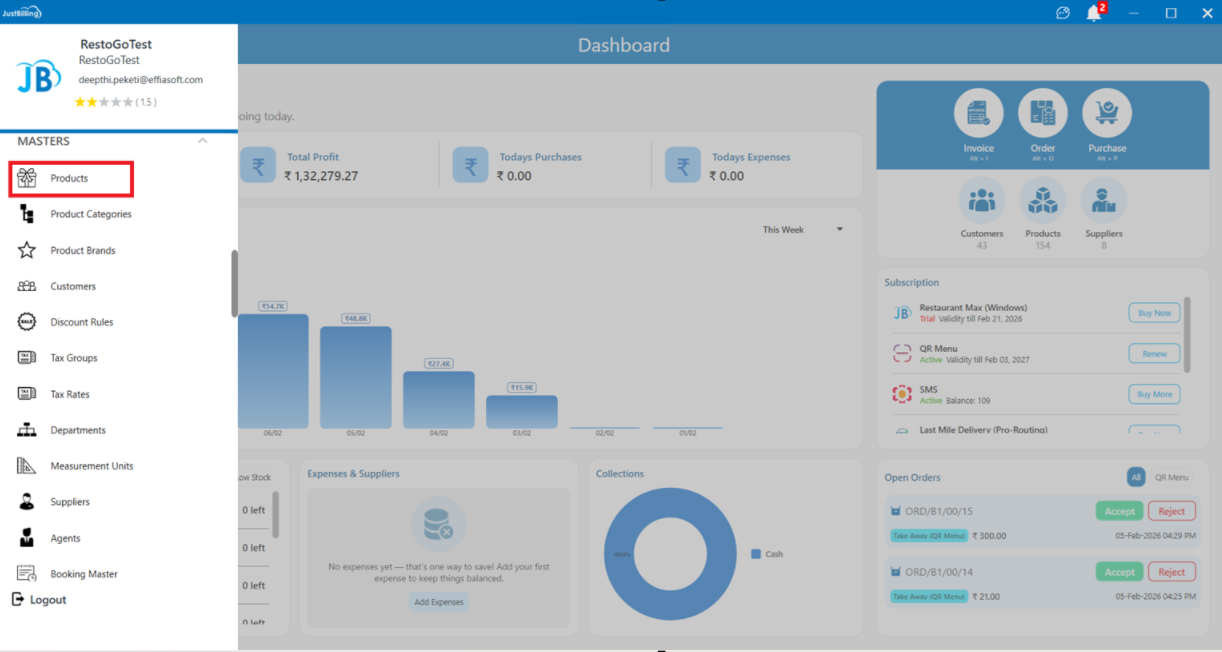
(Figure 2A - Accessing Products page from Menu)
From the Dashboard page (as shown in the below screen shot) tap on the Product icon available, which takes you to the Products page (see figure 1B).
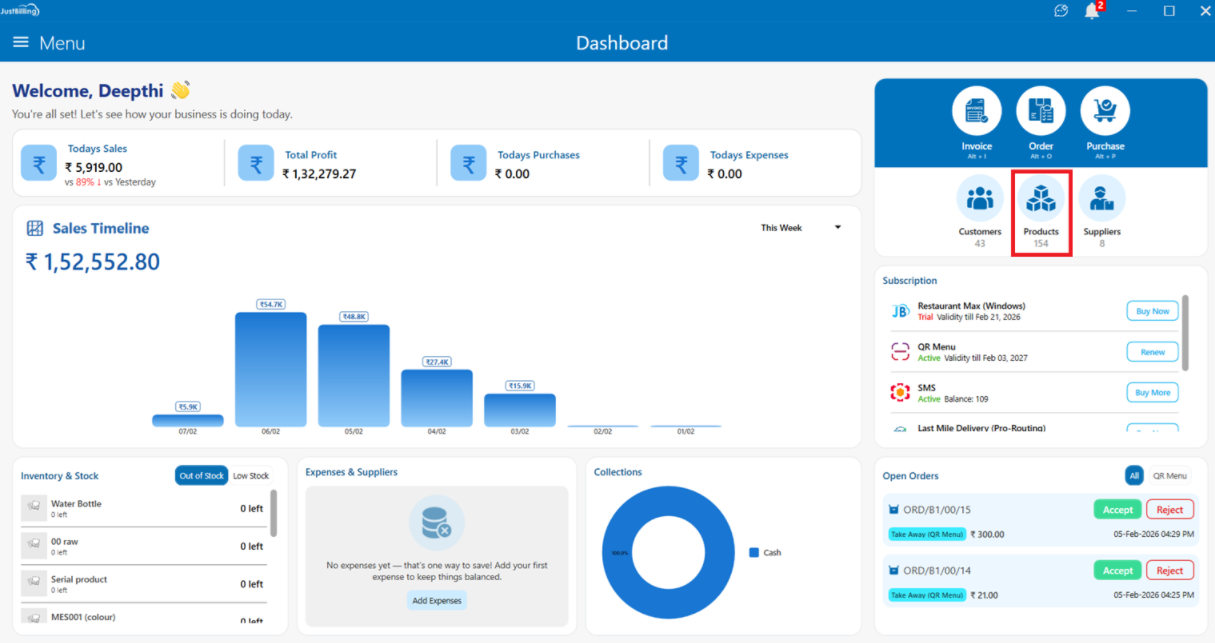
(Figure 2B - Accessing Products page from Dashboard )
How to create a Product ?
To create a new product category, you need to log into Just Billing Application in your desktop.
1. Navigate the page to from Menu > Masters > Products (see figure 2B).
2. Clicking on Add will open the below product add entry screen (see figure 3).
3. Enter product name,Product code and HSN code
4. Select Category name from the list of Product categories
5. Select Unit, Parent product, Department, Product type, Product Brand
6. Check the options for Is active, Return allowed, Allow negative stock, Sales item and Purchase item.
7. Enter the product description if any
8. Save the details
9. Once the product is saved it will show in Product list.
10. Once the product is saved It will enable few other options for us to enter like Price Catalog, Product alias, Suppliers, Modifier, Instruction, Cancel and Save.
(Figure 3 - Adding a product)
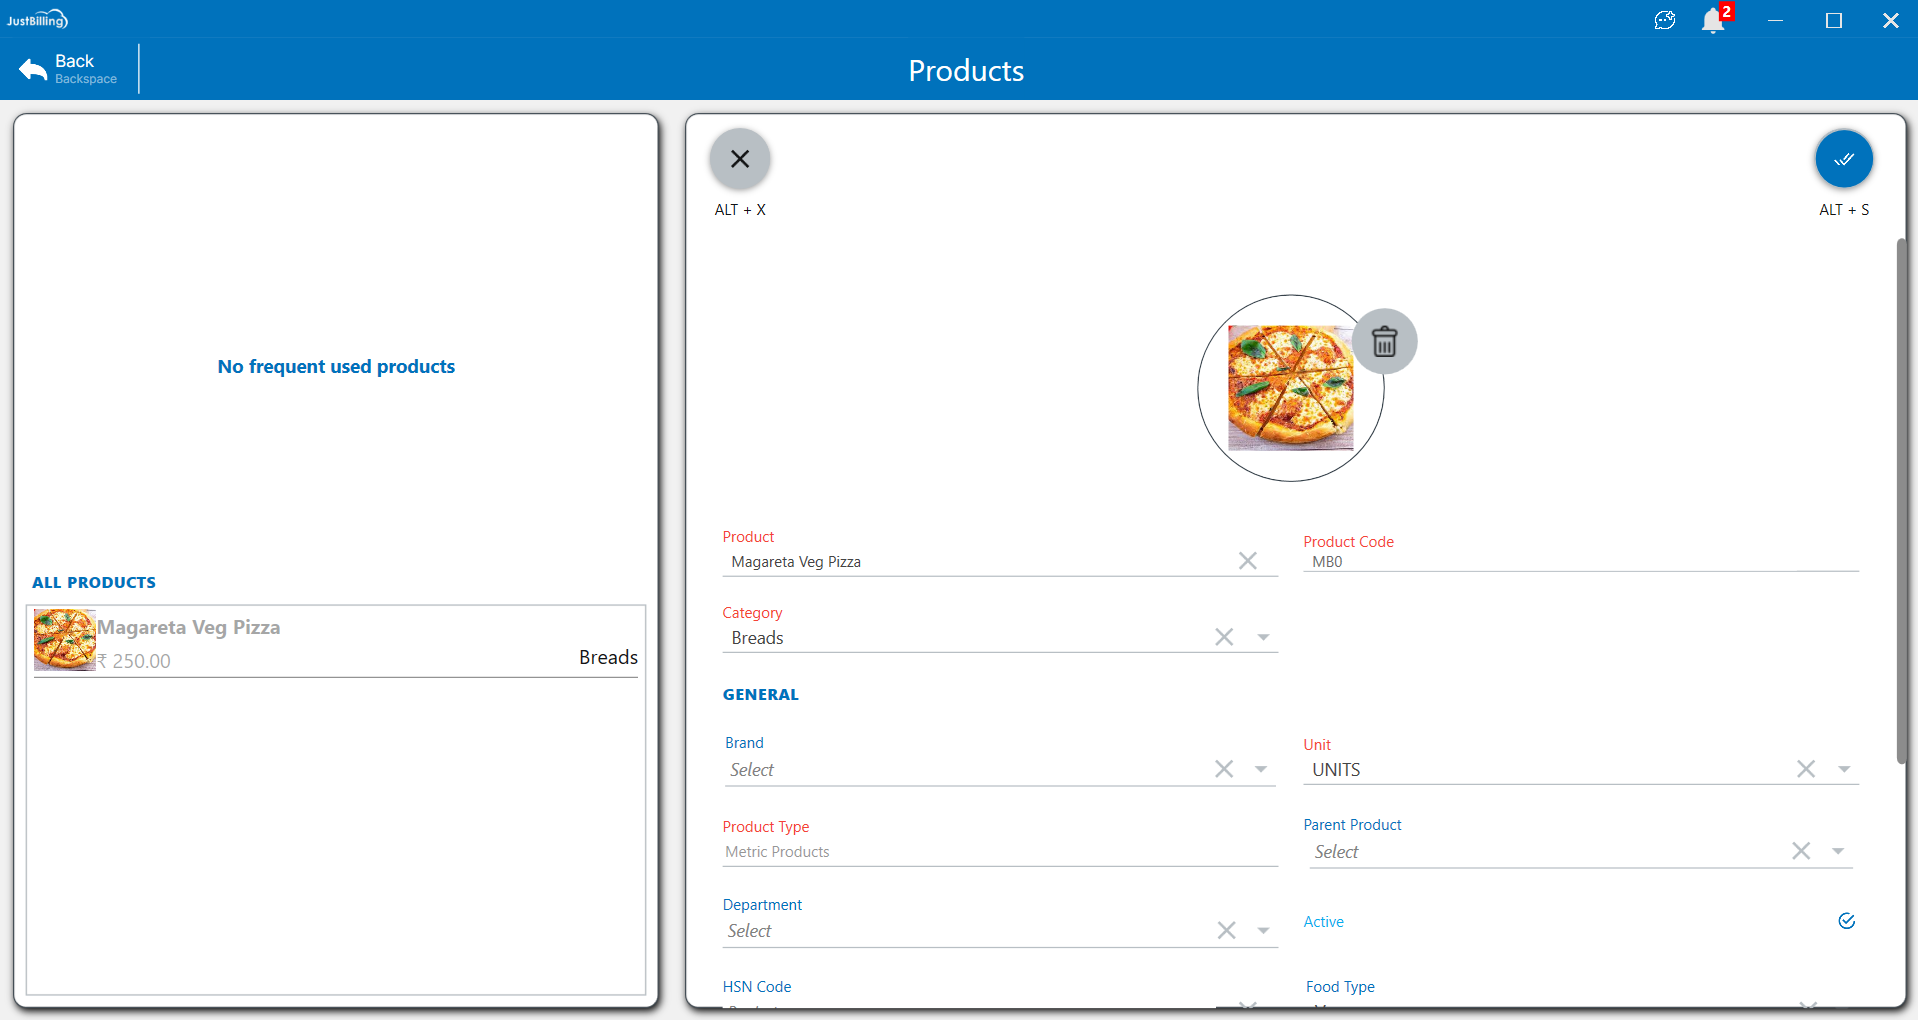
(Figure 4 - Product detail section)
In the above screen, mandatory fields will be displayed in red and should not be left blank.
- Product name: It refers to the name of the product.
- Product Code: Its a unique identifier for a product e.g it may be unique id or machine-readable bar code that helps the item to be tracked. Product code works as a primary key so there can be duplicate product names but each will have a unique product code.
- Category name: Products are organized by their categories. There can be different categories of products for example: Coca Cola Maaza, Sprite etc, can be categorized as soft drinks. By default application provides two categories - default and modifier.
- Unit : It refers to the unit of measure for a product : Generally unit can be defined as Standard unit or system of units by means of which a quantity of an item is accounted for and expressed.
Note : A new category can be created from the Product Categories page.
- Default price: It refers to the standard price of the item (without tax and discount).
- Description: In this field user can add a description for product for example if a plate of Puri consists of 4 pieces, user can add a description such as “Four pieces per plate. Description is an optional field.
- Parent product: In some cases, a store may buy certain items in bigger units, but while selling them, the store may break it down into smaller units and sell each unit as one product. The bigger unit will be considered as the parent product.
For example, a store may buy a box of mineral water bottles, but sells a bottle of mineral water (see figure 5).
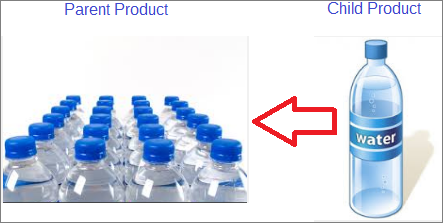
(Figure 5 - Parent and child product)
A box of mineral water can be considered as one product (Parent Product) and a bottle of mineral water can be considered as its child product. Inventory will be maintained in terms of parent product. In order to maintain the relationship between the parent and child product, a factor should be specified.
Taking the above example, create two measurement units:
NOTE: Measurement units can be created from Masters > Product Management > Measurement Units page.
- 1 box of mineral water
- 1 bottle of mineral water
Assume 1 mineral water box contains 10 bottles. So the factor for the unit ‘1 mineral water box’ should be specified as 1/10 =.10
- Department: It refers to the section in which the product/item is available in. For example, a restaurant having bar & fine dine-in sections, will have two departments, e.g Bar Department and Dine-In Department. Based on the product's mapping with a department, a KOT will be generated according to the department selected for the product.
- Product type: It refers to the state a product is available in. In a restaurant products are usually available in finished state; big stores may want to maintain/track some products in semi-finished state, or as raw materials, etc. Below screen shows different types of products that can be set for a product.
- HSN Code:Enter the HSN code for GST compliance.Mandatory for tax-enabled products.
- Food type:Select Veg / Non-Veg for food items.Used for food classification and compliance.
Note : Any product having different variant based on size, Color or Both for one single product then those products needs to be mapped as Metric Product. This can be done from Back Office only. While creating Invoice you need to select appropriate product variant so that inventory will hit for the respective product variant.
To create Variant Master refer to Variants page in Cloud Back Office.

(Figure 6A : Product Variant Master Screen)
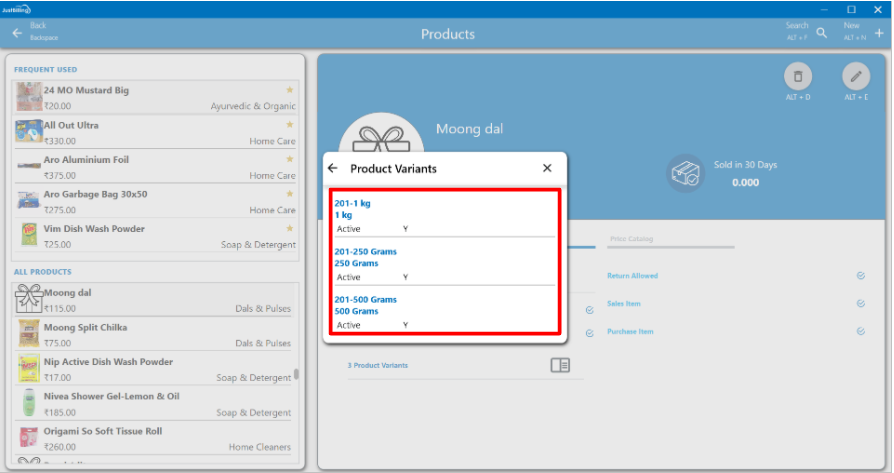
(Figure 6B : Product Variants Screen)
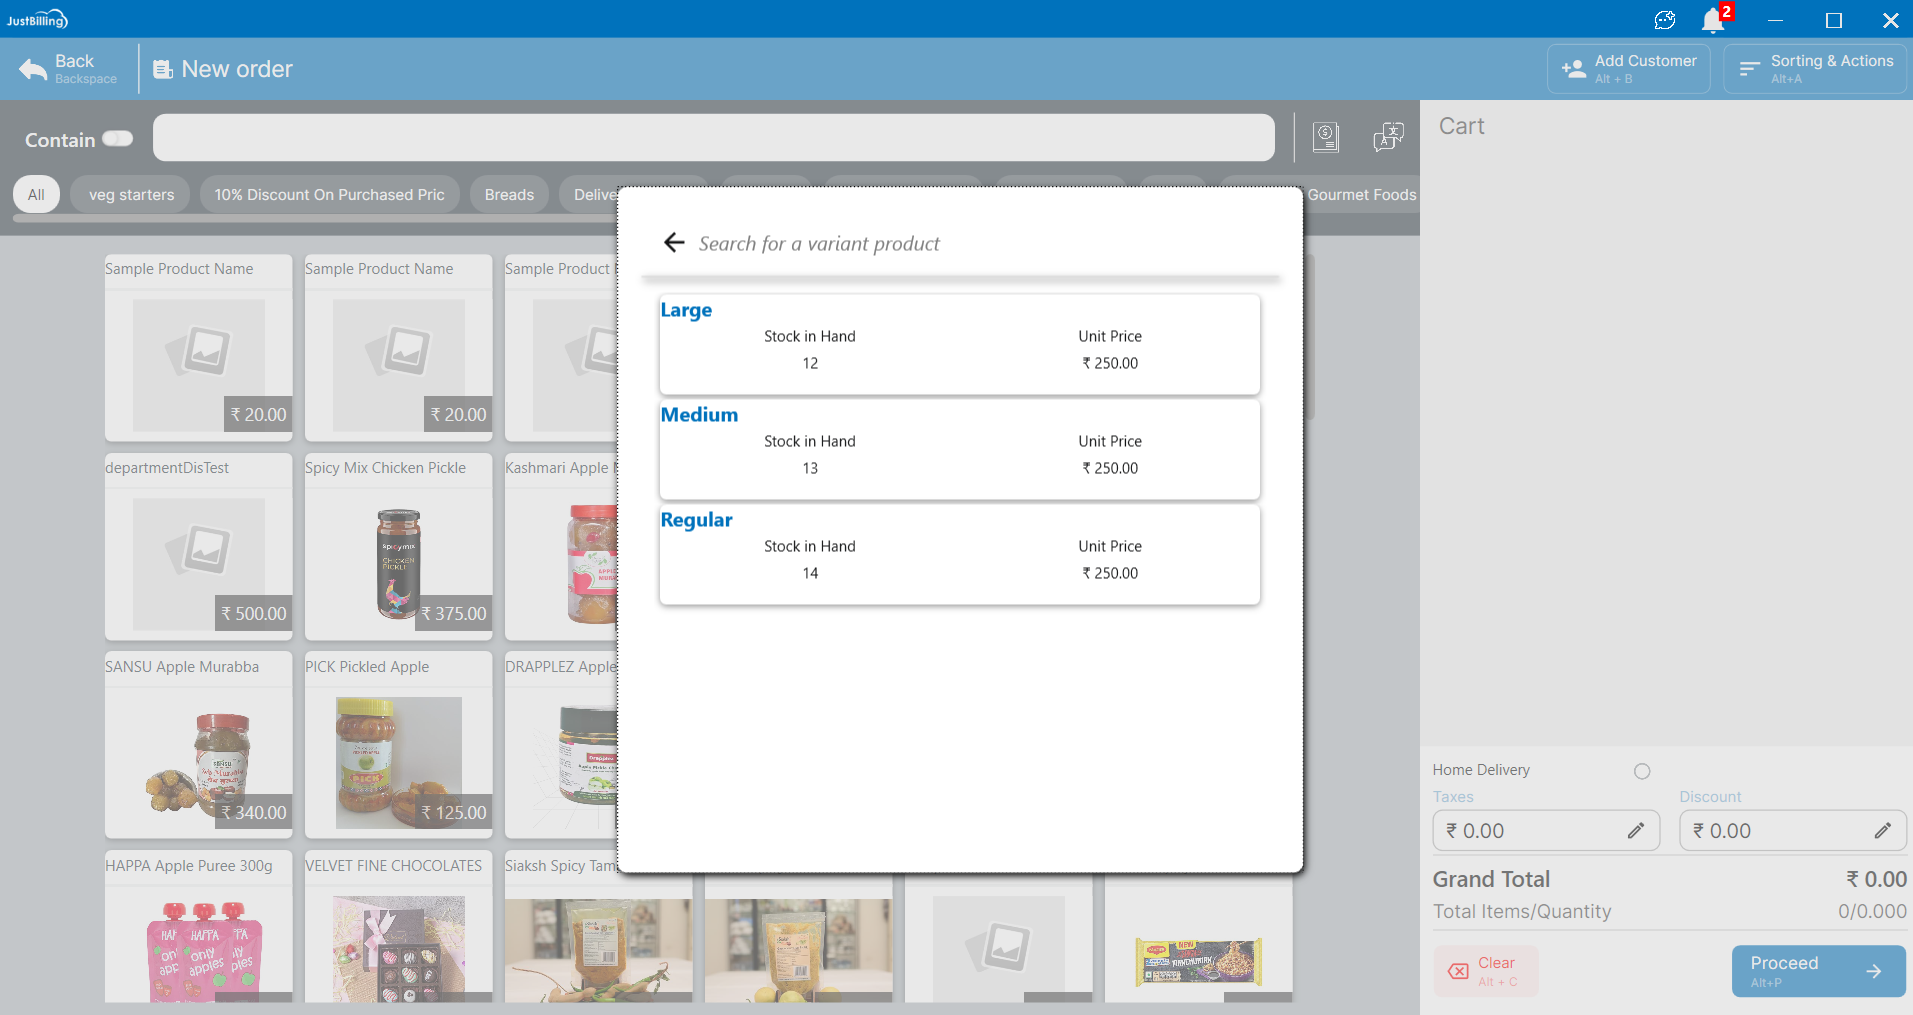
(Figure 6B : Billing cart displaying Product Variant Screen)
- Manged by: A “batch number” is a unique identifying number (or set of letters and numbers) assigned to one product batch which can be used to identify each individual finished product made in that batch. When you assign batch numbers and put them on the products, you can just look at the product label and know immediately from which batch that particular item came.
- For products Managed by Serial will have a unique serial number for every SKU of the product. Similarly for the products managed by batch numbers then those will have Batch number of the product. If you have same product with two different batch numbers then you can enter lot size of all the batches of product for managing the inventory.
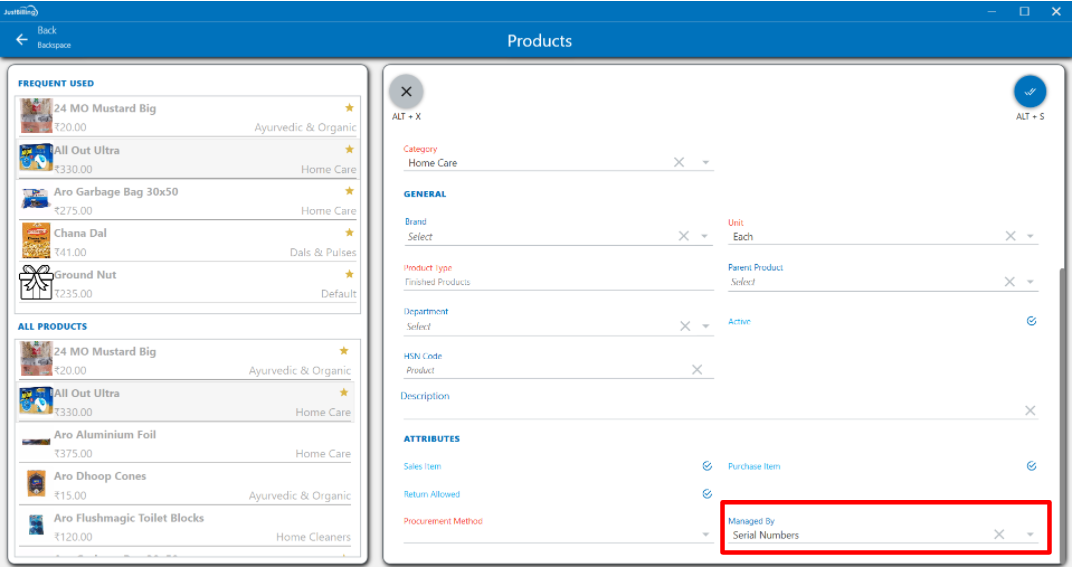
(Figure 7 - Product "Manage by" )
- Is Active: A product must be active for it to be displayed in billing screen. The icon '
 ' acts as the notification if the product is active or not.
 - Return allowed: This option should be checked for items that store will decide to return back from customers after a sale is made.
- Stock in hand: In this field user can enter the initial stock of product, after processing every transaction (customer sales order) the stock will be deducted from stock in hand status.
- Brand: Usually most of the products are associated with some brands. In this field, users can select the brand of the product which is predefined in the back office.
- Allow negative stock: If you uncheck this option, a store cannot sale the product once the stock of the product = 0. Out of stock products will be displayed in the billing screen, but the same product cannot be added to the billing cart. If you try to add an out of stock product to cart, the system will display a message.
- Sales Item: If you are going to sell the product you are adding, it is a sales item.
- Purchase Item: If you are going to buy the product you are adding, mark it as purchase item. For retail businesses, most of the products are purchased and sold.
Note : You can edit an existing product by the Edit button