PhonePe
PhonePe Integration
The PhonePe Integration allows JustBilling users to collect digital payments through the PhonePe payment gateway. This section provides detailed instructions on how to enable PhonePe, configure merchant credentials, and save the settings.
Accessing PhonePe Integration
- Go to Menu → Integrations.
- Select the PhonePe tile and click Manage.
- You will be redirected to the PhonePe configuration screen.
PhonePe Configuration Overview
The configuration screen is divided into two parts:
PhonePe Toggle (Enable/Disable)
- A toggle button is provided to activate or deactivate the PhonePe payment feature for the selected branch (e.g., Maruti Enterprises or Cosco).
- When the switch is OFF, PhonePe payment fields remain hidden or inactive.
- When the switch is ON, the configuration fields appear allowing the user to enter PhonePe credentials.
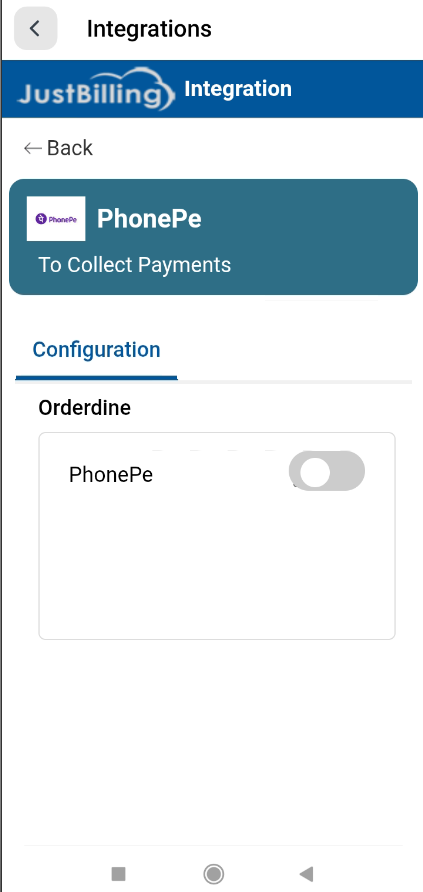
(Figure-1- Phone Pe Configuration)
Merchant Credentials Setup
After turning ON the PhonePe toggle, the following field becomes active:
X-MERCHANT-ID
- This field is mandatory for enabling PhonePe payments.
- It contains the Merchant ID provided by PhonePe.
- It must be entered exactly as received from PhonePe (case-sensitive).
- Used by the PhonePe system to validate and link payments to your merchant account.
Example:
TSPEFFIASOFTUAT
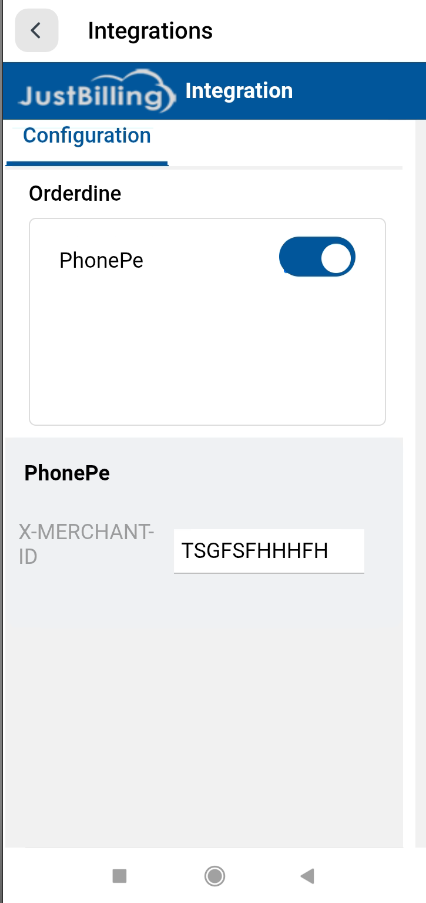
(Figure-2- Phone Pe Configuration)
Saving the Configuration
After entering the X-MERCHANT-ID, click the Save button (located at the bottom-right corner).
Upon successful save, the system displays a confirmation message:
“Saved successfully”
This indicates that PhonePe is now active and ready to receive digital payments.
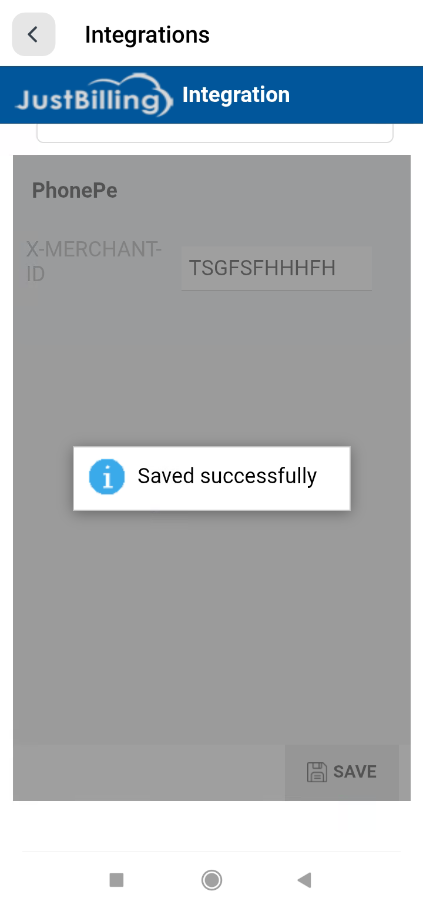
(Figure-3- Phone Pe Configuration)
How PhonePe Works After Setup
Once PhonePe is enabled:
- PhonePe appears as a payment option during billing/checkout.
- Customers can pay using UPI via PhonePe.
- Payment confirmation flows back into JustBilling instantly.
- Transactions are automatically recorded in the system.