QR Menu
QR Menu : From this User need to purchase the QR menu by selecting Buy Now.
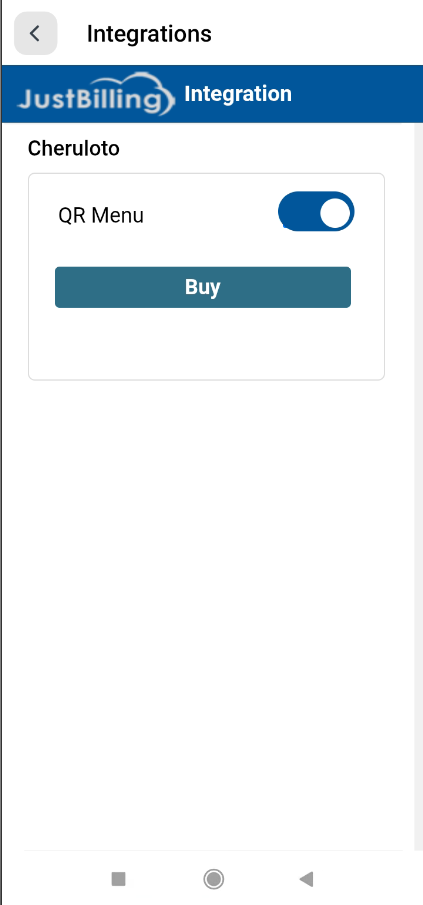
( Figure 1 : QR Menu)
From the above screenshot on selecting Buy Now, Merchant will purchase QR menu subscription. And after successful purchase system will display QR code fields.

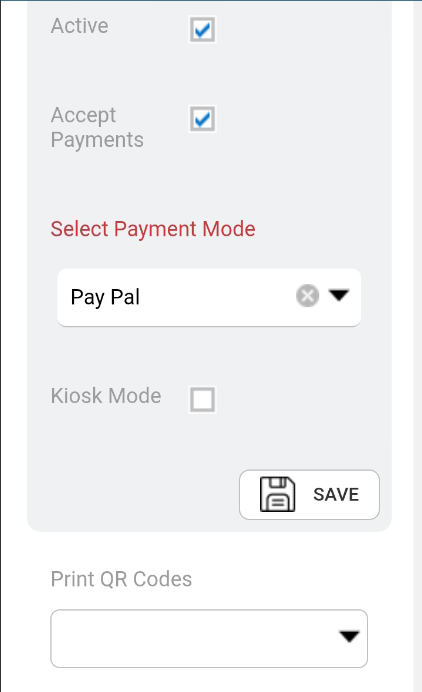

(Figure 2-QR code Fields)
On selecting Accept Payments system will display the Insta Moji fields to enter.
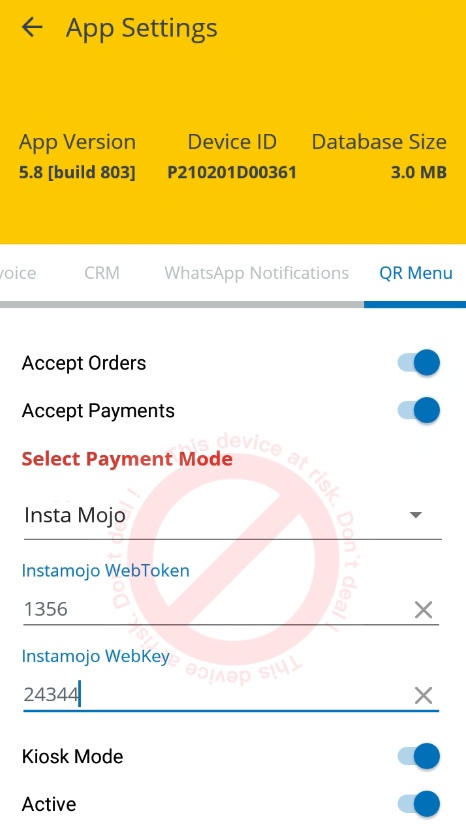
(Figure 3-QR code fields)
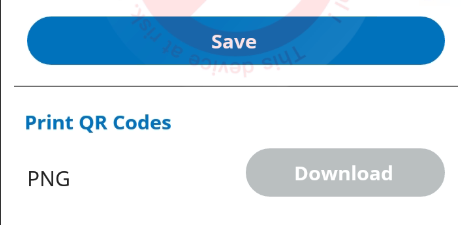
On selecting Save button, System will dislay a message as QR menu setup complete, Tap Print to get your QR codes.
On selecting print system will redirect to the downloaded QR code.
Process for QR Menu billing
From the configuration process, on downloading the QR code. Here User can scan the QR code and proceed by selecting the menu.
Below is the QR code.

( Figure-1-QR code)
On scanning the QR code user can view the order items and proceed for the order confirmation and pay as per the configuration.
Below is the screenshot for the order items.
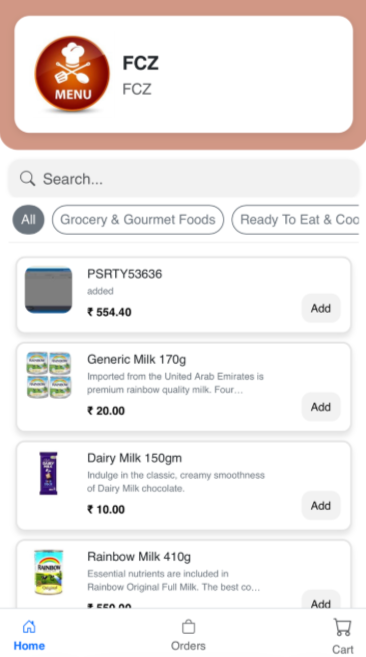
(Figure 2-QR Menu Products)
From the above screenshot add any items and the items will be added to the cart.
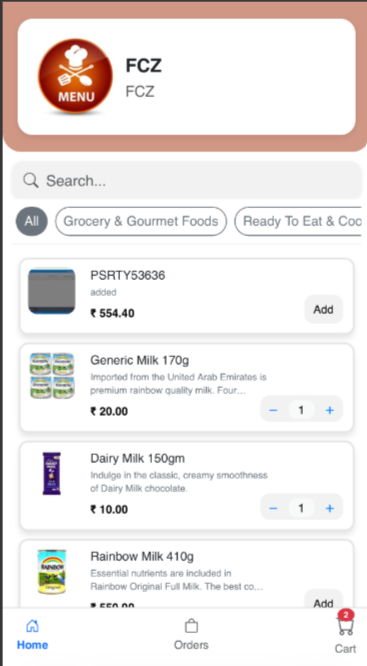
(Figure 3-QR Menu Products)
Navigate to cart icon and confirm the order, in-case if user wants to add more products user can add more items by selecting add items.
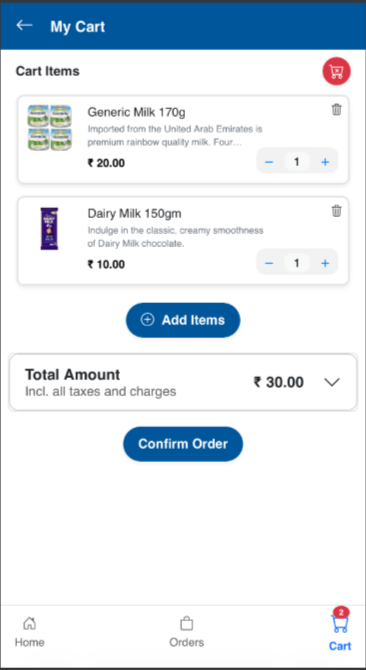
(Figure 4-Confirm Order Screen)
On selecting confirm order, system will display a pop up message to enter mobile number and Name.

(Figure 5-Order confirmation)
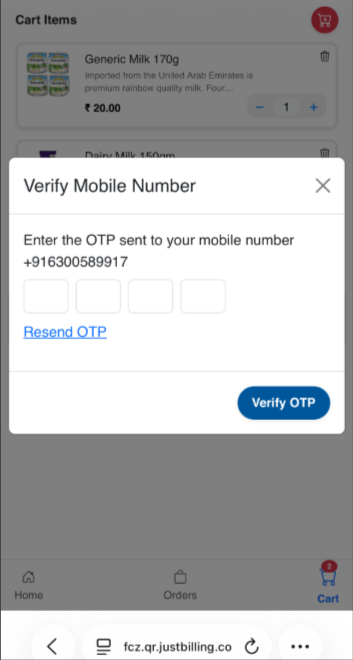
(Figure 6-OTP confirmation)
System will display a pop up message on confirming mobile number and enter OTP to proceed. And system will display Payment button to proceed for the payment.
(Figure-6-Payment Screen)
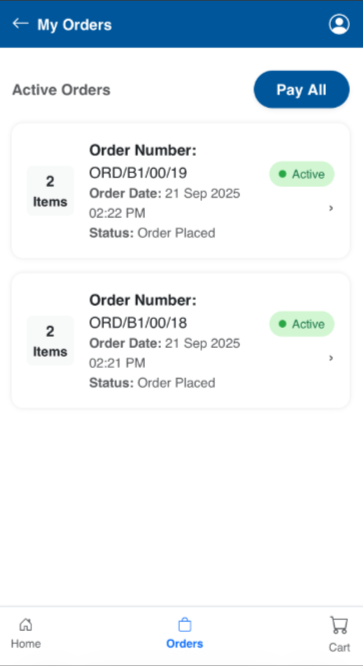
From the above screen system is displaying as order placed, To confirm the order user need to accept the order from Transactions--Order confirmation page.
Below is the screenshot for reference.
(Figure 7-Order Confirmation Page)
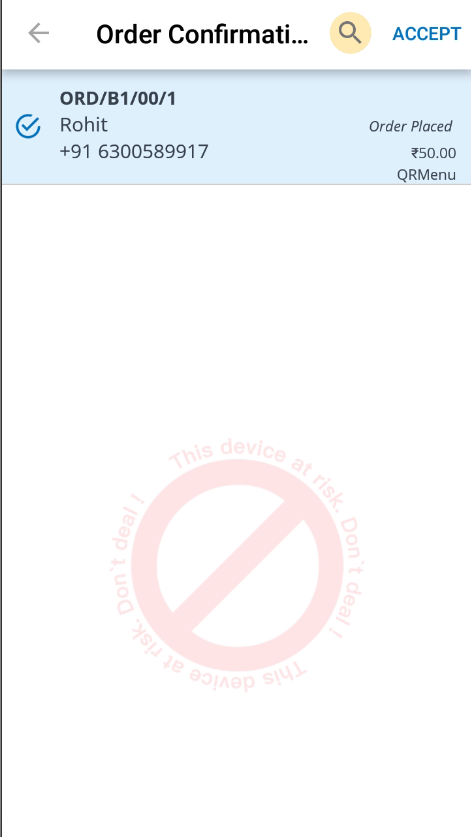
(Figure 8-Order confirmation Page)
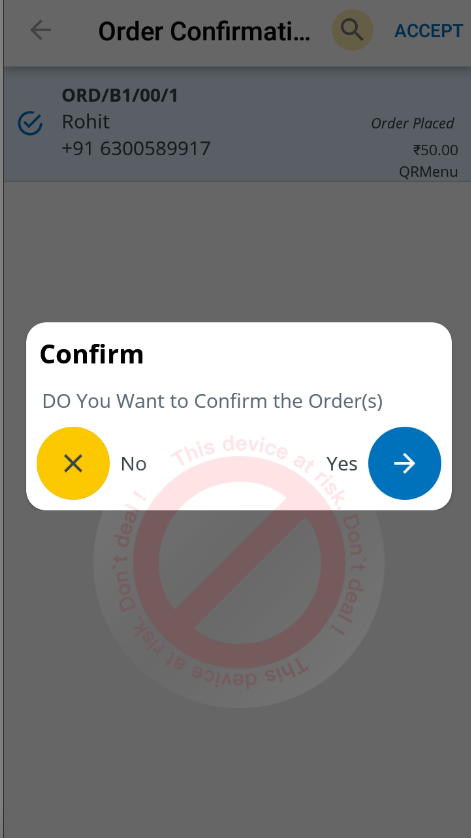
(Figure 9-Order Confirmation Page)
On confirming the order, in my orders the order status changes as confirmed
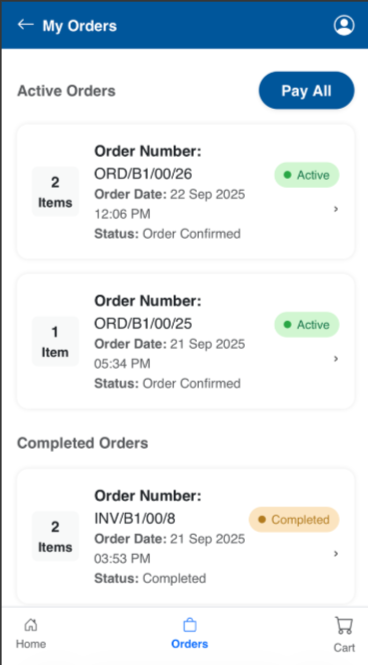
( Figure-10-Order confirmed)
After confirming the order from POS , from the above screen, the order status will be changes to confirmed. On selecting Pay all button the system will re-direct to payment gateway and proceeds us for the payment section.
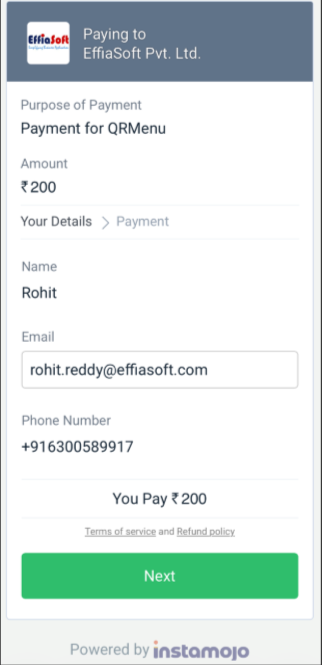
( Figure-11-Payment Screen)
On selecting next system will redirect to the different Payment methods. Where user can select any Payment method.

( Figure-12-Payment Screen)
On selecting any wallet payment system will re-direct to the particular payment gateway.
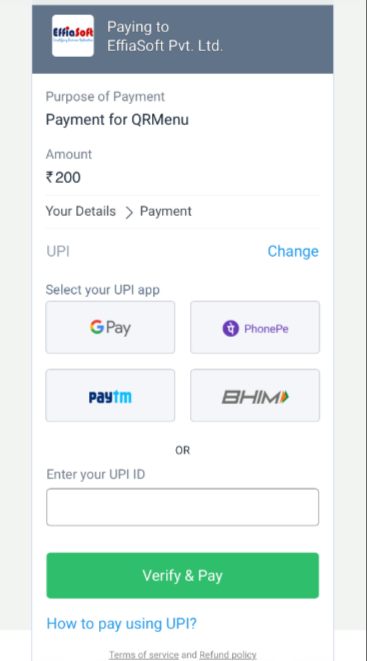
( Figure-13-Payment Screen)
On selecting Gpay, and proceeding for the payment system will display as payment as successfull and receipt is generated via registered email.
.