Item level discount
Item level discount
Item level discount can be set in various ways -
Steps for Case 1: Discount added from Product page through price catalog
- Log in to JB Windows, and navigate to Masters > Product.
- From Product page, edit a product. Click on Price Catalog (see figure 1).

(Figure 1 - Choosing price catalog)
- Specify a discount (for example, 10% discount) for Standard Sales Price Catalog and Save (see figure 2).
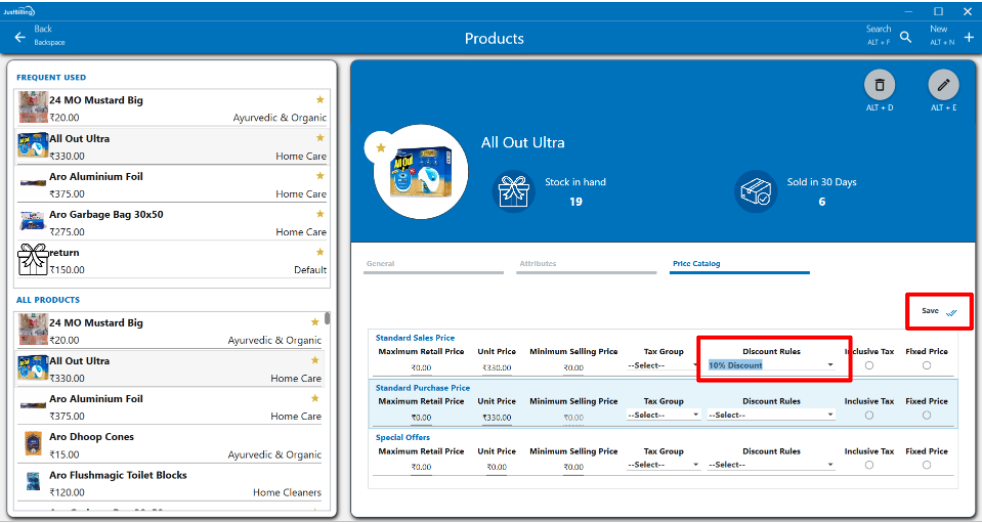
(Figure 2 - Defining catalog based discount)
- The specified 10% discount for the item will be reflected after adding the product to cart (see figure 3).
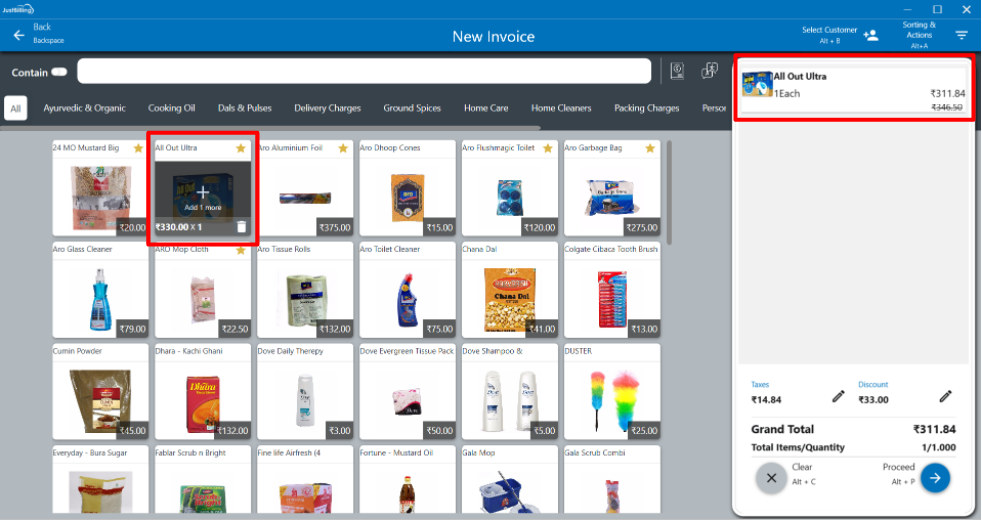
(Figure 3 - Discount reflected in billing cart)
Steps for Case 2 : Discount added from Product brand page
- From Application, navigate to Masters > Product Brand.
Create /Edit a brand and specify a discount. - Let's say “Pepsi” brand has been created with the discount “10% discount”, and Save (see figure 4).

(Figure 4 - Defining discount against brand from back office)
- Now this discount will be applicable for all the products which are under this brand.
- In JB Windows create 2 products - 1 Ltr. Pepsi bottle & 2.5 Ltr. Pepsi for Pepsi brand (see figure 5).
NOTE: The Product brand should be synced from Back Office to JB before creating the product , otherwise brand will not reflect in the Brand drop down in product page.
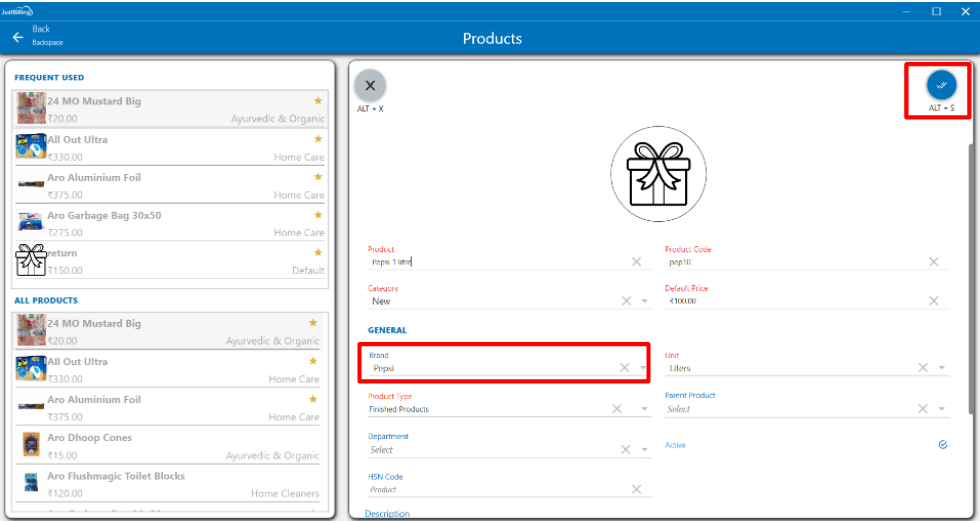
(Figure 5 - Adding product against brand under which discount was defined in back office)
Given a 25% discount for the Pepsi brand , the item 1 Ltr. Pepsi bottle will be billed at discounted rate. The discount will be reflected after adding the product to cart (see figure 6).
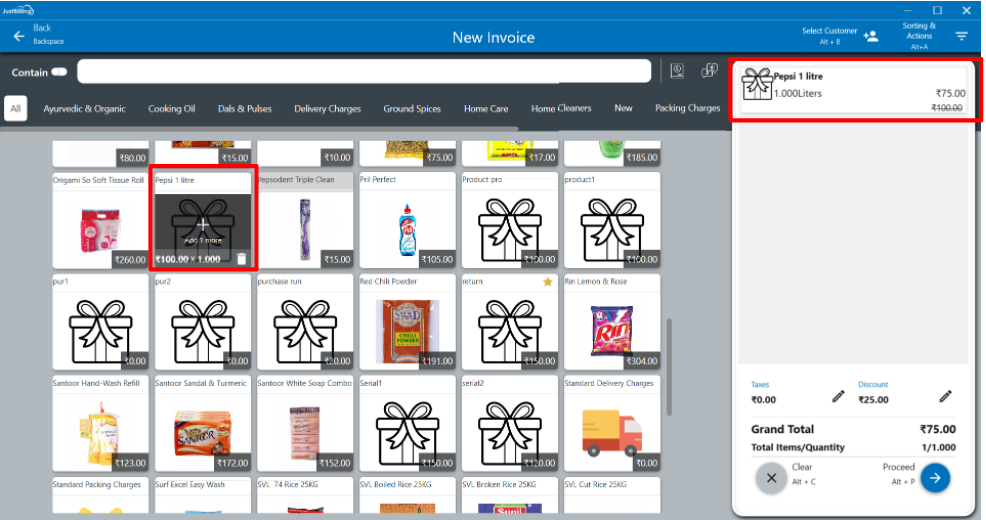
(Figure 6 - Discount reflected in billing cart)
Steps for Case 3 : Discount added from Product Category page
- From Application, navigate to Masters > Product Category.
Create /Edit a category and specify a discount. - Let's say “Soaps” category has been created with the discount “30% Discount” (see figure 7).
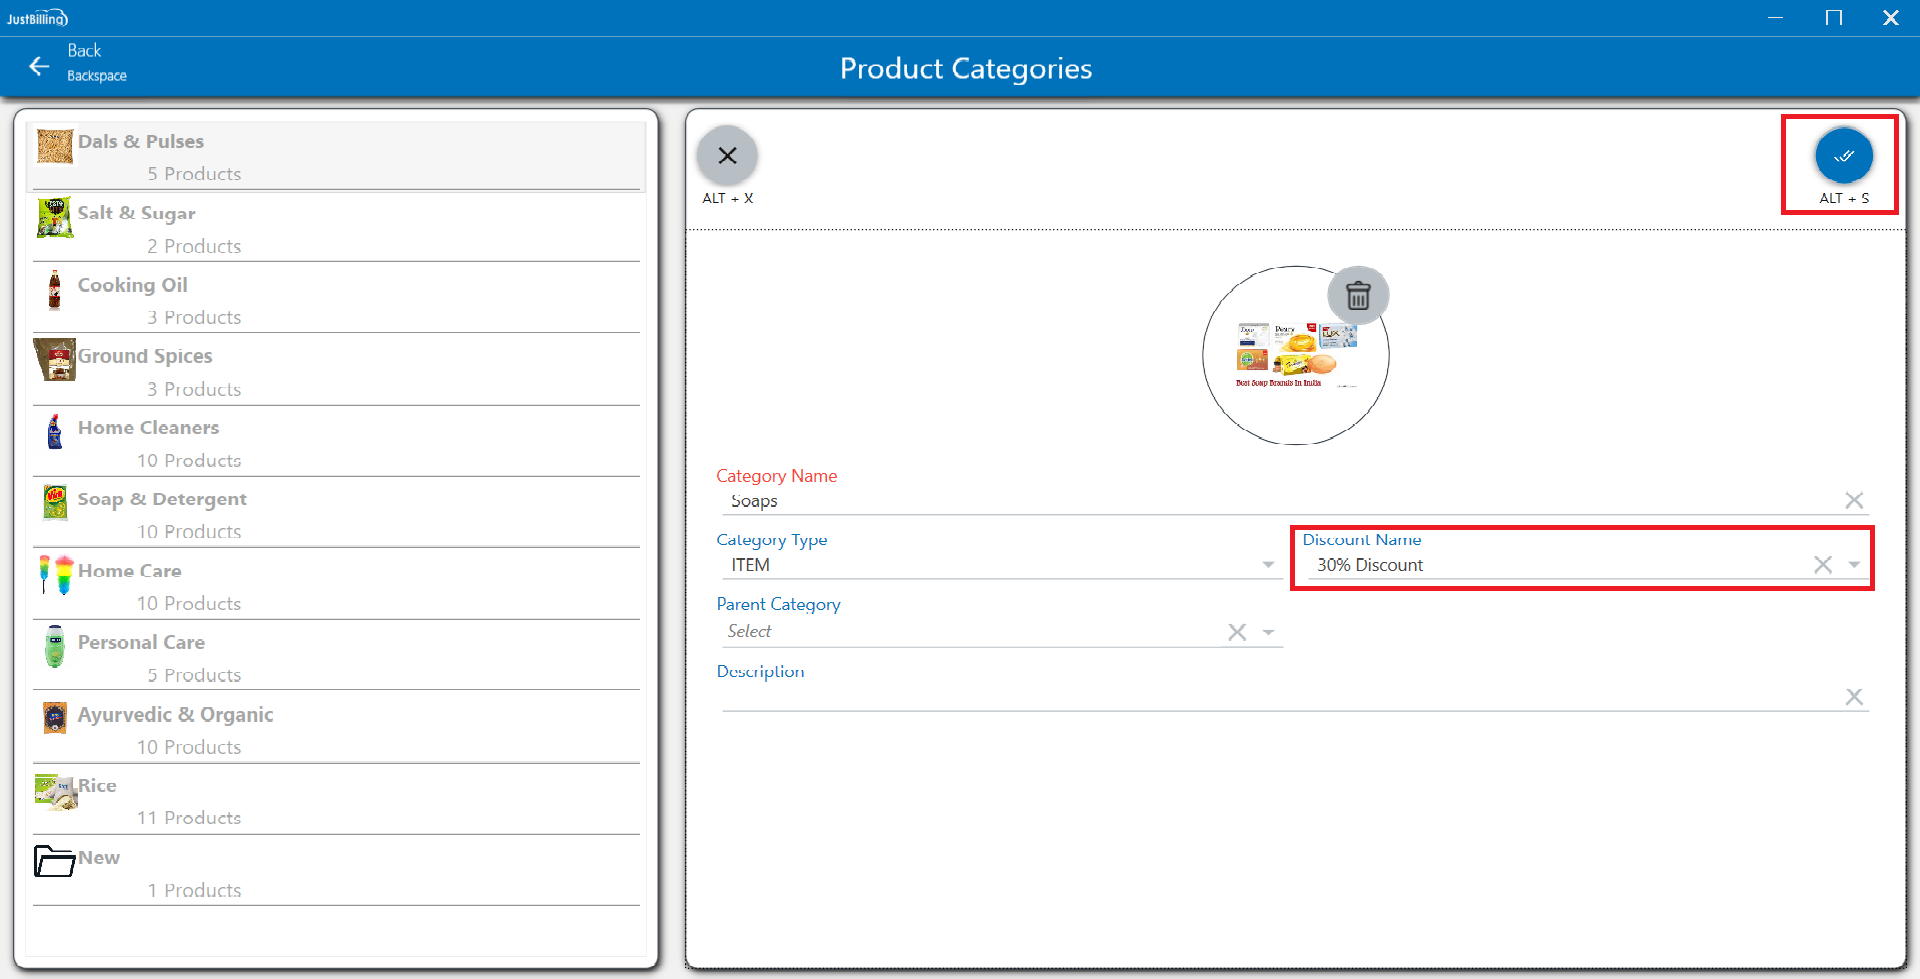
(Figure 7 - Defining discount against category from back office)
- Now this discount will be applicable for all the products which belong to this category.
- In JB Windows create 2 products -Soap1 and Soap2 for the Soaps category (see figure 8).
NOTE: The Product category should be synced from Back Office to JB before creating the product , otherwise category will not reflect in the category name drop down in product page.
Given a 30% discount for Soaps category, the item Black Forest Cake will be billed at a discounted rate. The given discount will be reflected after adding the product to cart (see figure 8).
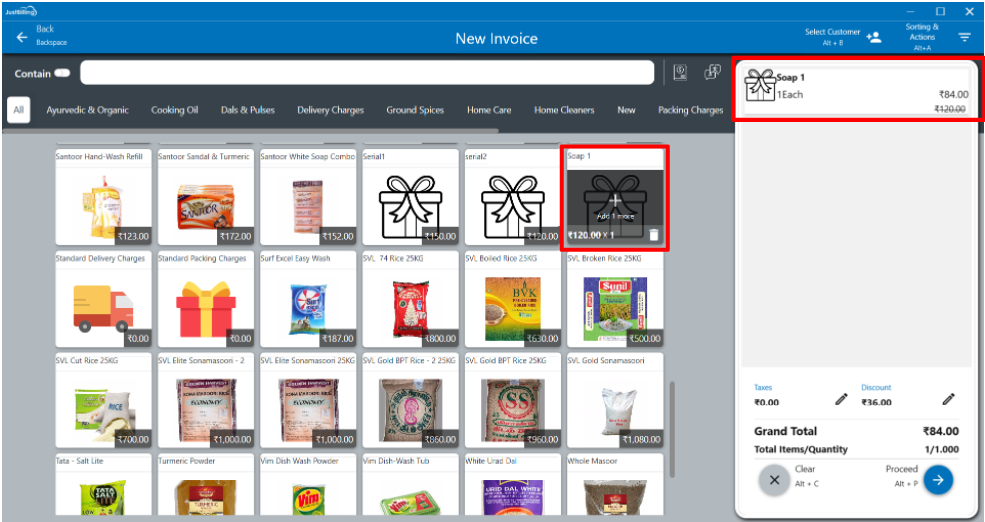
(Figure 8 - Discount reflected in billing cart)
Steps for Case 4 : Discount added from Billing Cart
- Log in to JB Windows, and click on Invoice Icon .
- This will open the Invoicing screen. In the invoicing screen add items to cart.
- Click on the Expand on Product, then click on More information from cart – this will open the product edit pop up (see figure 9).
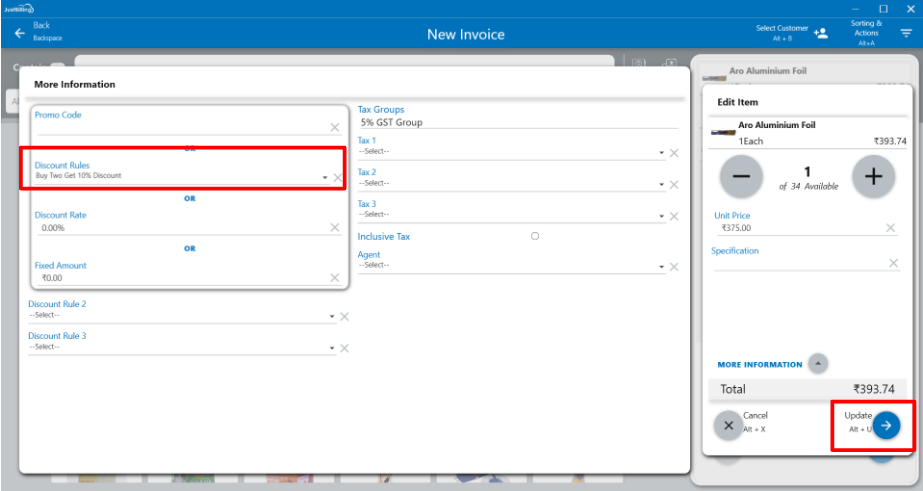
(Figure 9 - Selecting discount from billing cart)
- Select a discount (for example, 10 % discount) from this pop up and update.
- The discounted rate will now be reflected as seen from below screen-shot (see figure 10).
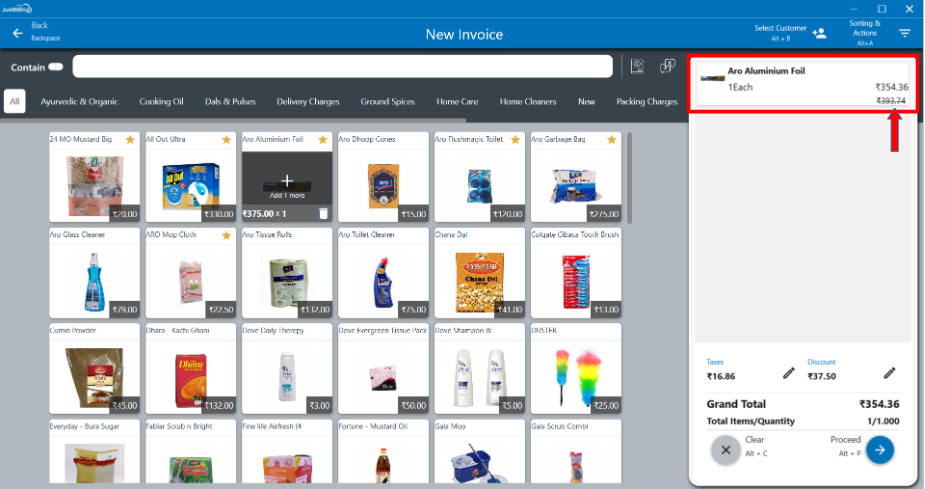
(Figure 10 - Discount reflected in billing cart)