Invoice level discount
Invoice level discount
Invoice level discount should be set when you want to give discount on the total bill amount. This is different from discount given at individual product level.
Invoice level discount can be set in various ways:
Case 1 : Discount on Sales Order Type
- From Back office, navigate to Masters > Sales Management > Sales Order Type page.
- Edit the Standard sales order type and specify a discount (for example, 10% Discount On Invoice) (see figure 1).
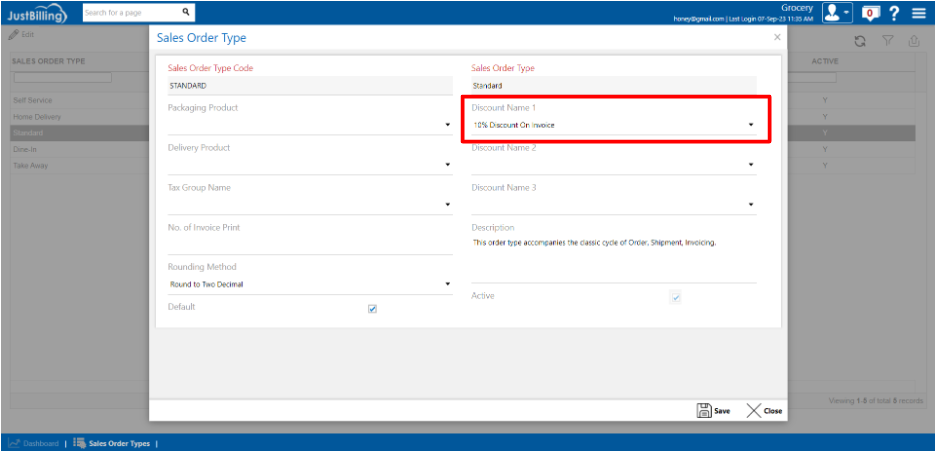
(Figure 1 - Defining sales order type discount from back office)
- From JB Windows navigate to Menu > Application Settings > Sales Configuration page, you can see that a 10% discount is applied on the invoice (as shown in below screen shot) (see figure 2).
NOTE: In order for the discount set at Sales Order Type (in back office) to get downloaded in JB, sync should be done.

(Figure 2 - Synced discount showing on Just Billing Windows)
Now at the time of billing in JB Windows the specified discount (10% Discount On Invoice) will be applied for the Take Away sales order type. The discount will be reflected after adding the product to cart (as shown in below screen-shot) (see figure 3).
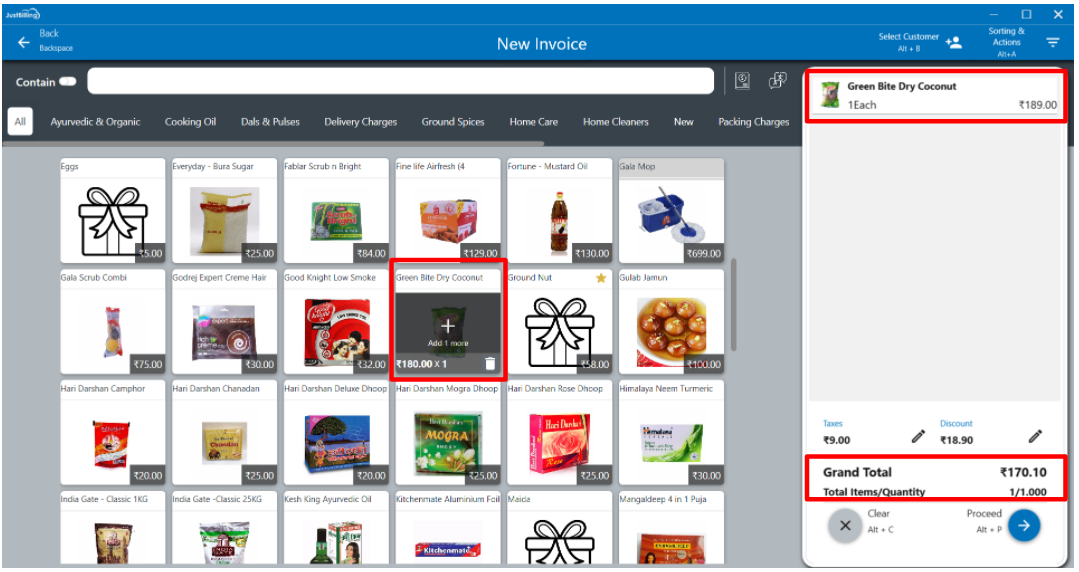
(Figure 3 - Discount applied in cart)
Case 2 : Discount on Loyalty Type
In this example let us assume that we are setting a 10% discount for bronze loyalty type. Overall steps to achieve this are stated below:
- From Back office, navigate to Masters > Sales Management > Loyalty Type page.
- Edit the Bronze loyalty type for example and specify a discount (for example, 10% Discount On Invoice) (see figure 4).
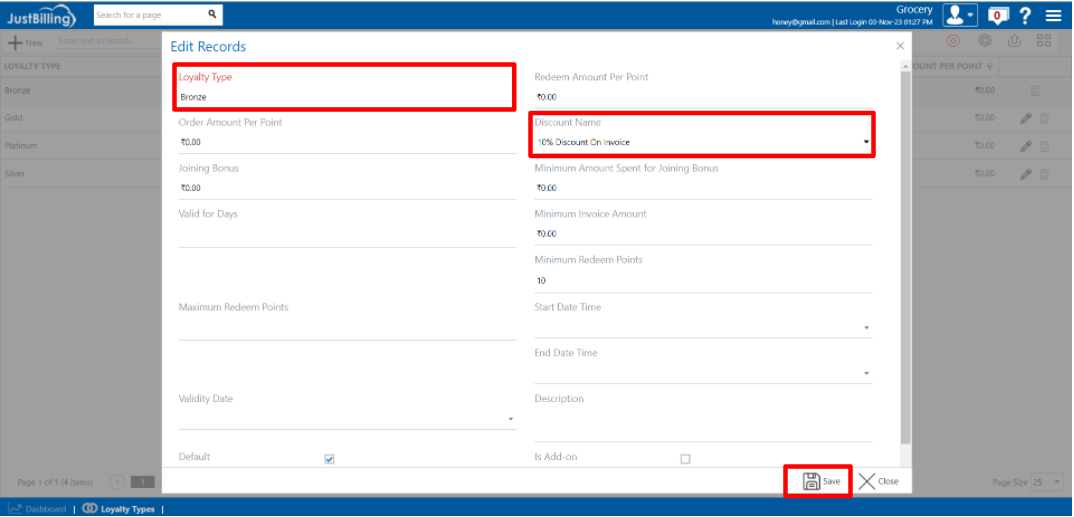
(Figure 4 - Defining loyalty type discount from back office)
Note : This type discount will be applicable all customers who belong to the Bronze loyalty Type.
- For example, let us assume, Rafi belongs to the Bronze loyalty Type. When he makes a transaction, the discount configured for Bronze loyalty type will be applied in the billing cart (see figure 5).
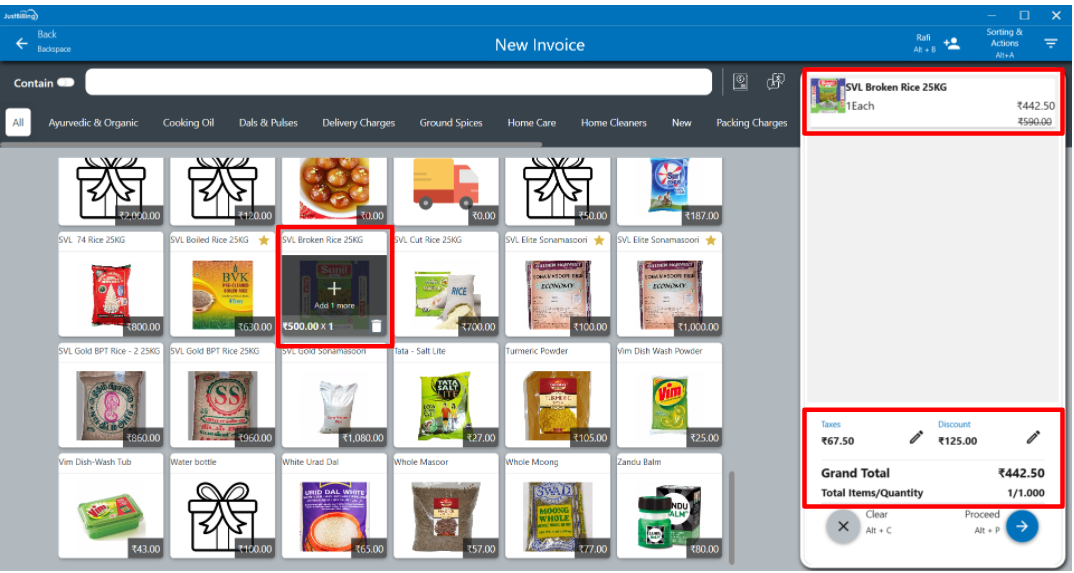
(Figure 5 - Discount applied in cart)
Case 3 : Discount added from billing Screen via discount button
- From billing screen via Discount button we can set discount in 2 ways -
- Promo code (see figure 6)
- Discount Type (see figure 7)
(Figure 6 - Defining discount based on Promo Code)
(Figure 7 - Defining discount based on Discount Type)
To give discount via Promo code, you have to login to Back Office and navigate to Masters > Sales Management > Discount Rules page. Then add an invoice level discount & set promo code (for example, EXTRA 20%) for that discount (see figure 8).
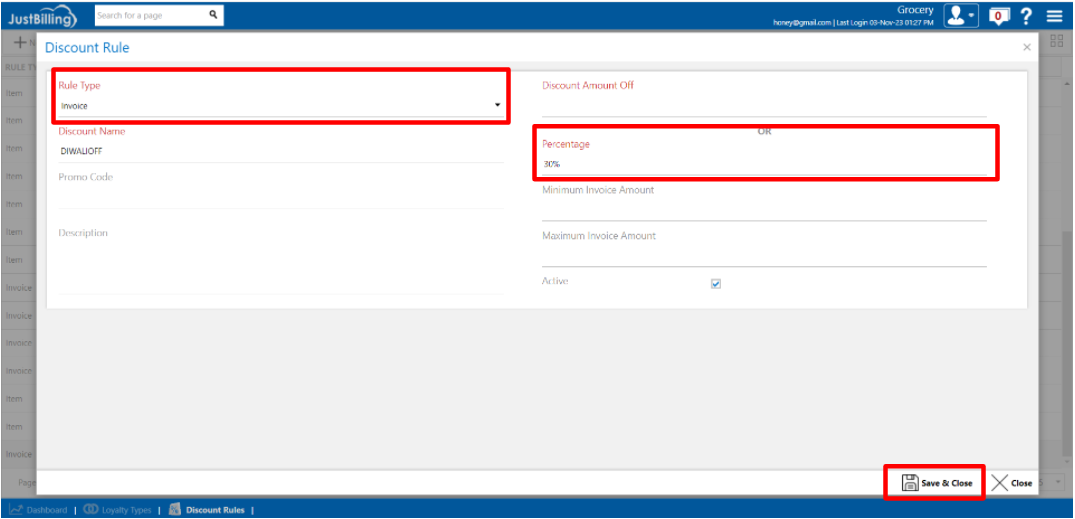
(Figure 8 - Defining discount under discount rule from back office)
- Then while doing billing from JB Windows, add product to cart.
- Click on Discount (see figure 9).
(Figure 9 - Defining discount via Discount button from billing screen for Promo Code)
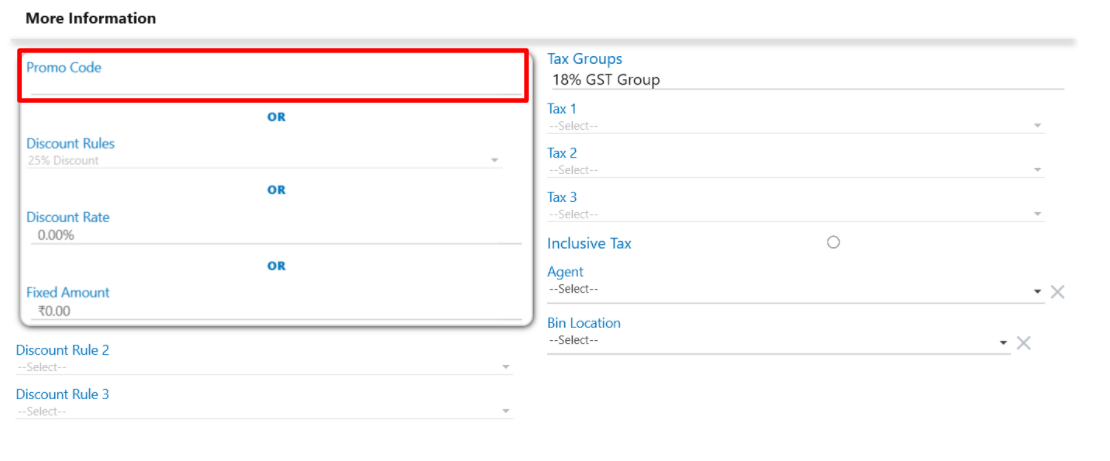
- This will open the Invoice Level Discount pop up. Enter the Promo code here (see figure 10).
(Figure 10 - Defining Promo Code)
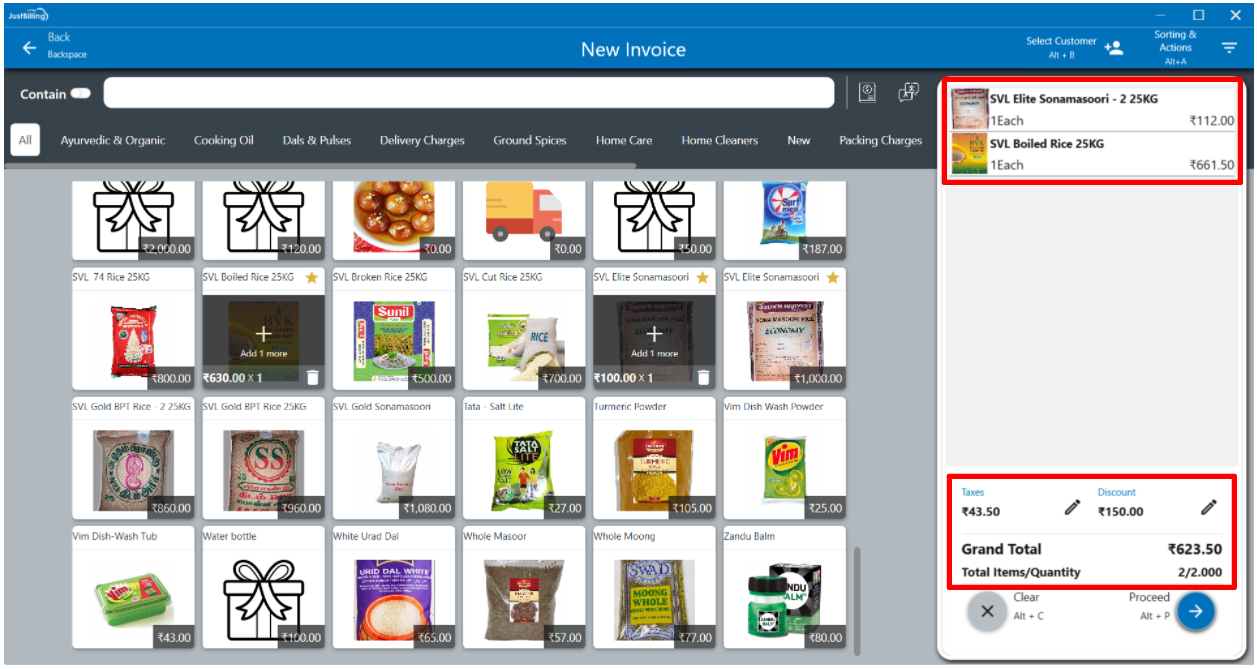
- Click on Update. Updating it will reflect the discounted amount in the billing cart as shown in below screen shot (see figure 11).
(Figure 11 - Discount showing against Total Discount field)
Discount via Discount Type can be given directly while doing billing in JB Windows.
- In the billing screen, add items to cart.
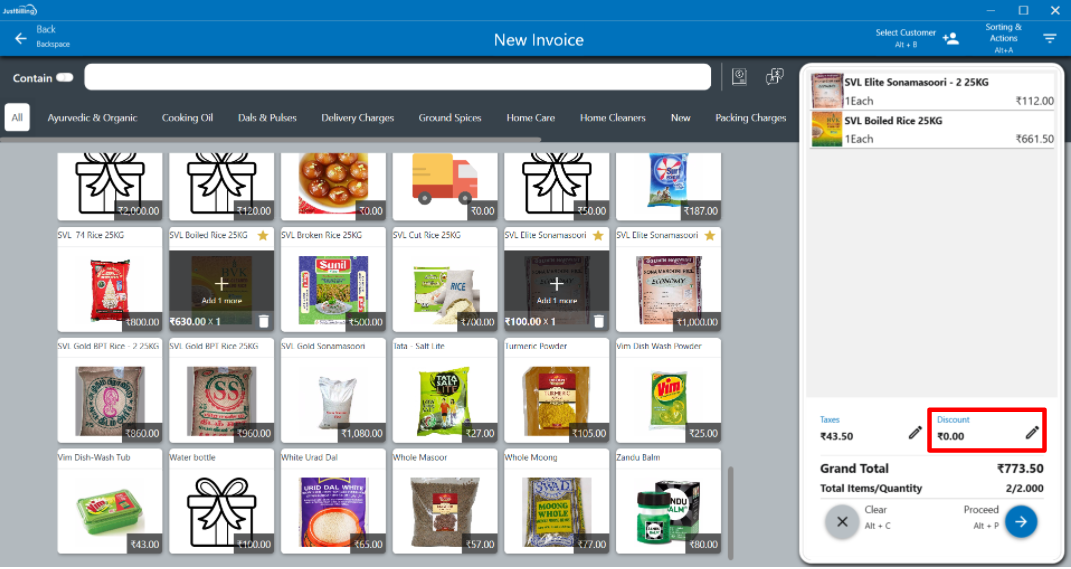
- Click on the Discount (see figure 12).

(Figure 12 - Defining discount via Discount button from billing screen for Discount Type)
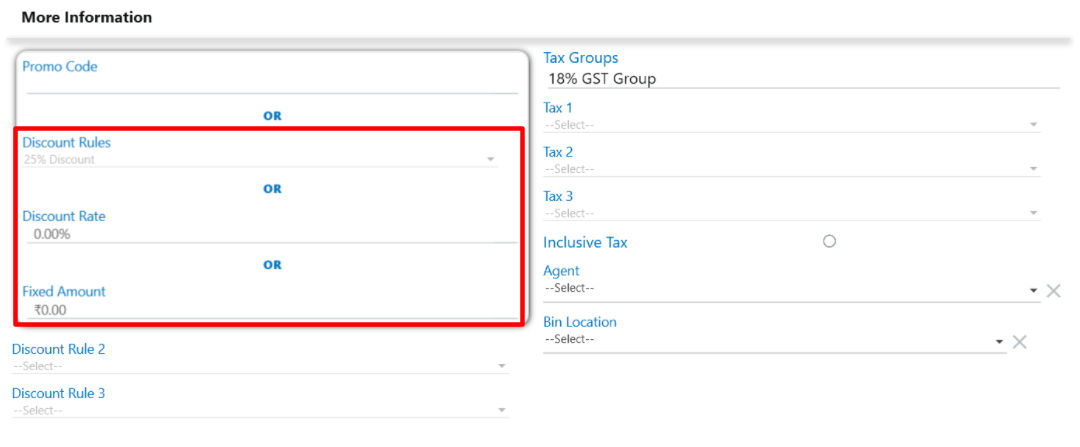
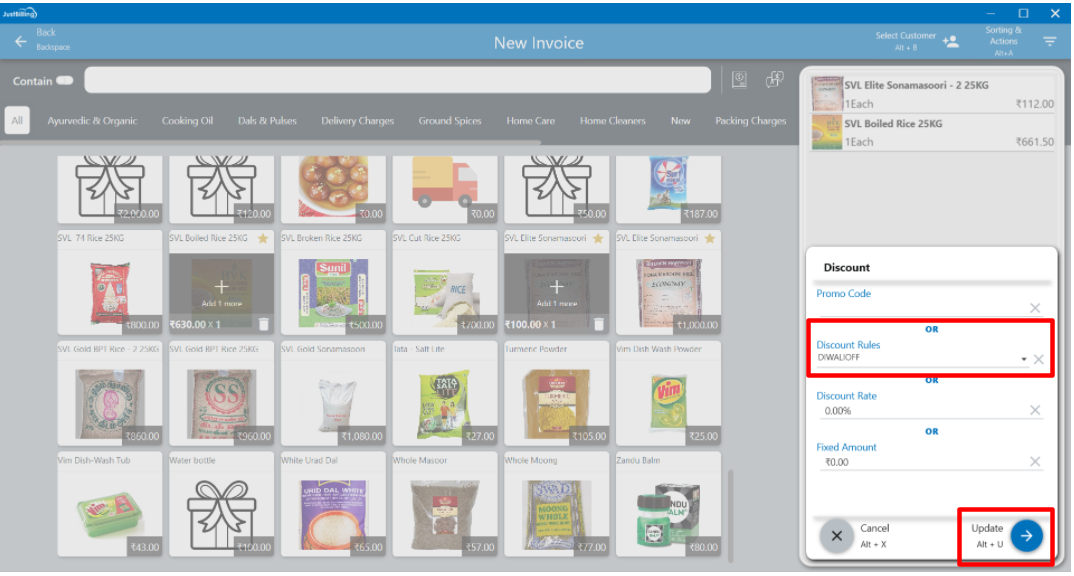
- This will open the Invoice Level Discount pop up. Here enter the Discount type as Percentage or Amount and update. For example, say we are giving a discount amount of Rs. 20 (see figure 13).

(Figure 13 - Selecting discount type)
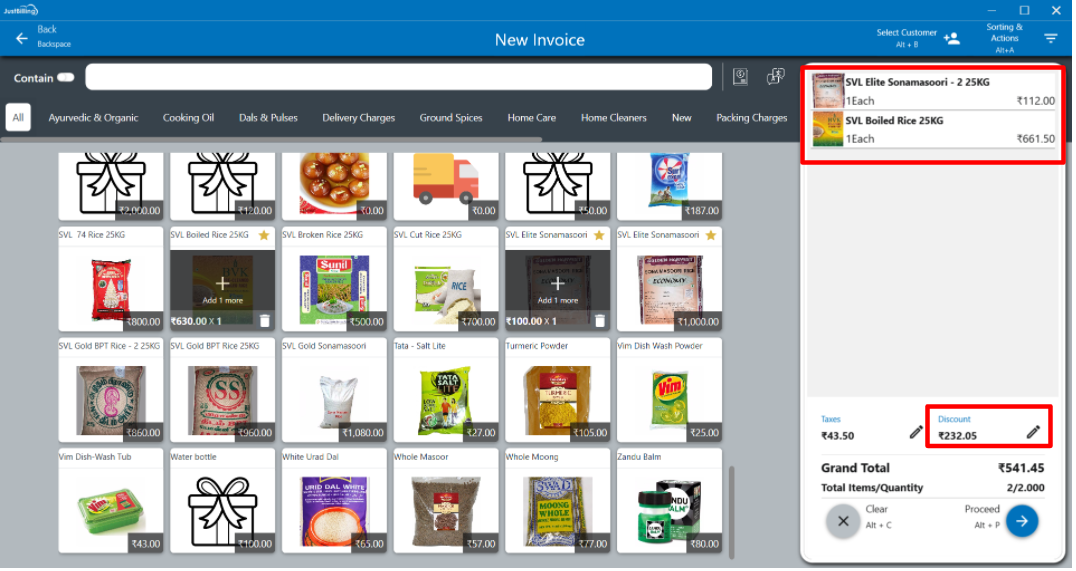
- Updating the discount will reflect the discounted amount in the billing cart as shown in below screen-shot (see figure 14).
(Figure 14 - Discount showing against Total Discount field)