Estimations
Estimations
Estimation
Sometimes buyers would ask for an estimated price for the goods/services they are interested to buy. From the Estimation screen, you can generate Estimation for the products/services you sell.
From this Screen you can view Estimation history, filter Estimation , sort Estimations and also to create Estimation.
- How to generate Estimation?
To generate a quotation, navigate to Menu  icon from top left > Transaction > Estimation > Click on
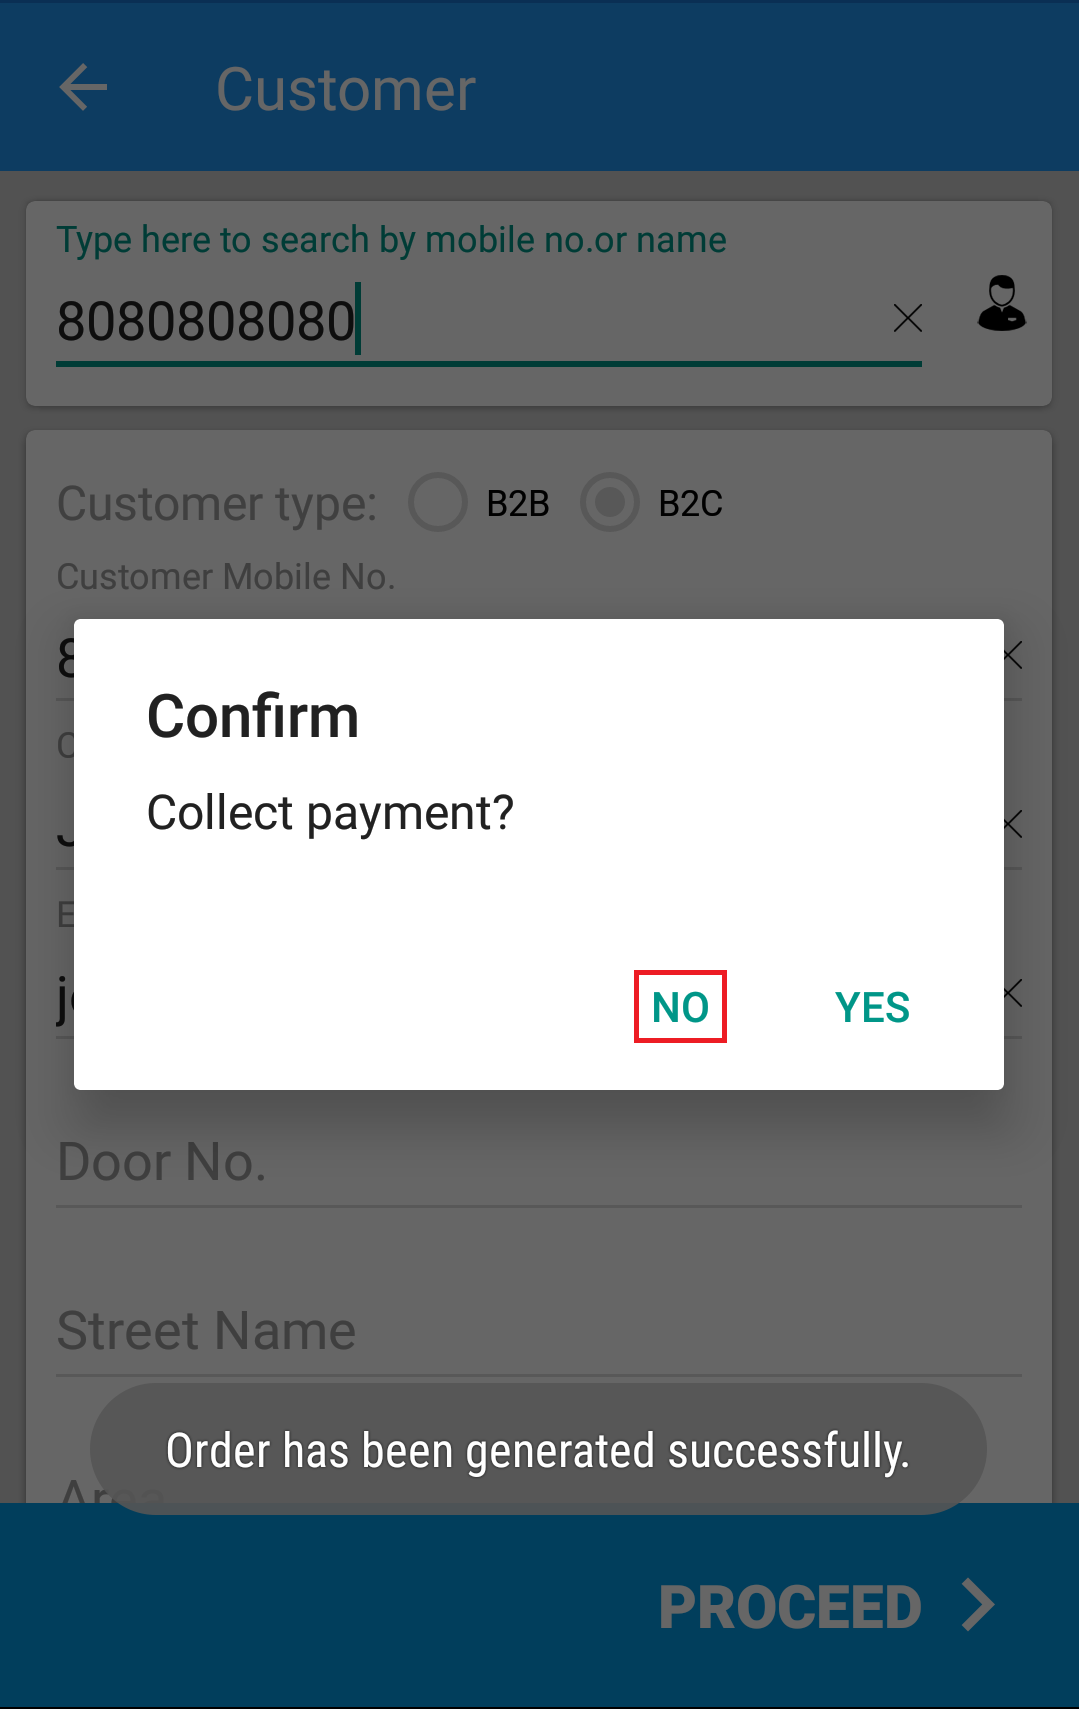
- Tap on Estimation.
- Tap on the product name to add products to the cart. (see figure 1)
- Add Discount and Tax, if there are any.
- Tap on Proceed. (see figure 2)
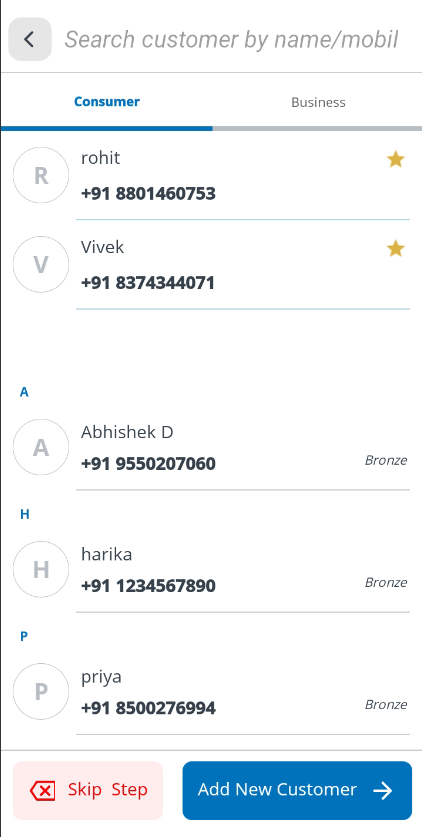
- Enter customer details e.g Mobile no, Name, Email and Address. Providing customer details is an optional step.
- Then Finish, Estimation is been created. (see figure 3)
- Created Estimation can be converted in to Either Invoice or Order. (see figure 4,5,6 & 7)
- Order and Invoice guide is provided in respective pages.
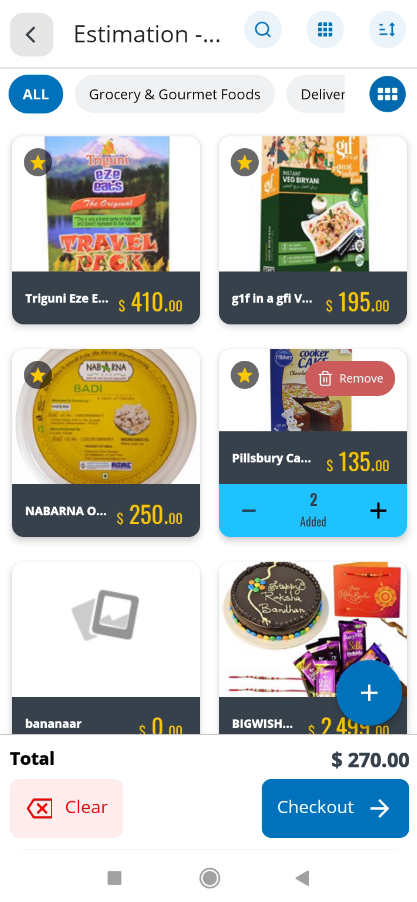
(Figure 1 - Estimation to invoice Screen)
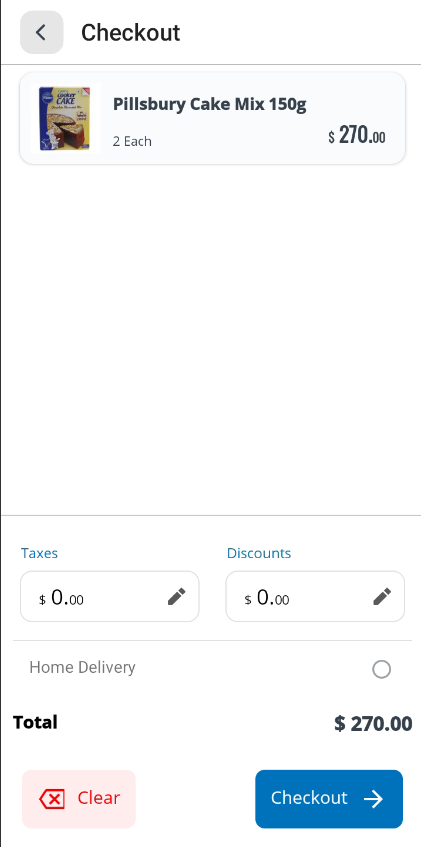
(Figure 2 - Estimation to invoice Screen)
(Figure 3 - Estimation to invoice Screen)
(Figure 4 - Estimation to invoice Screen)
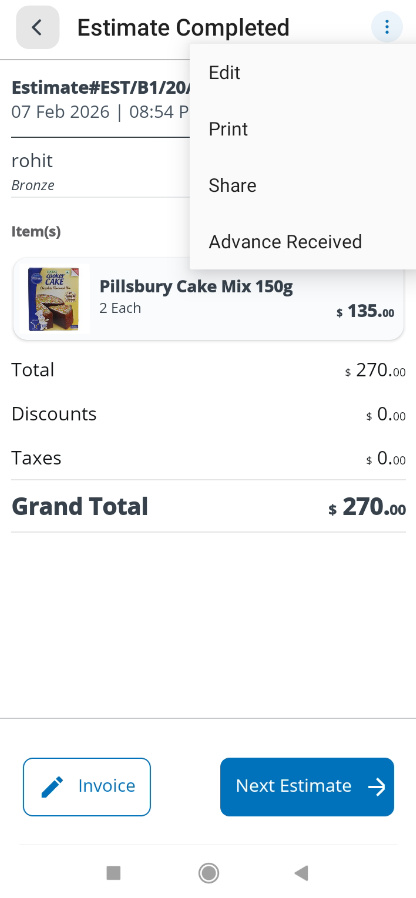
The Estimation Generated screen displays the summary of items added to an estimate along with customer details, pricing breakup, and available next actions. This screen is typically accessed after completing an estimation in the billing workflow.
It allows users to:
- Review estimated items
- View customer and estimation details
- Check total, discount, tax, and grand total
- Proceed with advance payment, invoice creation, or create a new estimation
Screen Layout Overview
The screen is divided into two main sections:
Left Panel – Estimated Items
Right Panel – Customer & Estimation Summary
Estimated Items Section
Estimated Items Header
- Displays the status “Estimation Generated”, confirming that the estimate has been successfully created.
- Shows the total number of items included in the estimation (e.g., 2 Item(s)).
- A Close (Alt + C) icon allows the user to exit the estimation screen.
Item Cards
Each estimated item is shown as a card with:
- Product Image
- Product Name
- Quantity and Unit (e.g., 1 Each)
These cards provide a quick visual confirmation of all items included in the estimate.
Customer Information Section
Customer Details
- Displays the Customer Name
- Shows the registered mobile number
- Displays the customer category or tier (e.g., Bronze)
This helps identify the customer associated with the estimation.
Estimation Summary
Estimation Reference
Displays the Estimation Number (e.g., EST/B1/118/2)
Shows the Date and Time when the estimation was created
This reference number is useful for tracking, follow-ups, and future conversion to orders or invoices.
Amount Summary
The amount breakdown is displayed clearly for transparency:
Total
- Displays the total value of items before discount and tax.
Discount
- Shows the total discount applied to the estimation.
Tax
- Displays applicable tax amount.
- If no tax is applied, it will show ₹ 0.00.
Grand Total
- Shows the final payable amount after discount and tax.
- Highlighted prominently for clarity.
Action Buttons
Advance Payment (Alt + A)
- Allows the user to collect partial or advance payment against the estimation.
- Useful when the customer pays before invoice generation.
Invoice (Alt + I)
- Converts the estimation directly into a Sales Invoice.
- All estimated items and amounts are carried forward automatically.
Next Estimation (Alt + N)
- Clears the current estimation context.
- Redirects the user to create a new estimation for the next customer.
Typical Workflow from This Screen
Review estimated items and pricing.
Confirm customer details and totals.
Choose one of the following:
- Collect Advance Payment
- Generate Invoice
- Proceed to Next Estimation
Keyboard Shortcuts
|
Action |
Shortcut |
|
Close Estimation |
Alt + C |
|
Advance Payment |
Alt + A |
|
Create Invoice |
Alt + I |
|
Next Estimation |
Alt + N |
2. How to convert Estimation in to order / Invoice?
To convert the estimation to either order / Invoice click on appropriate button as shown above and follow the instructions as provided in Order and Invoice pages in user guide.

(Figure 4 - Estimation to invoice Screen)
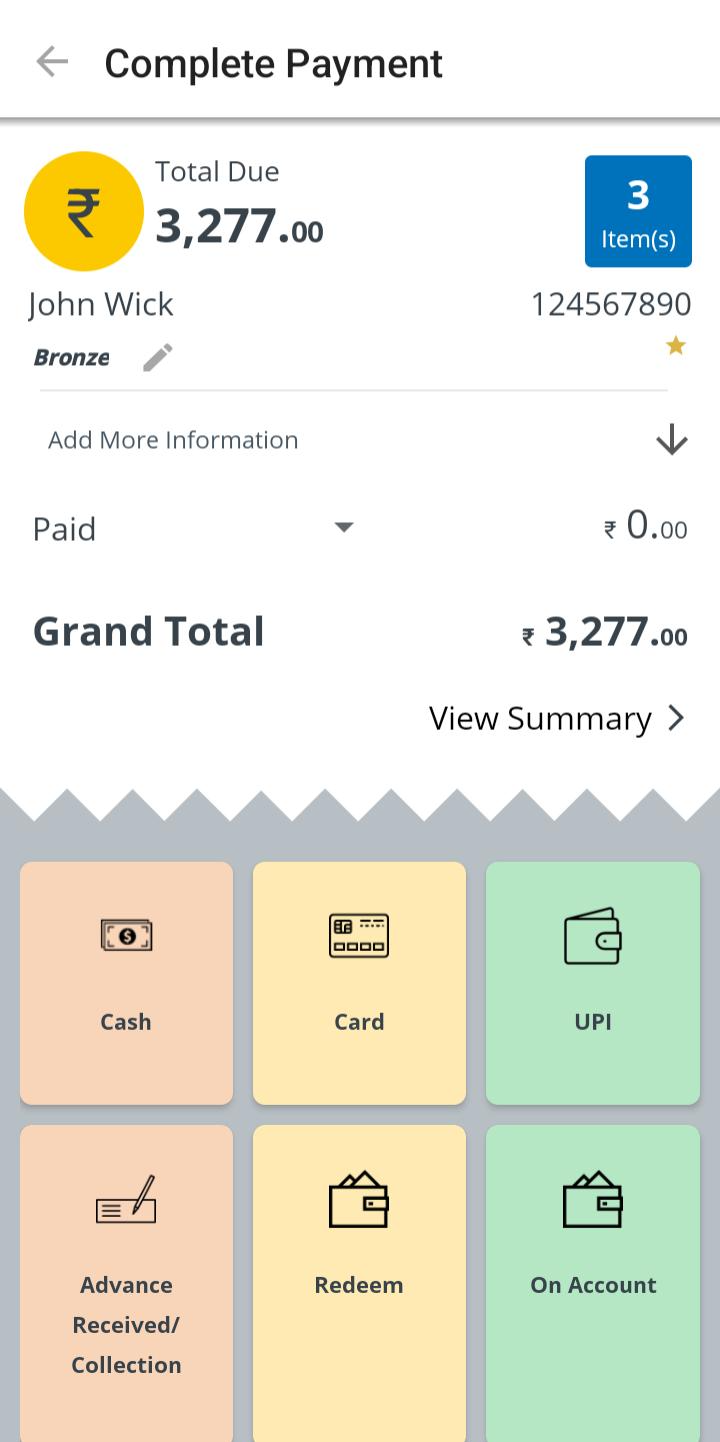
(Figure 5 - Payment mode selection Screen)
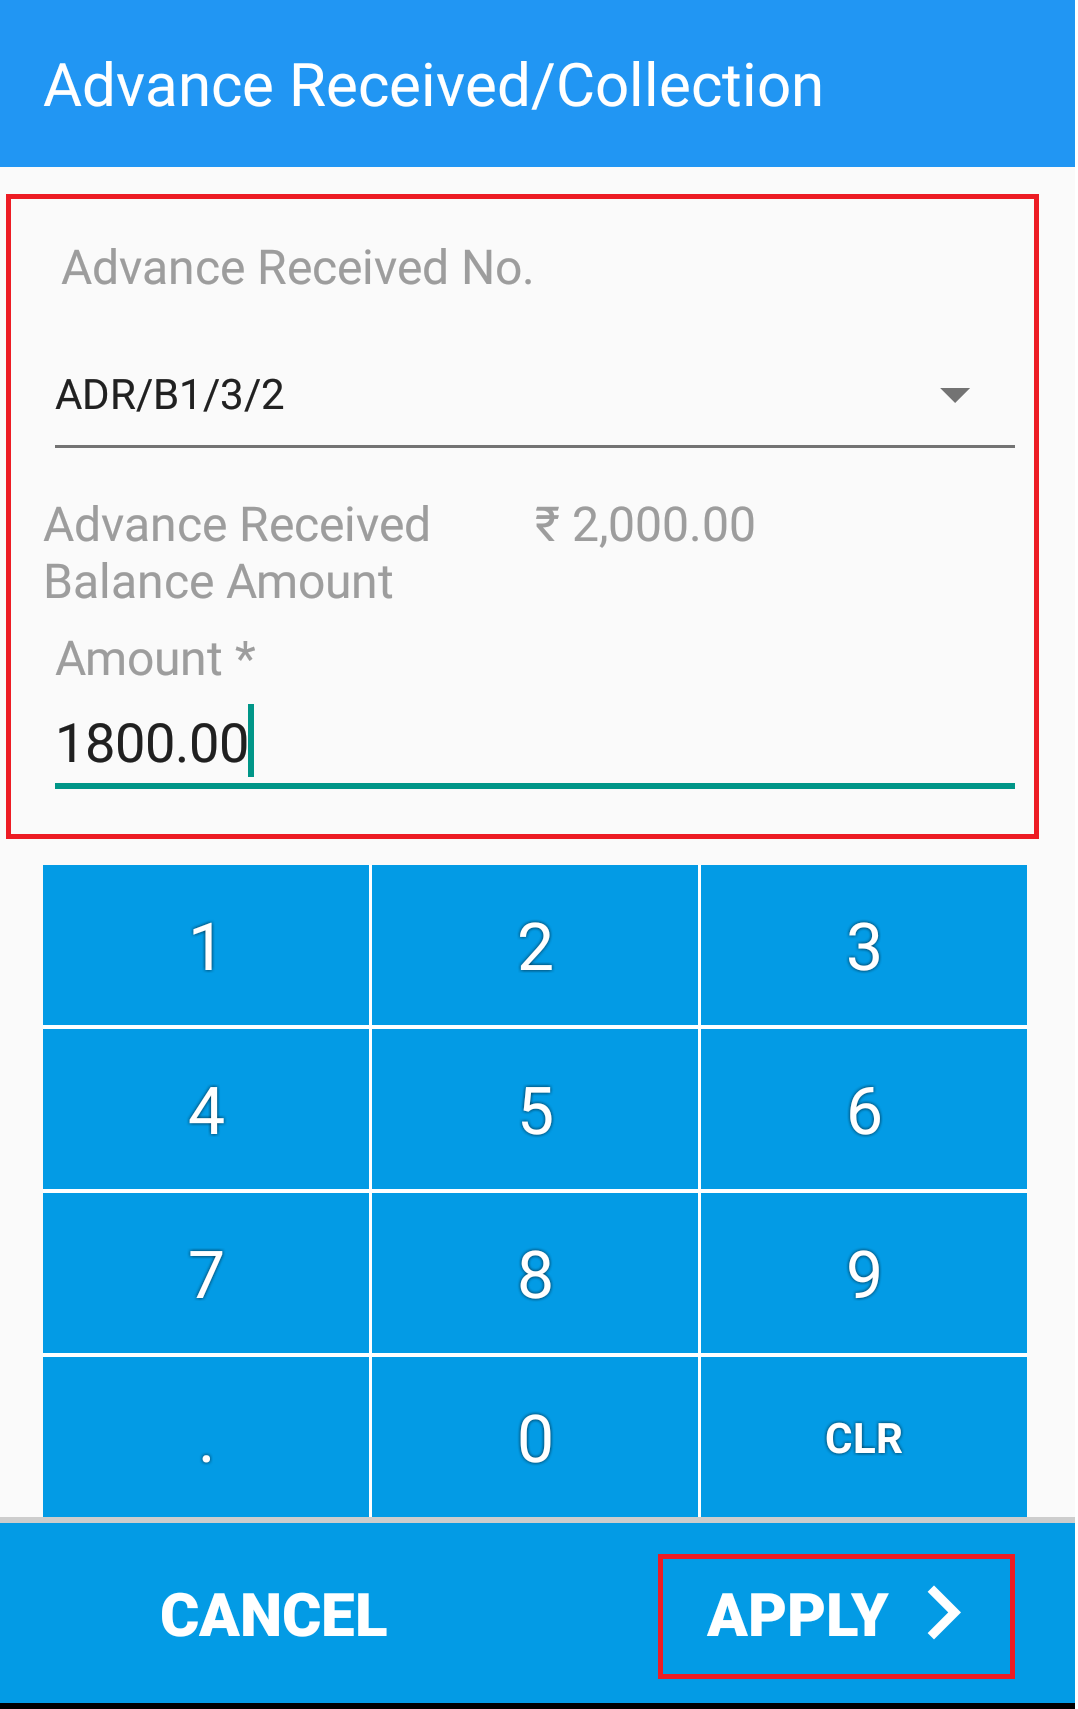
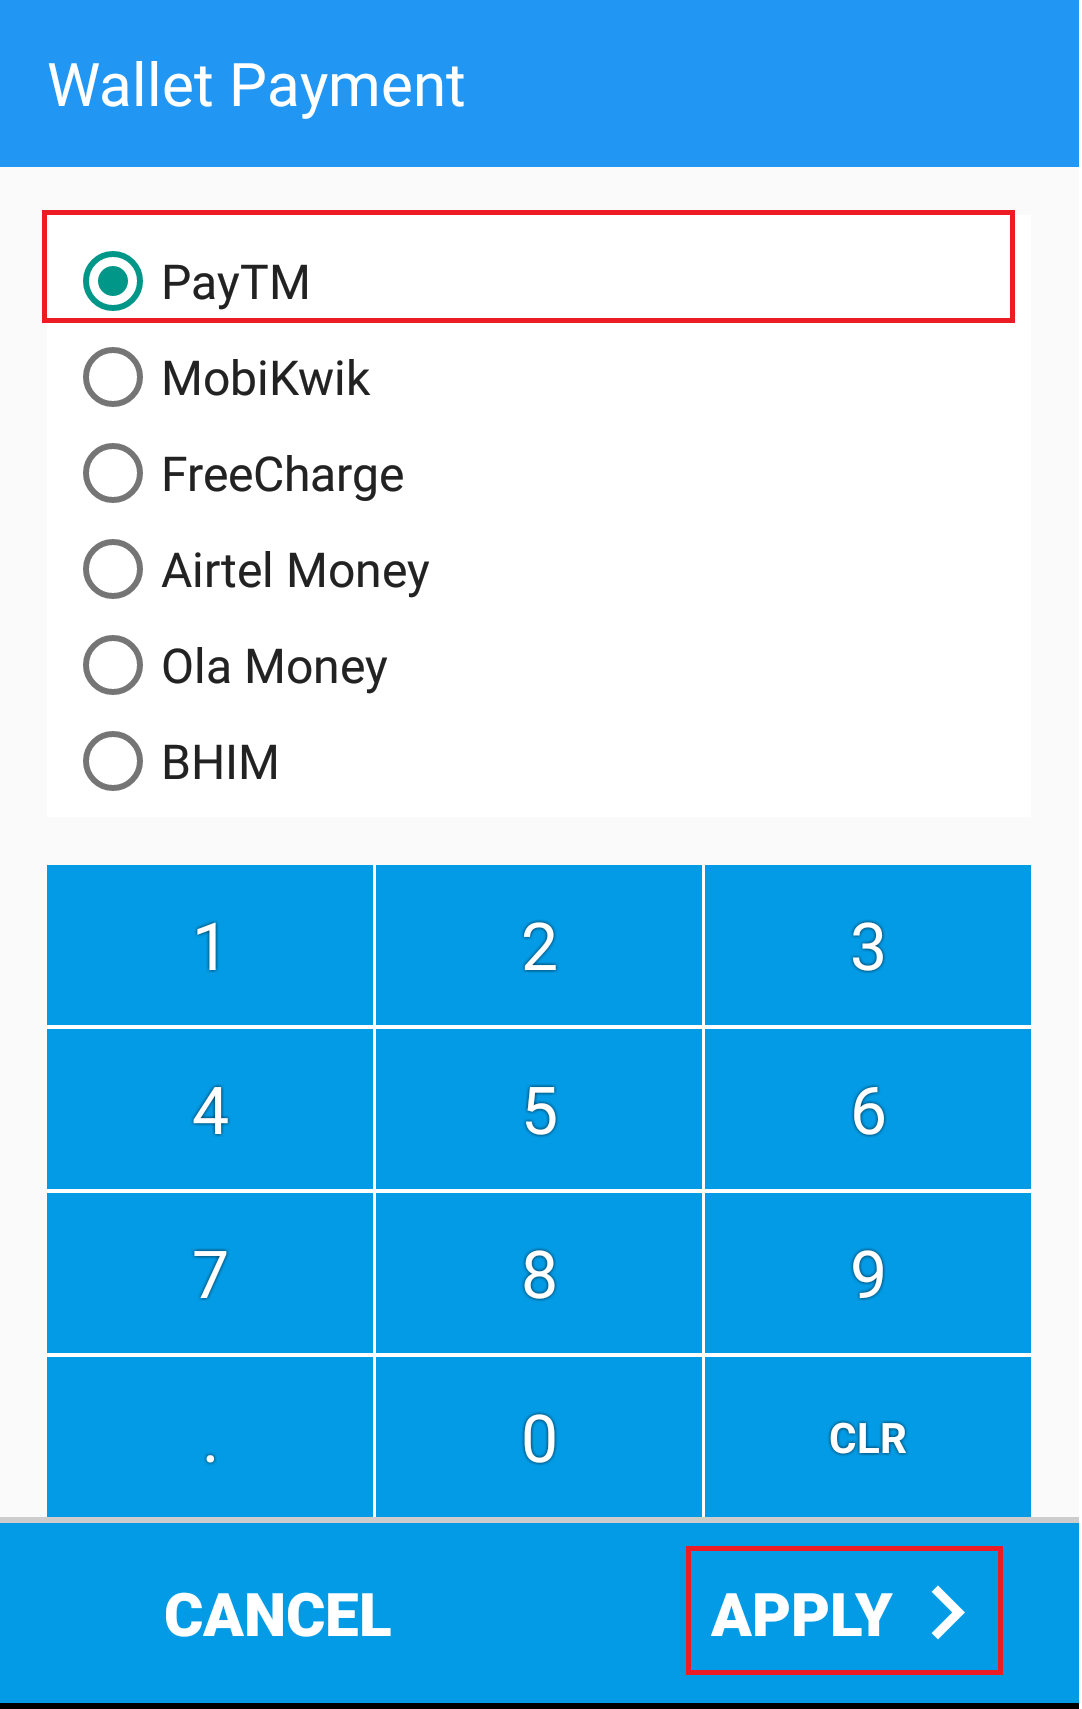
(Figure 6 - Payment Collection Screen)
(Figure 7 - Invoice created Screen)