Dine in
Dine in
From this page, you can create a new Dine in order. (see figure 1).
On Opening Dine in page it will take you to table selection screen.
Note: Tables will be created from Menu > Masters > Tables
How to create a new Dine in order ?
- Navigate to Menu > Transaction > Dine in
- It will take you to Table selection
- Select the Table
- Select the items for the dine in order
- Click on proceed and add additional information and select next order.
(Figure 1 - Dine in page)
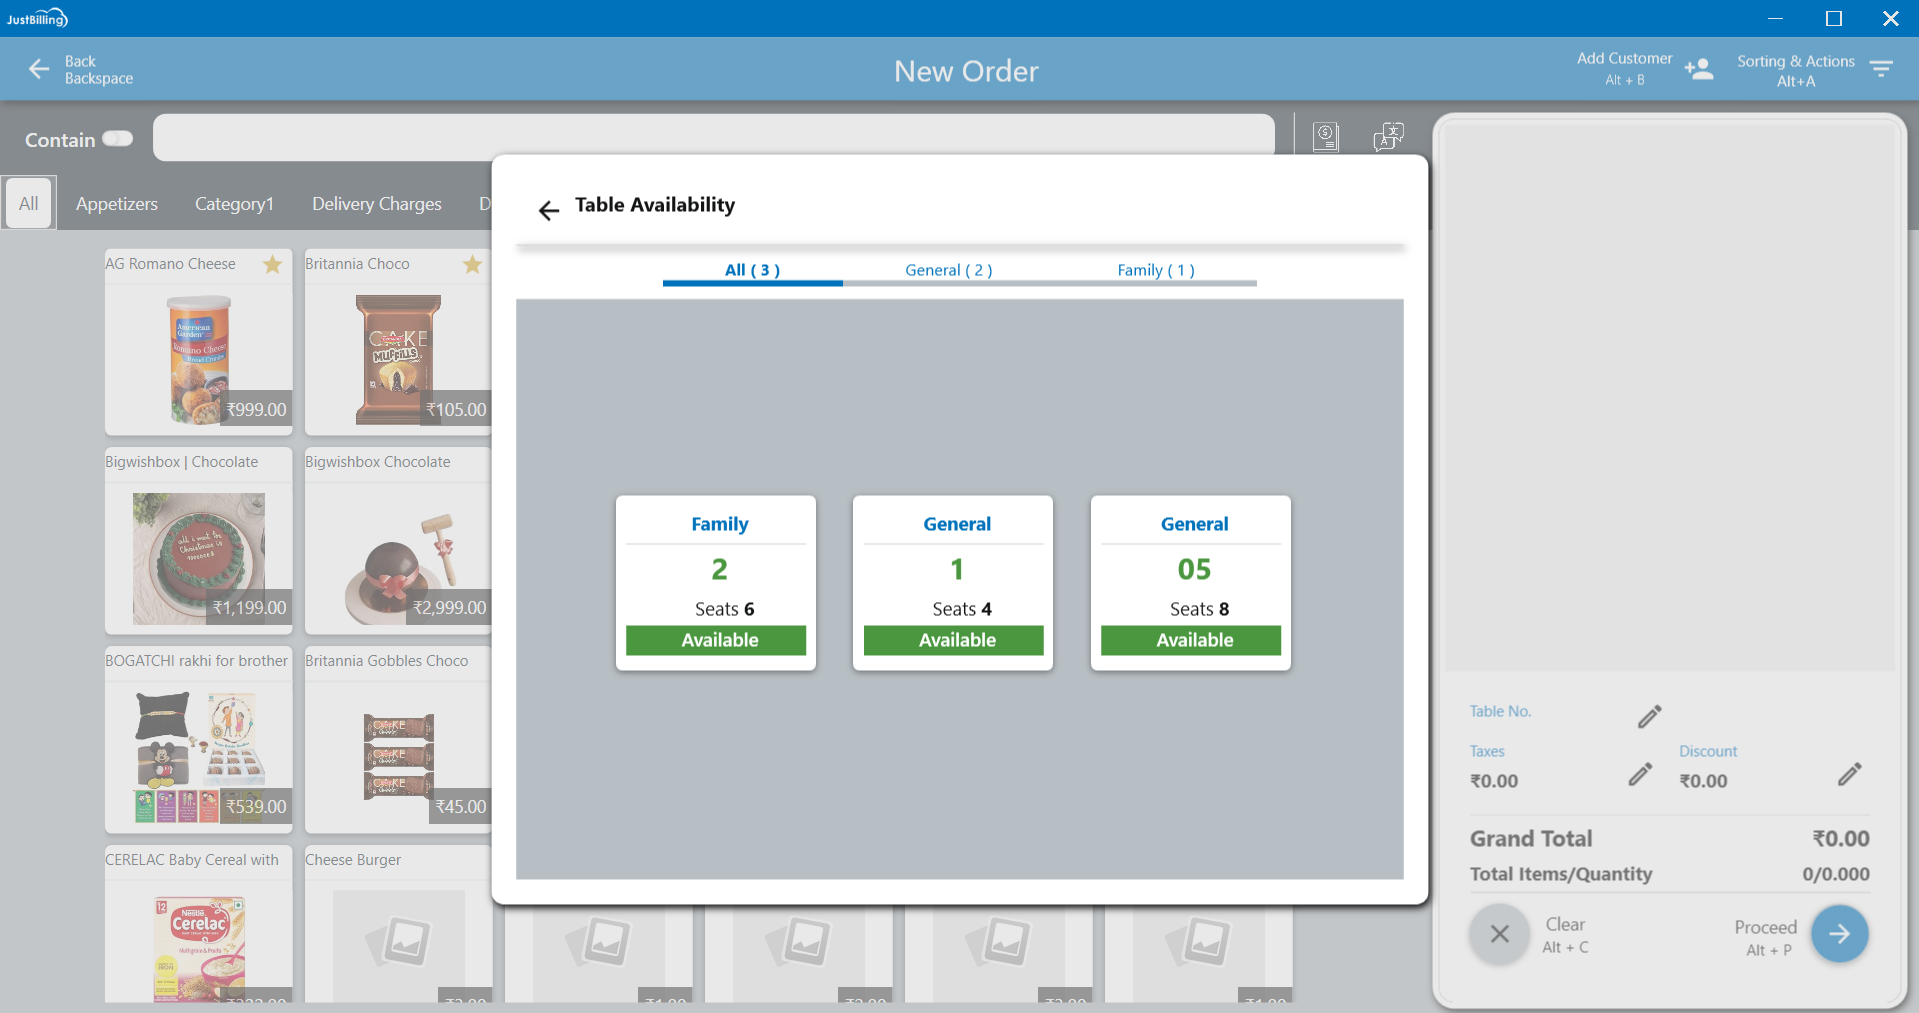
To assign a Dine-In order, first navigate to the Table Management screen. From the available table layout, select the table where you wish to assign the order. This step links the customer's order to the chosen table, allowing for tracking, billing, and table status management throughout the dining experience. (see figure 2)
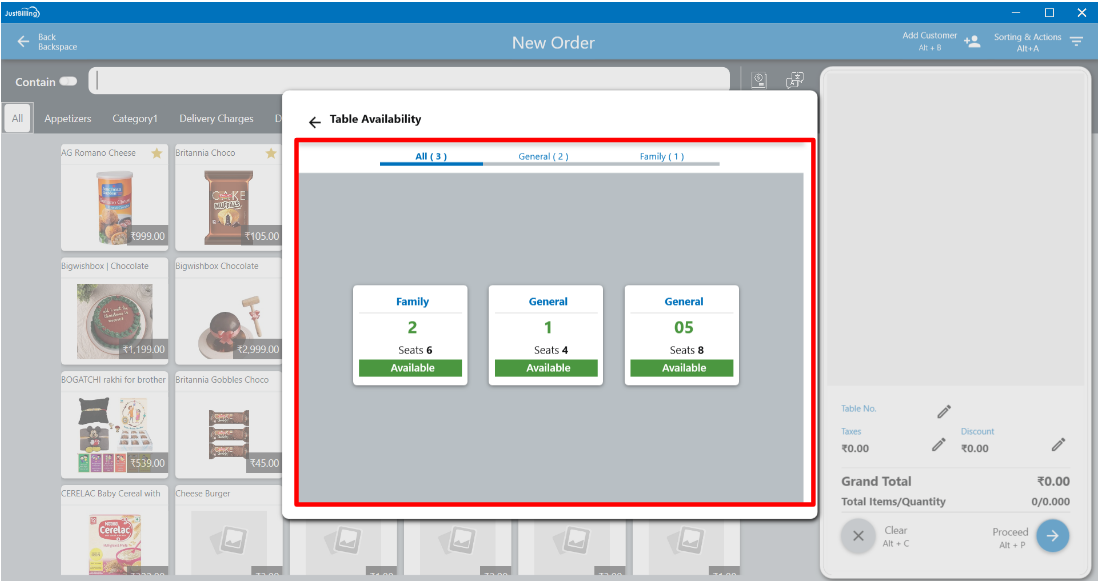
(Figure 2 - select table)
After selecting the desired table, the Table Availability screen will automatically close, and you will be redirected to the Products pane. From here, you can begin placing the Dine-In order by selecting the required products from the available list. Simply browse through the categories or use the search function to find items, and tap on each product to add it to the table's order. Click on proceed to place the dine in order. (see figure 3)
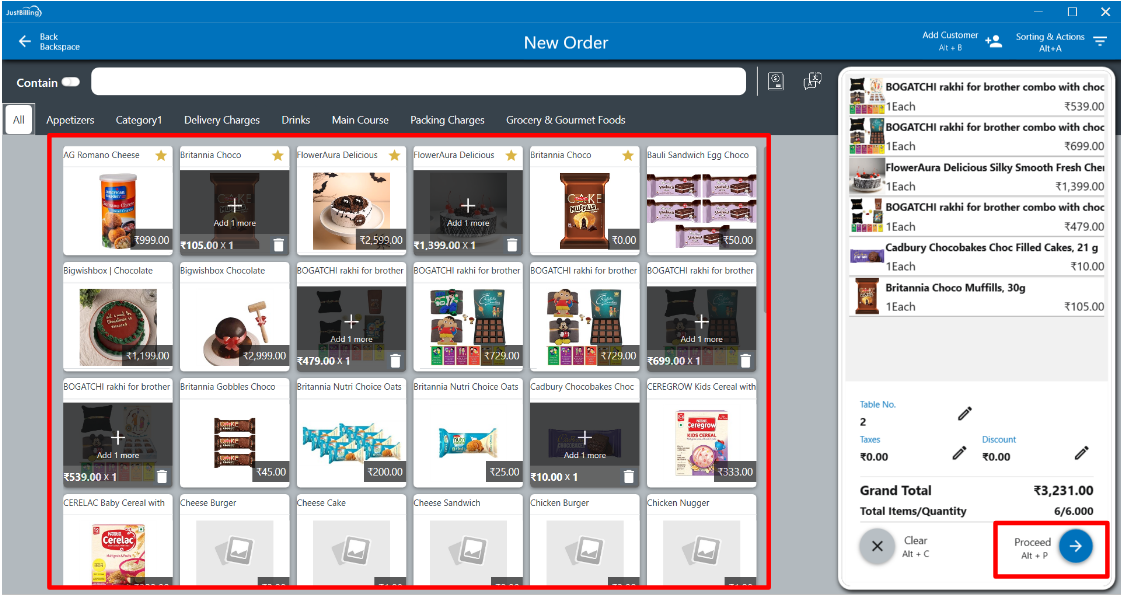
(Figure 3 - Add products to table)
Once you have selected all the required products for the Dine-In order, click on the Proceed button. A popup window will appear, allowing you to enter any special instructions for the kitchen or service staff (e.g., “less spicy,” “no onions,” etc.). After entering the necessary instructions, click on the Apply button to save them and continue with the order processing.(see figure 4)
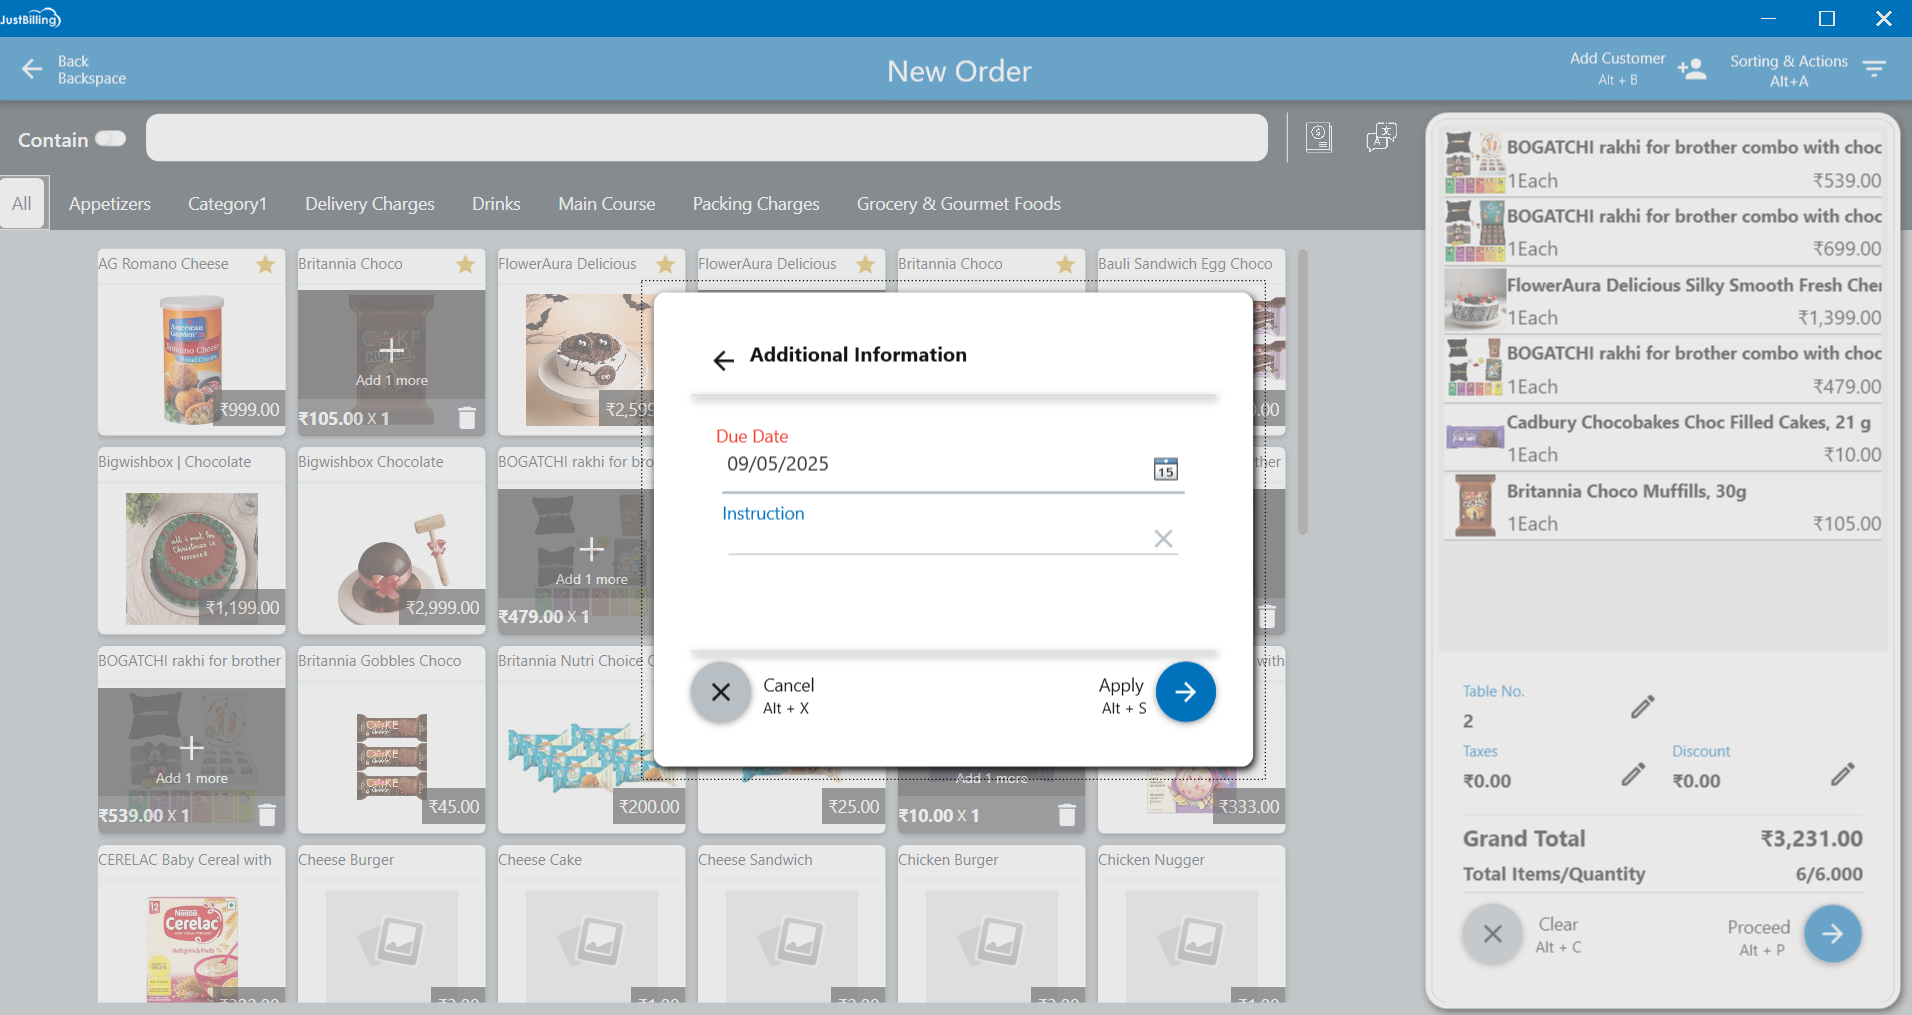
(Figure 4 - Add instructions to table)
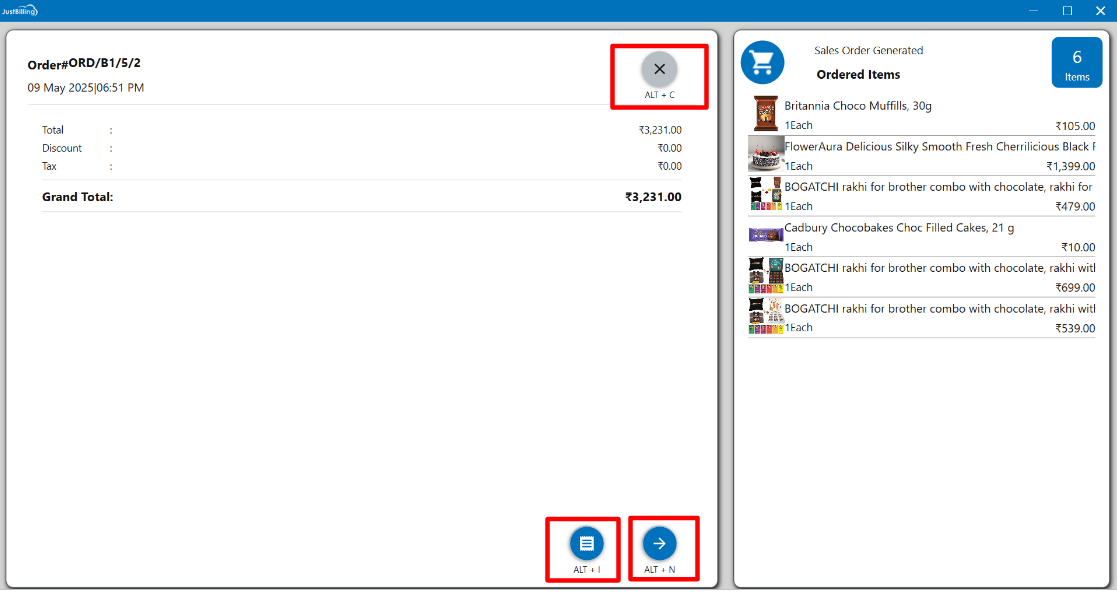
After clicking the Apply button, the system will create a Table Order for the selected items. Once the order is placed, you will have the following buttons and keyboard shortcuts available to perform the next actions efficiently:
- Press ALT + I to convert the table order into an invoice, allowing you to proceed with billing and payment.
- Press ALT + N to start a new Dine-In order for another table.
- Press ALT + C to cancel the current operation and return to the Dashboard screen.