Application settings
Application Settings
From the Application Settings page, various application level configurations can be done.
Stated below are the options that can be set from this page :
1. Configuration: From this option you can configure various setting controls for configuration.
- Allow Inventory From: This setting controls when/how the inventory of an item is impacted when an Order is taken/created.
For JBW Retail there are 2 Options available for Allow Inventory From - Invoice and Order.
For JBW QSR there are 3 options available for Allow Inventory From - Order, KOT and Invoice.
- When Inventory From = Order, the stock would be affected when you ‘Take Order’ at the billing screen.
- When Inventory From = KOT, the stock would be affected when you clear the KOT from KOT page for previously taken order.
- When Inventory From = Invoice, the stock would be affected when you generate invoice for an Order by making payment.
At the time of billing, when you generate an Invoice directly (i.e. do not ‘Take Order’ but make payment) stock would be affected even if Inventory From = Order.
NOTE: Changing the - Allow Inventory From – option automatically re-starts JB Windows.
- Currency : This field is to select currency ( Currency field cant be changed once it is selected during registration process
- Default price catalog : From this option users can select the default price catalog based on which products and prices will be filtered in the Billing screen. In JustBilling Pro subscription, by default there are five system defined Price Catalogues as below: Default Price List, Avg. Sales Price, Last Sales Price, Standard Sales Price.
- Standard sales price : This field is to configure Standard sales price.
- Business Start time : This field is to enter Business start time.
- Business End time : This field is to enter Business end time.
- Show feed back after billing : This field is to enter feedback by customer after billing.
- Show item edit Pop up while billing : This field is to configure Edit pop up while billing.
- Show QR Code in invoice : This field is to configure QR Code print in the invoice.
- Allow cashier to delete transaction : This field is to configure to delete a transaction record by cashier user.
- Add new customer while billing : This field is to configure adding customer details while invoicing.
- Show bar code in invoice : This field is to configure displaying Barcode in invoice.
- Allow cashier to edit transaction : This field is to configure allowing cashier to edit a transaction record.
- Send OTP to redeem : This field is to configure sending OTP to redeem while invoicing.
- Purge data after : This field is to configure Purge data after certain days.
- Select weighing scale port : This field is to configure weighing machine.
Once you enter the details then save upon saving setting are been configured with Just Billing Application.
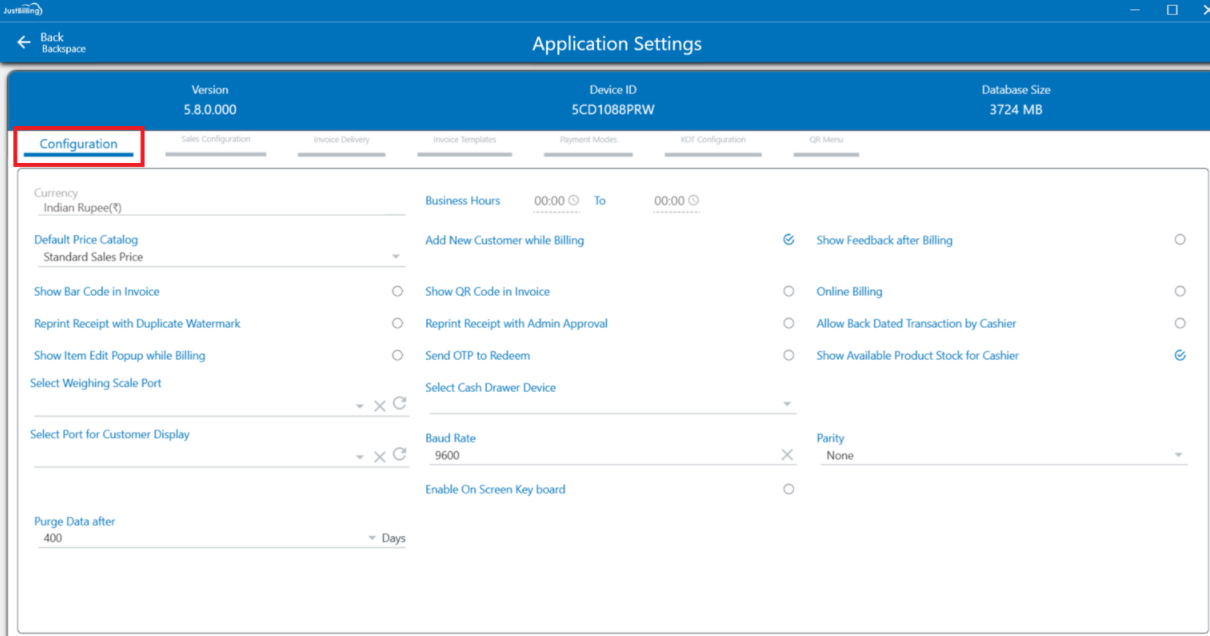
(Figure 1 - Configuration Settings Screen)
2. Invoice Templates : From this option you can configure various settings controls for invoice templates.
- Template : This field is to configure Invoice Template size from A4, 2 inches and 3.5 inches.
Once you select Template size then save, upon saving setting is been configured with Just Billing Application.
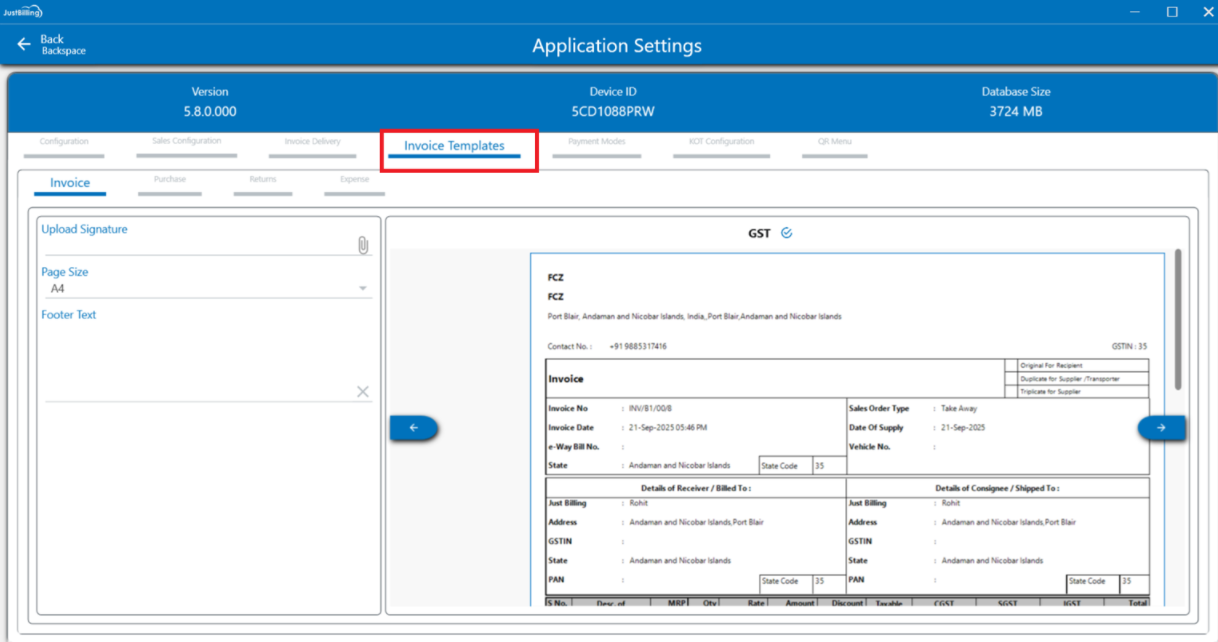
(Figure 2 - Invoice Template Settings Screen)
3. Invoice Delivery : From this option you can configure Invoice delivery mode.
- SMS : This field is to configure Invoice delivery through SMS
- Email : This field is to configure Invoice delivery through Email
- Print : This field is to configure Invoice delivery by print. Invoice will print on Printer connected to desktop.
Select Printer options: From this setting users can select the printer to print Invoice and KOT. Only the printers which are installed on your computer will be available for selection in the drop down.
Note: Any printer which can print a document from your Windows machine can be used to print Invoices/KOT from Just Billing application. Before trying to print a KOT/Invoice from the application, please ensure that your printer is working fine by printing any document from notepad/word.
Network Printers are WIFI/Ethernet enabled printers which can be used to print documents remotely. For example, if you want to print KOT from the billing computer itself by using a KOT printer which is located in your kitchen, we need set the Network printer option.
Once you select Invoice delivery mode then save, upon saving setting is been configured with Just Billing Application.
How to configure Printer in Just Billing Application ?
To configure printer with Just Billing Application you need to follow below mentioned steps :
For configuring printer to Just Billing application first printer needs to be installed in the appropriate system with valid printer drivers.
Just Billing Windows application supports USB and LAN printer (2 inches, 3.5 inches and A4 & A5 Size)
Once the printer is installed successfully in the system then check the test print. If the test print is printed and working fine then select the printer as default printer.
1. Log-in to Just Billing application.
2. Select menu option on the right-hand side top corner.
3. Navigate to settings
4. Select Application Settings option
5. Navigate to Invoice templates - Select the installed printer paper size (2inch,3.5 inches, A4 or A5).
6. Invoice Delivery - Check the print option and select the invoice printer.
i.If the installed printer is USB port printer, check local printer and select the printer from the drop-down field.
ii.If the installed printer is Network printer, check the network printer and select the printer from the drop-down field.
7. Sales Configuration - As per the sales order type enter the value for total number of invoices to be printed for the order.
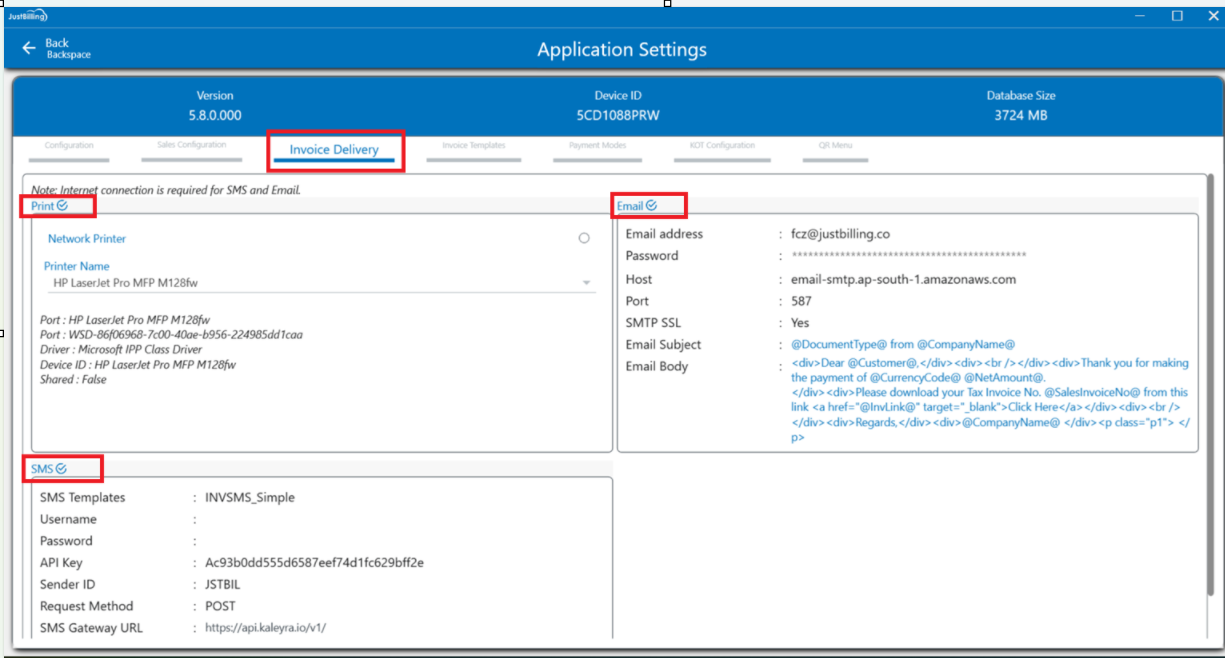
(Figure 3 - Invoice Delivery Settings Screen)
4. Payment Modes : From this option you can configure different payment modes
- Selecting Payment mode : This field is to configure different types of payment modes from the list available.
Cash payment : By checking this option will enable payment through cash
Cheque payment : By checking this option will enable payment through Cheque
Gift voucher payment : By checking this option will enable payment through Gift voucher
Wallet Payment : By checking this option will enable payment through wallet
Bank Payment : By checking this option will enable payment through Bank settlement
Credit note payment : By checking this option will enable payment through Credit note
Debit note payment : By checking this option will enable payment through Debit note
Advance received payment : By checking this option will enable payment through Advance received from customer
Advance paid payment : By checking this option will enable payment through Advance paid from customer
BP50 Payment : By checking this option will enable payment through BP50 Payment terminal
BP5000 Payment : By checking this option will enable payment through BP5000 Payment terminal
Once you configure different payment modes then save, upon saving settings are been configured with Just Billing Application.
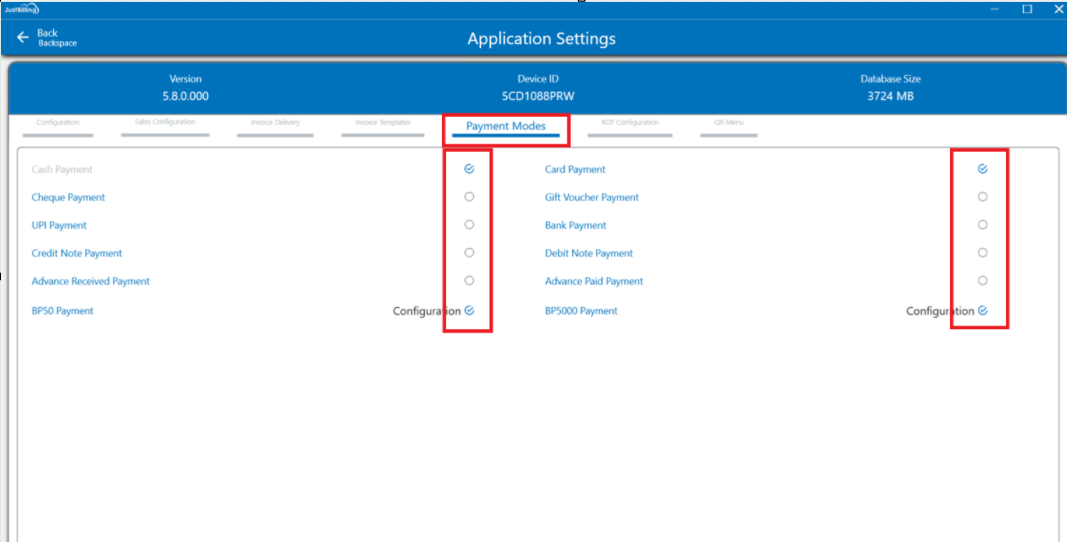
(Figure 4 - Payment Modes Settings Screen)
5. Sales Configuration: From this option you can configure Sales related settings.
- Sales order type : This field is to configure Default Sales order type from Home delivery, Dine-In and Take away
- Discount 1 : From this option you can select Discount type
- Discount 2 : From this option you can select Discount type
- Discount 3 : From this option you can select Discount type
- Delivery charges : From this option you can configure delivery charges
- Packaging charges : From this option you can configure packaging charges
- Tax Group : From this option you can configure Tax group
- Rounding method : From this option you can select rounding to decimal or fractional
- No of Invoice print : From this option you can configure number of Invoice prints to be printed
- Allow Estimation Mode : Allows users to quickly generate and record customer order estimations without converting them into invoices
- Low Stock Alert : Alerts the users via email, whenever the inventory stock level is below the threshold. And users can select the email for notification alerts.
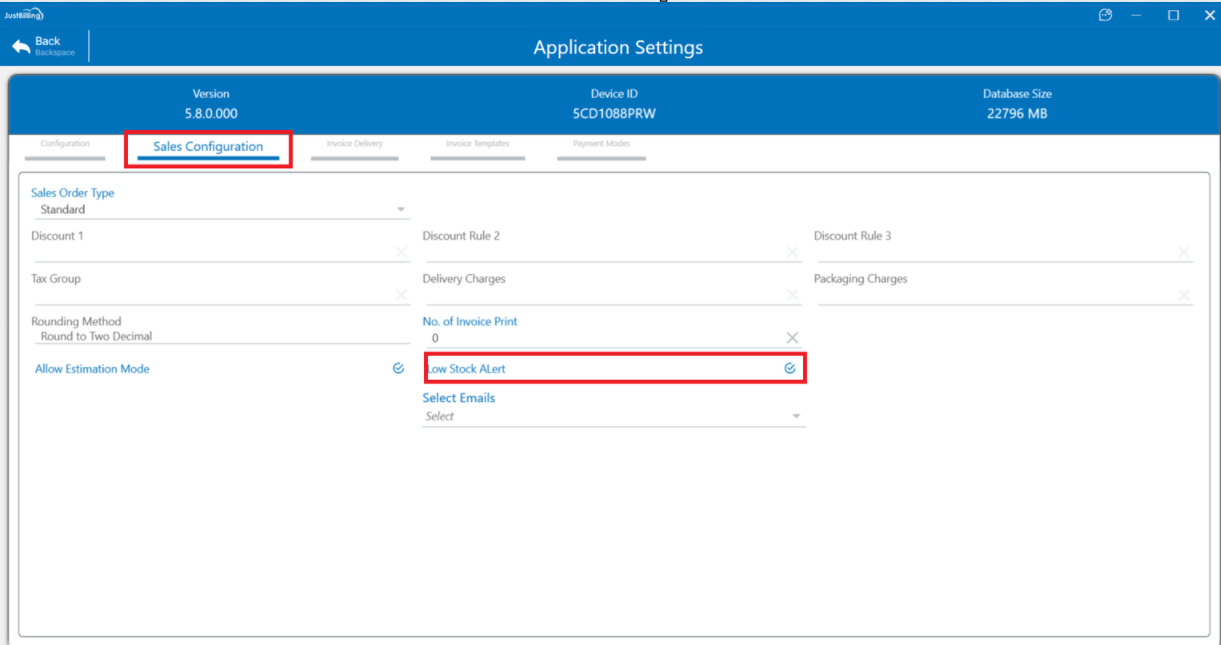
(Figure 5 - Sales Configuration Settings Screen)
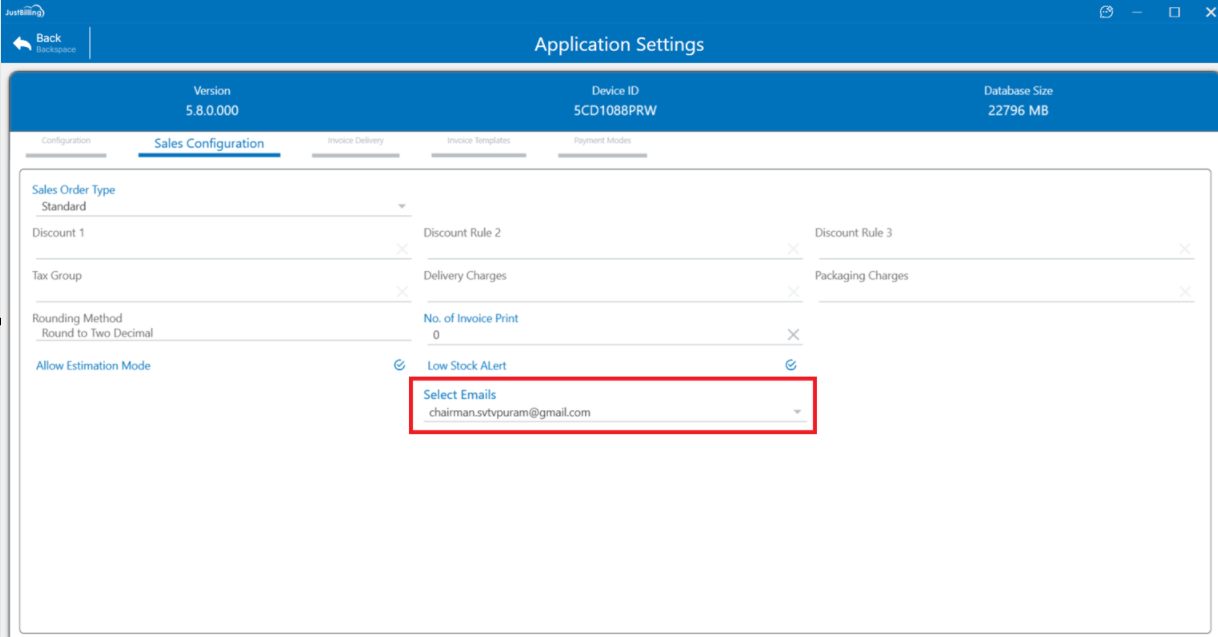
(Figure 6 - Sales Configuration Settings Screen)
6. KOT Configuration: From this option you can configure KOT related settings.
How to configure Printer in Just Billing Application ?
To configure printer with Just Billing Application you need to follow below mentioned steps :
For configuring printer to Just Billing application first printer needs to be installed in the appropriate system with valid printer drivers.
Just Billing Windows application supports USB and LAN printer (2 inches, 3.5 inches and A4 & A5 Size)
Once the printer is installed successfully in the system then check the test print. If the test print is printed and working fine then select the printer as default printer.
1.Reset KOT on every Timer-9999
2.Reset KOT everyday at 12:00PM
3.Allow KOT by department if needed.
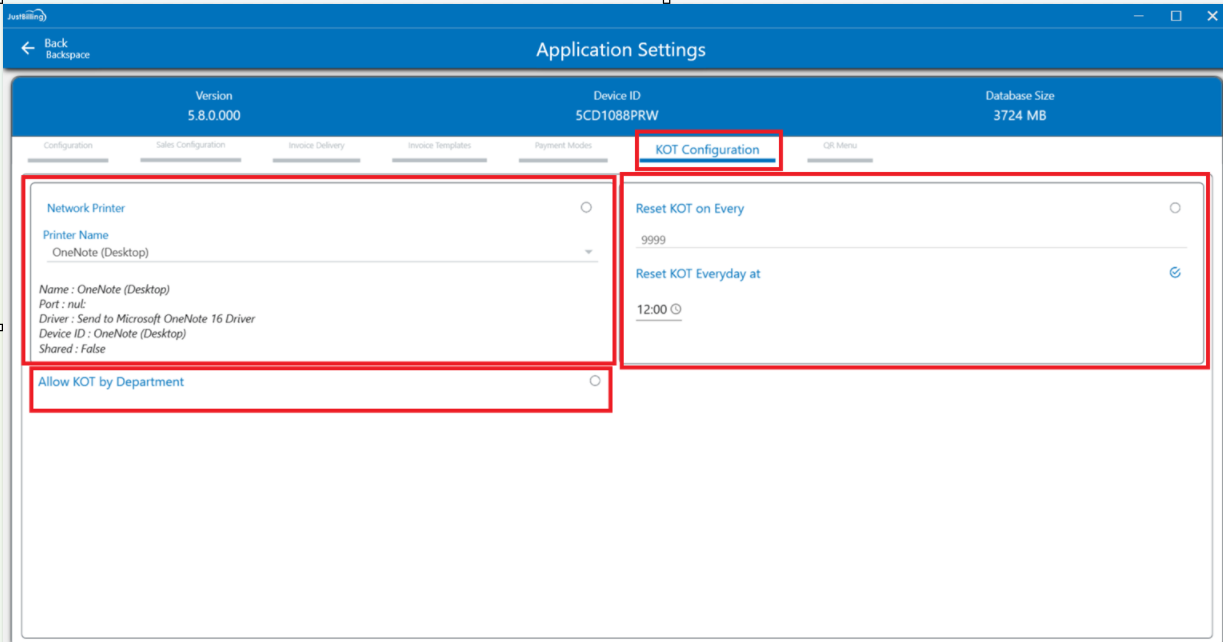
( Figure 6 - KOT Configuration)