Invoice Delivery Mode
Invoice Delivery Mode
This screen shows the different Invoice delivery mode. (See Figure 1)
There are different invoice delivery modes are available in Just Billing where you can switch on and Switch off the button to configure invoice delivery mode from the list.
1. SMS : From this option we can send Invoice in the format of SMS message.
2. Email : From this option we can send Invoice in the format of Email.
3. Print : From this option we can send Invoice in the format of Print.
4. Redeem OTP : From this option customer can redeem points from accumulated redeem points via OTP for the sales invoice.
5. Show QR Code on Print : From this option it will show QR code in the print copy of Invoice.
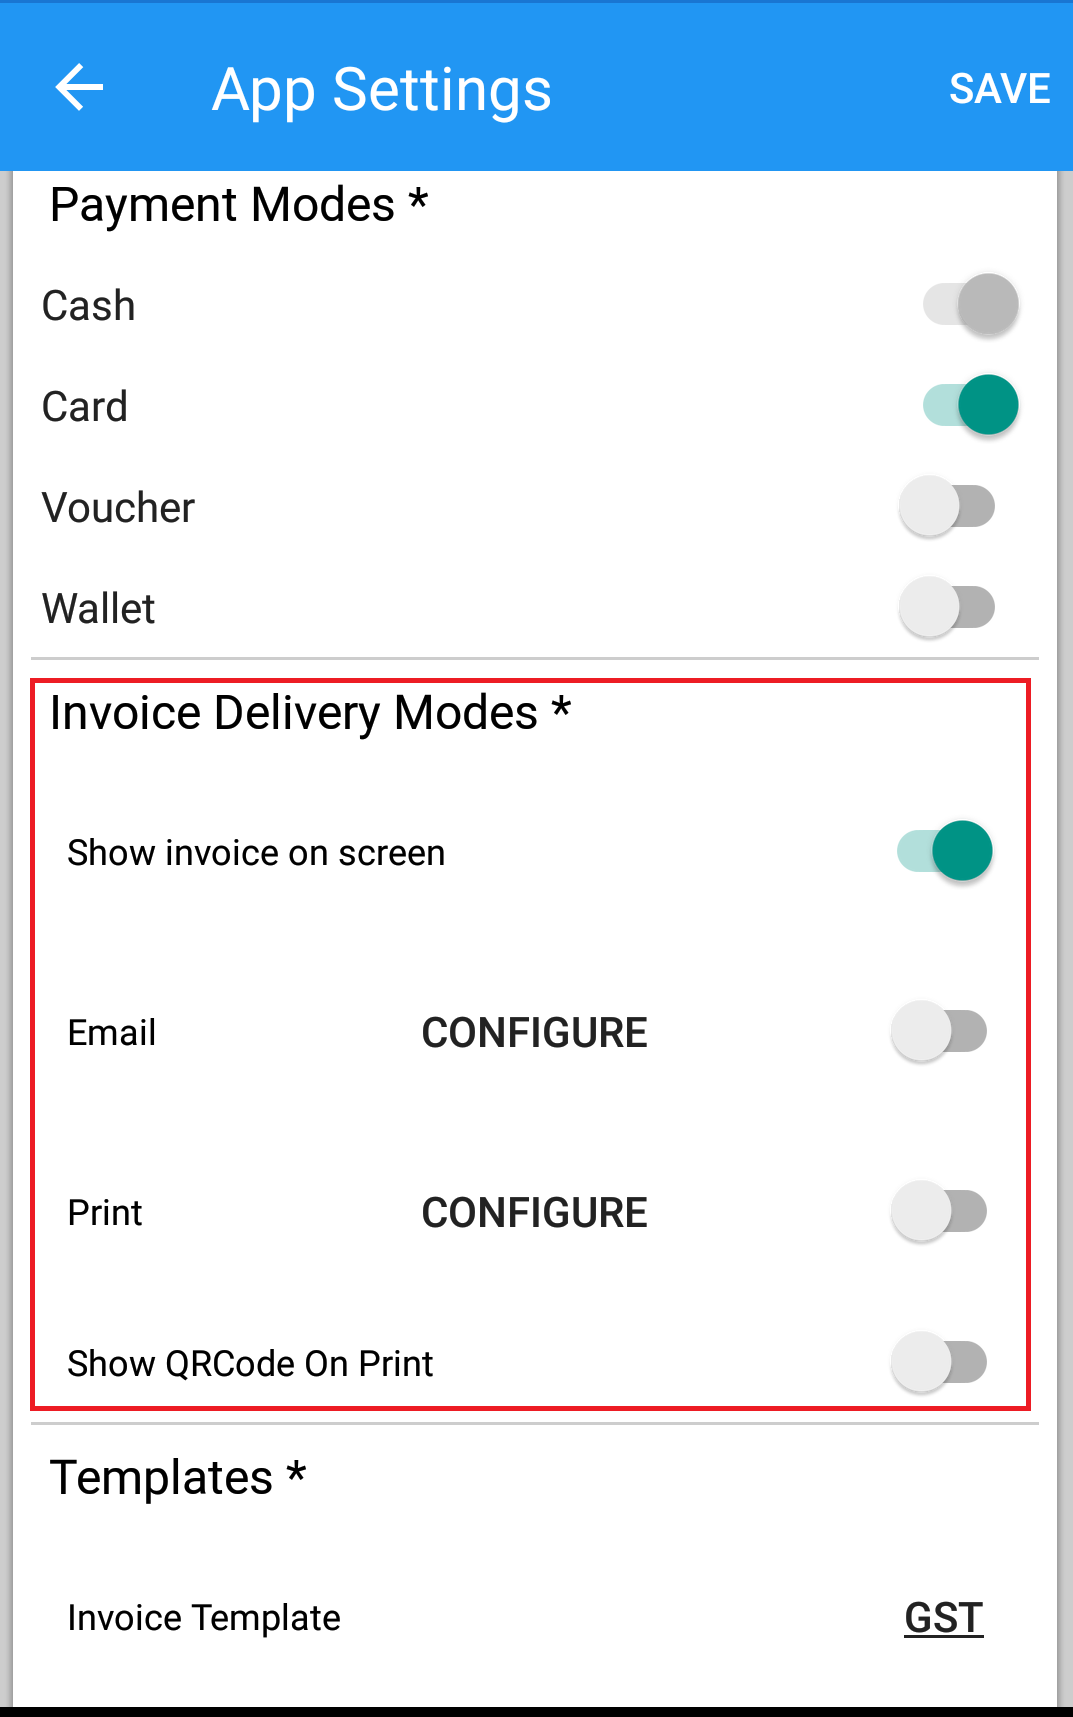
(Figure 1 : Invoice Delivery Mode Settings Screen)
1. How to configure invoice delivery through various options like SMS, Email and Print :
Email :To configure Invoice delivery through Email. Toggle button to enable or disable invoice delivery through Email.
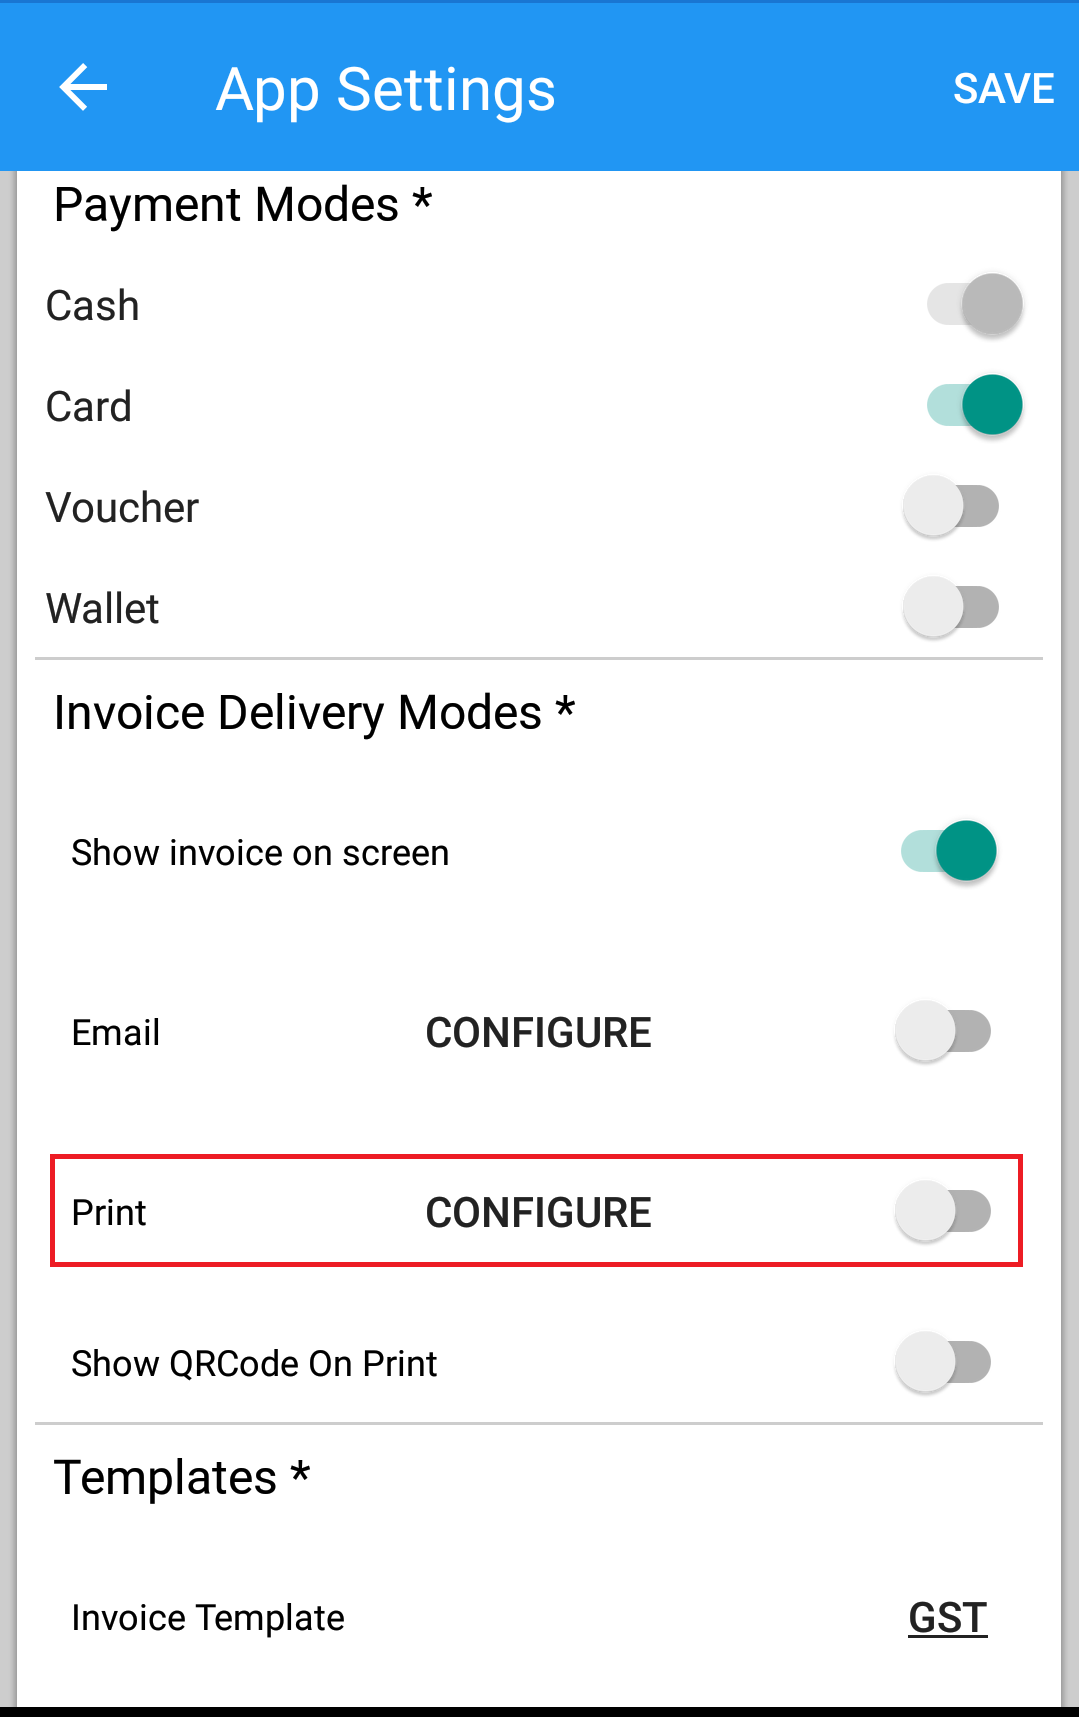
Printer : To configure Invoice delivery through print option. Toggle button to enable or disable invoice delivery through printer.
Note : a) For the invoice to be delivered through Print option the device needs to be configured and connected to the respective printer.
b) To configure printer with Just Billing Application click on CONFIGURE to take you to Printer configuration screen.(See Figure 2)
c) It will ask you to turn an App wants to turn on the Bluetooth device click on OK if you are have Bluetooth printer.(See Figure 3)
d) After that it will show list of Printers that are available to connect. select the printer that you wanted to connect for printing purpose.
e) If you have Wifi Printer / Network printer then select Wifi option and then enter the IP address same as the printer is connected so that print will come from the respective printer.
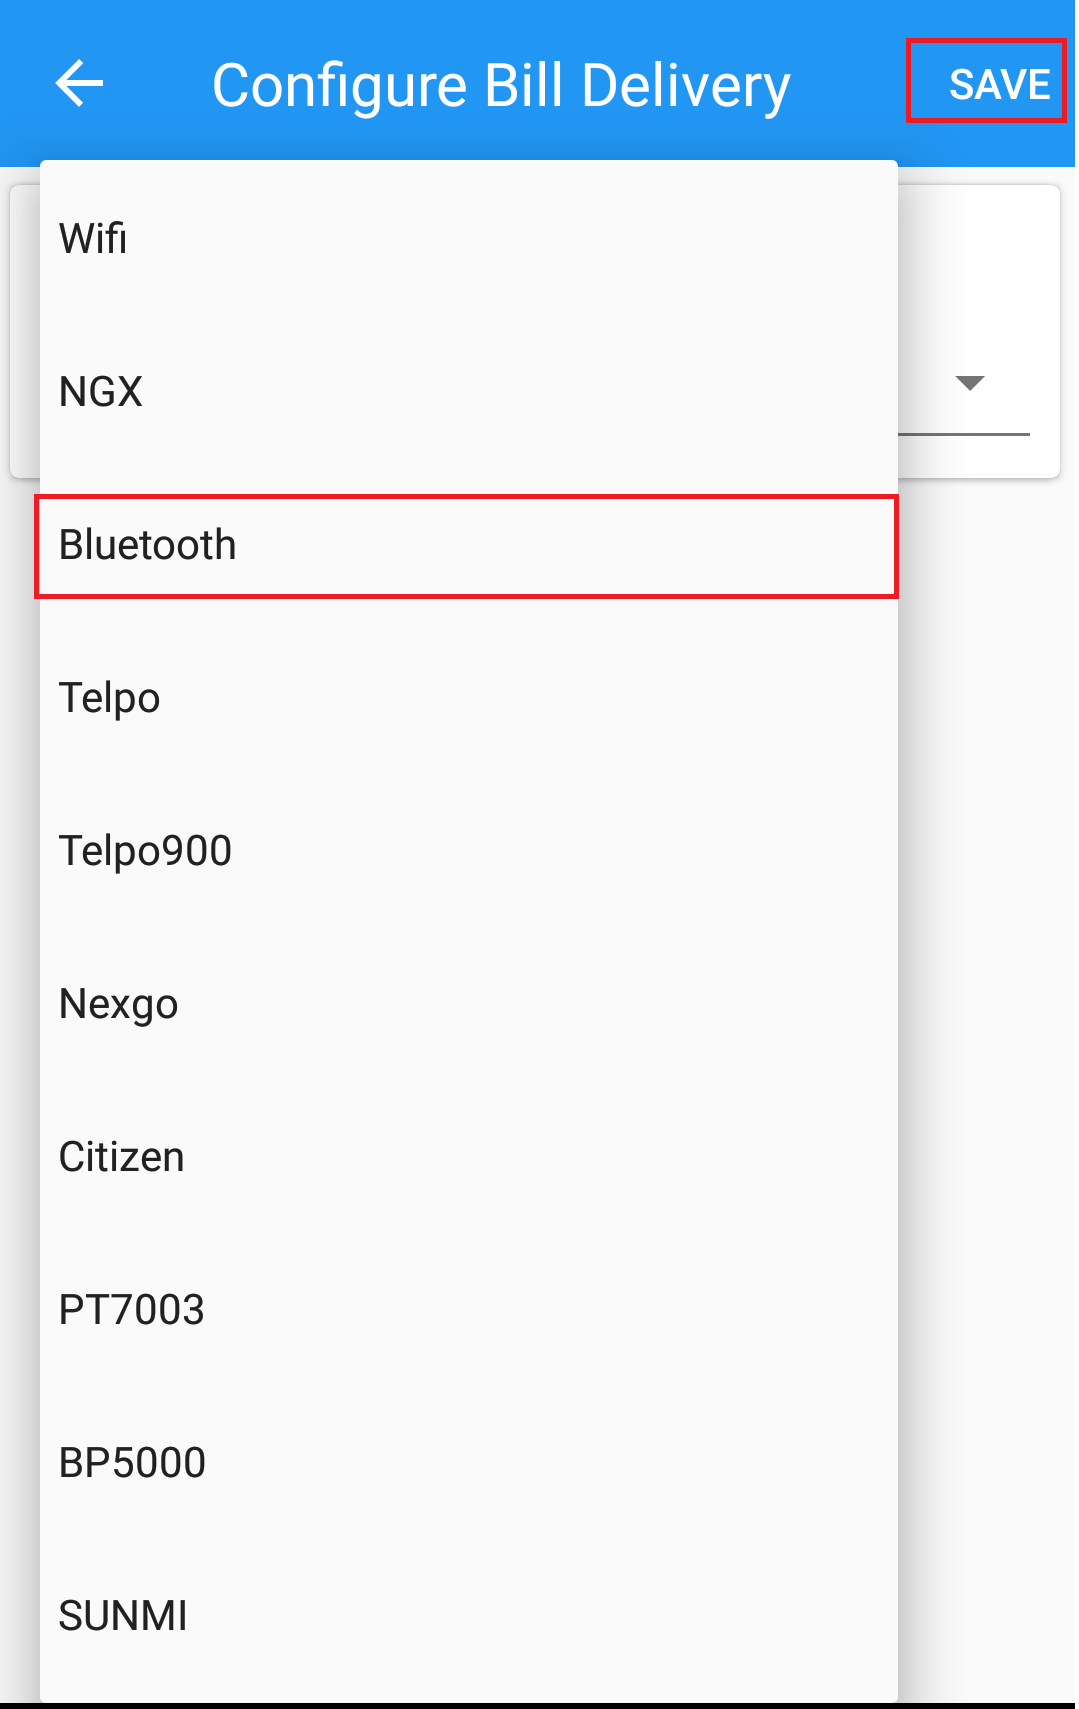
f) Apart From that there are some pre integrated list of devices . Select respective Model Device or Printer from the list of devices like Telpo, Nexgo, Citizen,Sunmi etc.(See Figure 3)
(Figure 2 : Configure Printer Screen)

(Figure 3 : Configure Printer Screen)
(Figure 4 : Configure Printer Type from the List)
Just Billing Android application supports
i.Bluetooth printer (preferable models - Coineltech & Epson).
ii.Cloud printing (A4 Size only - Both Android device and printer has the feature to support cloud print).
iii.Citizen printer Ethernet(CT-S651 model only).
2. How to configure printer in Just Billing Application ?
Here we explain you how to configure Bluetooth, Cloud print and Citizen printer.
I. Bluetooth Printer configuration:
Turn on Bluetooth on Android device and pair Bluetooth printer to the Android device.
1. Login to Just Billing application.
2. Select the menu option on the left-hand side top corner.
3. Navigate to 'Invoice delivery mode' option.
4. Select print option.
5. Click on 'configure' shows the pop up text message "An App wants to turn Bluetooth ON for this device" select ’ALLOW’.
6. Select printer type as "Bluetooth".
7. Select the paired printer name from the drop-down.
8. Select the printer paper size (2inch or 3.5 inches).
9. Enter the value for No. of invoices.
11. Click on save option and then click back option.
12. Turn on the print option (move the toggle button to right side) and click on save.Enter the value for No. of invoices to print.
II. Citizen printer Configuration:
i.First, check the IP address of the printer by using the small button which is available in the backside of the printer.
ii.check the tablet IP address.
iii.Printer and tablet should be on same network.
1. Select the menu option on the left-hand side top corner.
2. Navigate to 'Invoice delivery modes' option.
3. Select print option.
4. Click on 'configure' shows the prompt message "an app wants to turn Bluetooth ON for this device" select 'deny'.
5. Select printer type as "Citizen".
6. Enter the IP address of the printer.
7. Select paper size as 3.5 inches.
8. Click on save option and then click back option.
9. Turn on the print option (move the toggle button to right side) and click on save.
III. Cloud print Configuration (A4 size only):
For cloud printing configuration printer and Android tablet should be in one network (Same Wi-Fi network)
Turn on cloud print in Android device.
1. Select the menu option in the left hand side top corner.
2. Navigate to 'Invoice delivery modes' option.
3. Select print option.
4. Click on 'configure' shows prompt message "an app wants to turn Bluetooth ON for this device select ‘deny’.
5. Select printer type as "wifi".
6. Click on save option and then click back option.
7. Turn on the print option (move the toggle button to right side) and click on save.
8. Creating an invoice, once the payment is done in the invoice screen right hand side corner there is an option to share and print the invoice. Select the print option and select the appropriate printer to take print.