My Organization
My Organization
My Organization page helps you manage various configurations in one go. Discussed below are the settings that can be done from this page:
- General: From the General menu, you can manage organization name, select your business type and industry, set the year of establishment, revenue, number of employees, select financial period, currency and stake holders.
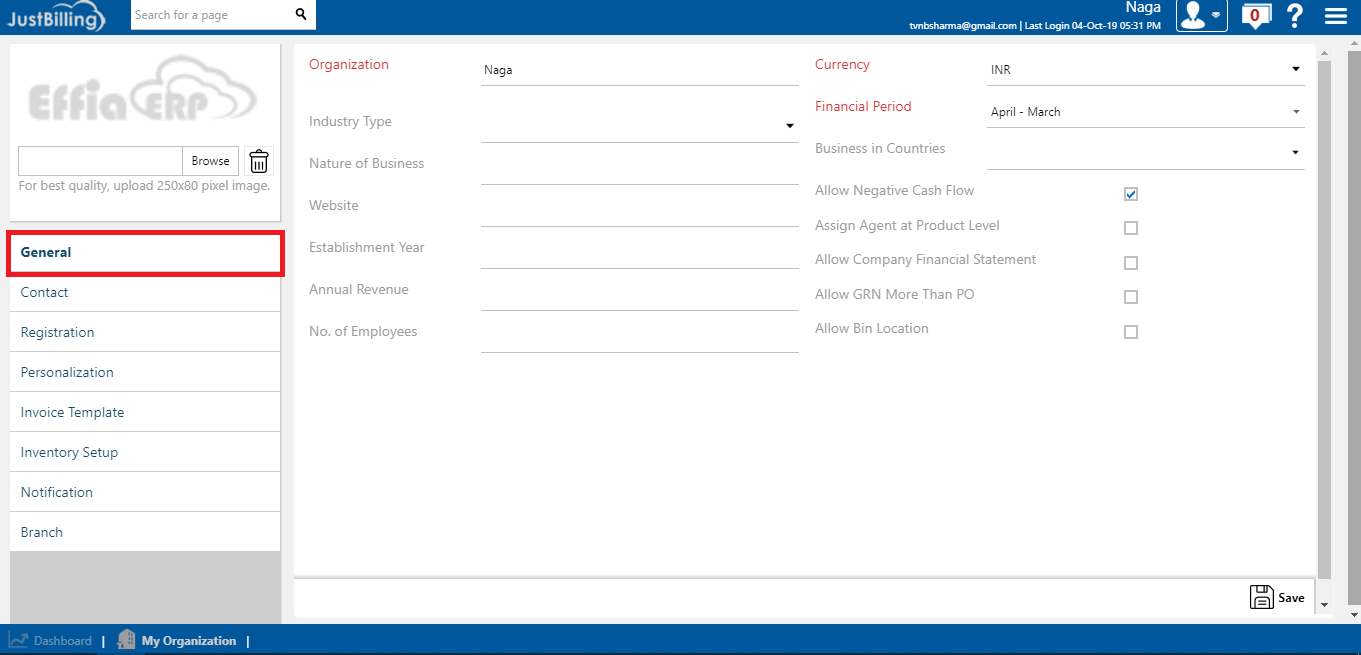
(Figure 1 - My Organization General Configuration page)
- Contact: From the Contact menu you can manage contact details of your organization, such as address, email id, phone number and fax number of your organization.
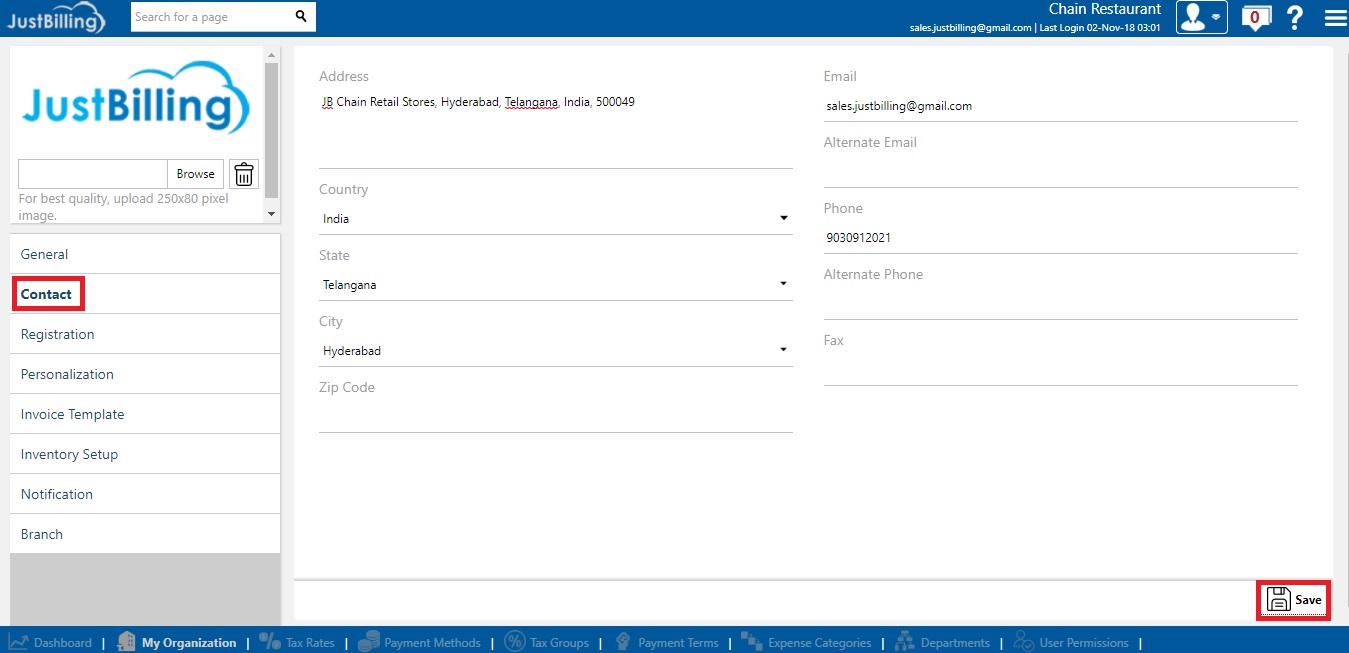
(Figure 2 - My Organization Contact Details page)
- Registration: From the Registration menu you can manage your company's registration details. The details displayed in this page are the ones provided at the time of configuration of JB Windows.
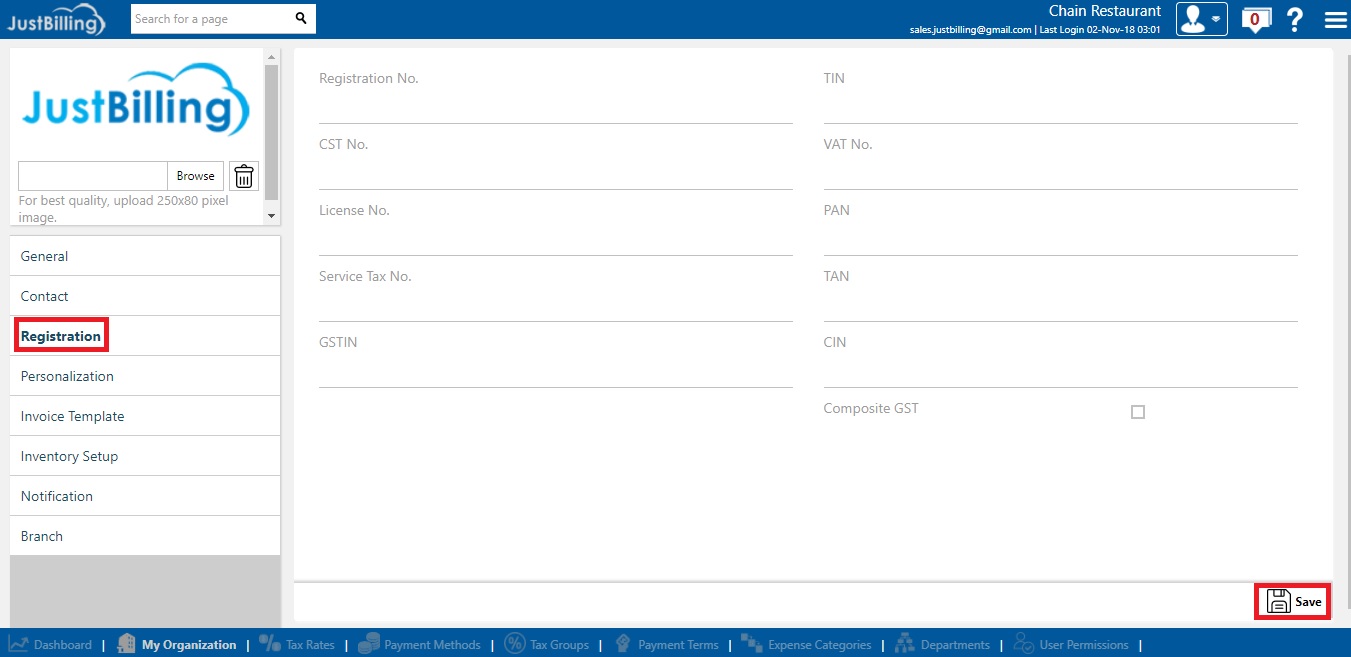
(Figure 3 - My Organization Registration Details page)
- Personalization: From the Personalization page you can add header and footer for Reports and Banners for your Portal.
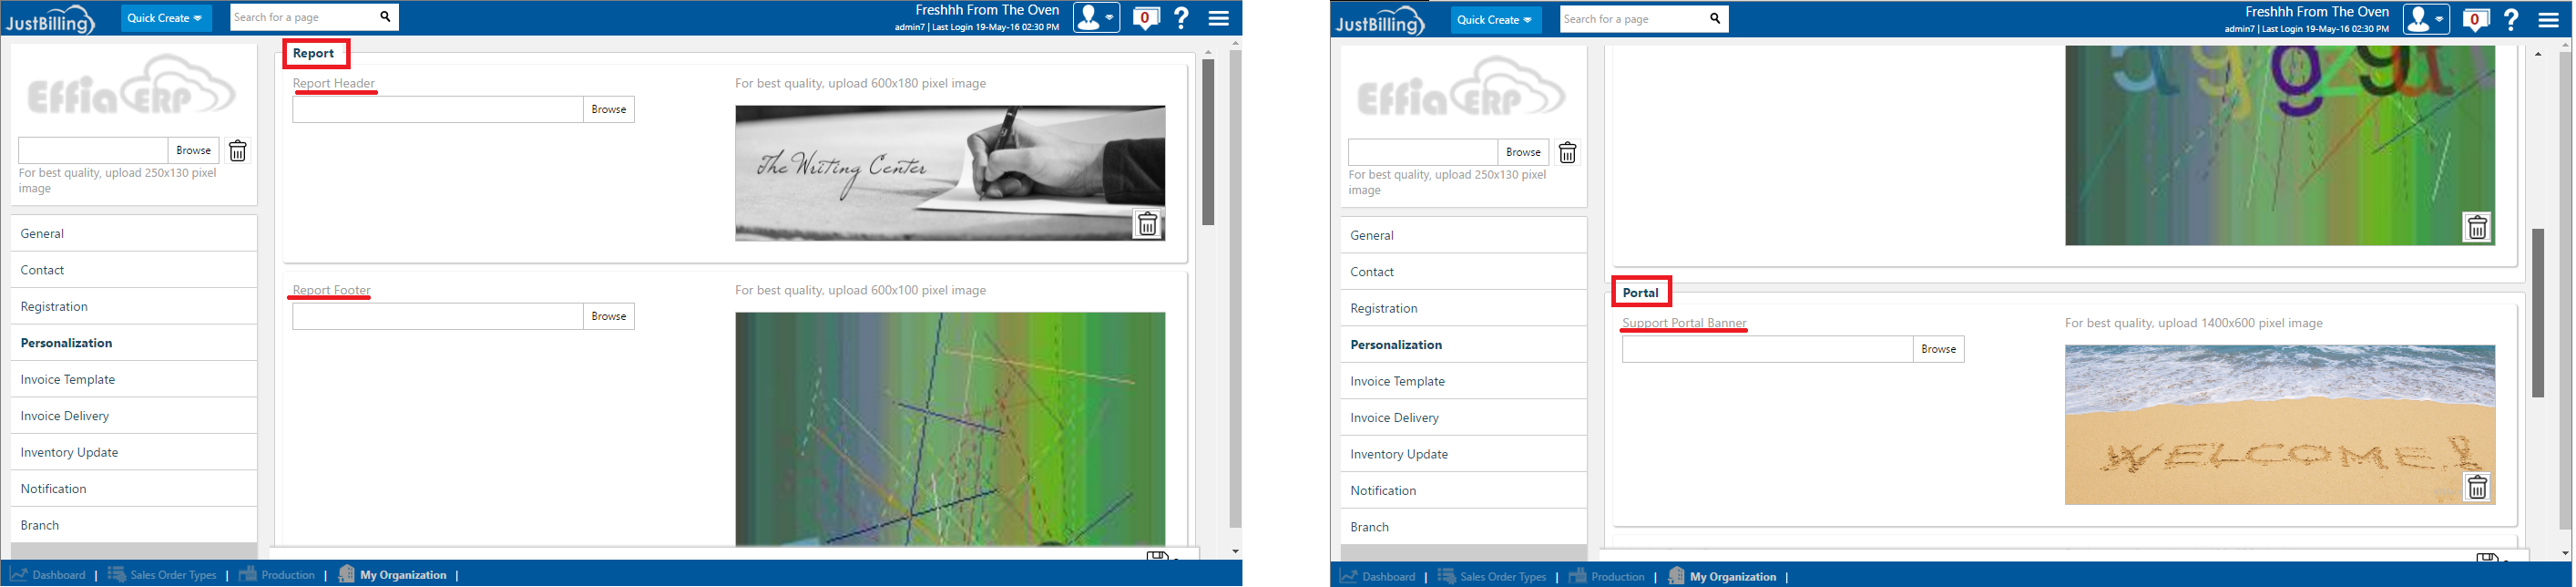
(Figure 4 - My Organization Personalization Details page)
- Invoice Template : From the Invoice Template menu, you can set the invoice template size and choose a template. You can also add footer texts and signature.
Default template size & template are 2 Inch & 2 Inch Invoice Template1 respectively.
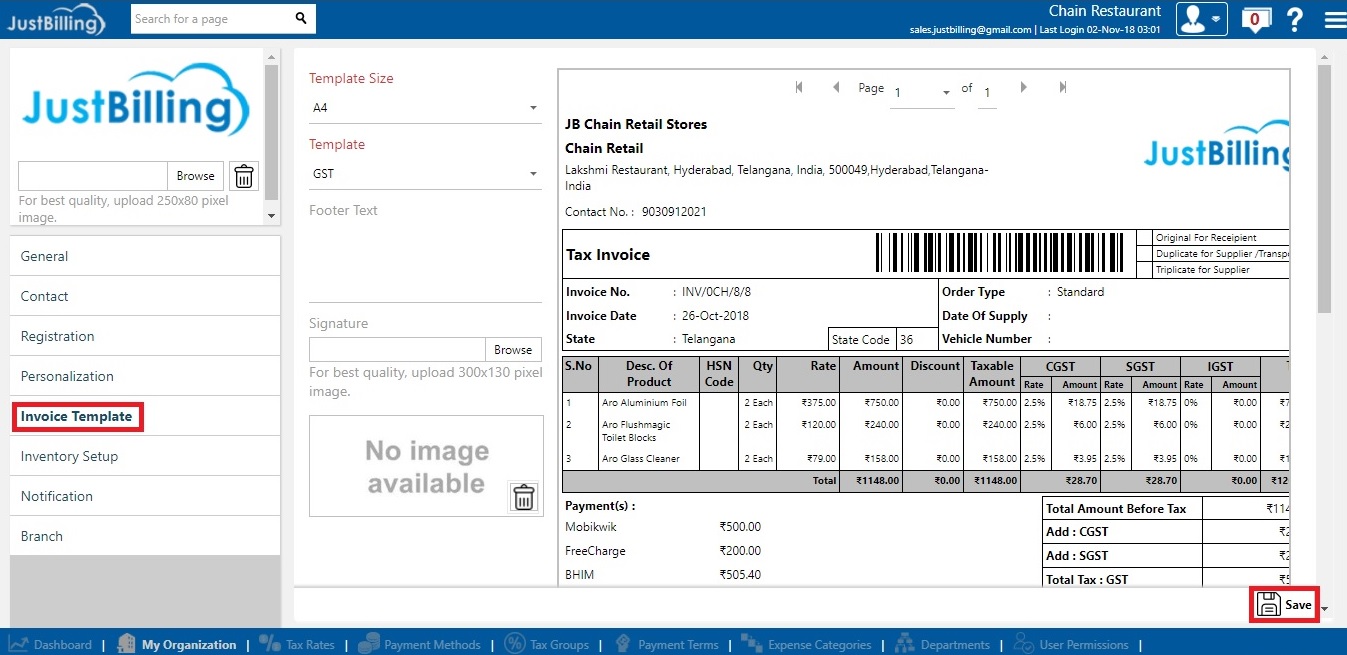
(Figure 5 - My Organization Invoice Template Configuration page)
- Inventory Set-up: From the Inventory Set-up menu, you can select the option when your inventory /stock will be affected during the Purchase (Inventory In) and Sales (Inventory Out) process. The available options are:
Inventory In: Goods Received, Purchase Invoice, and Purchase Order.
Inventory Out: Sales Invoice, Sales Order.
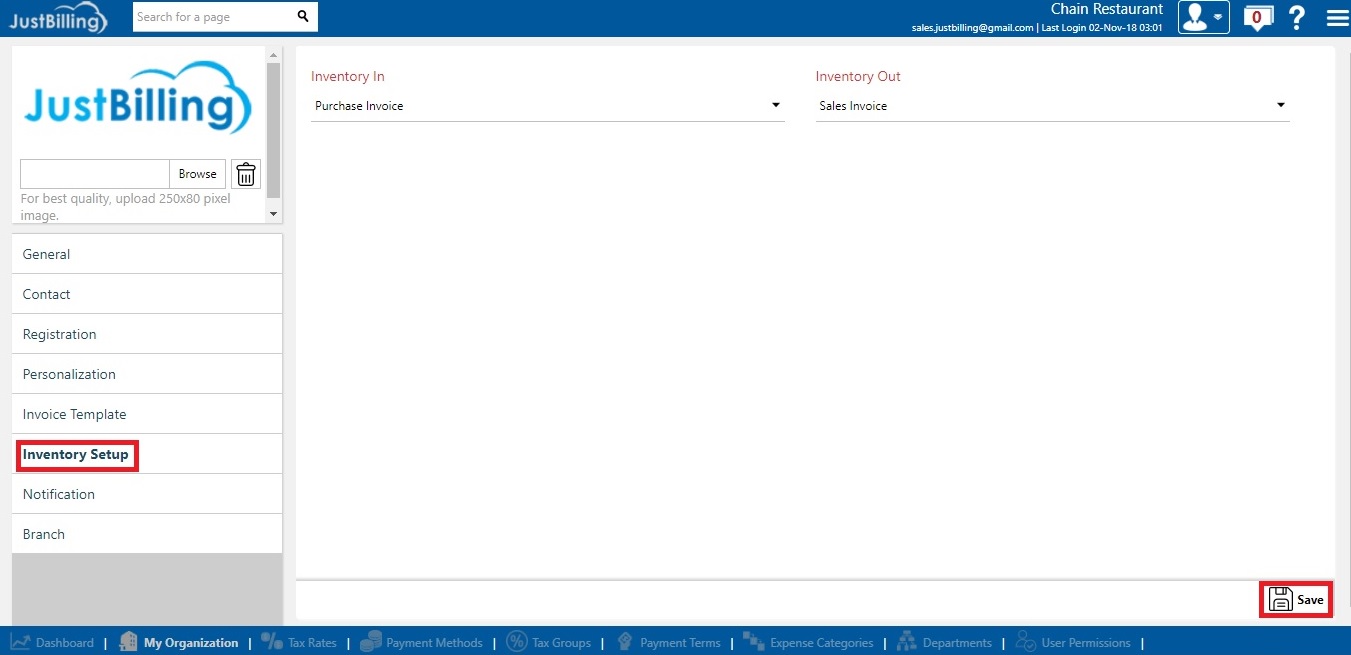
(Figure 6 - My Organization Inventory Setup configuration page)
- Notification: From the Notification menu you can configure the email server settings required for invoice delivery via Email.
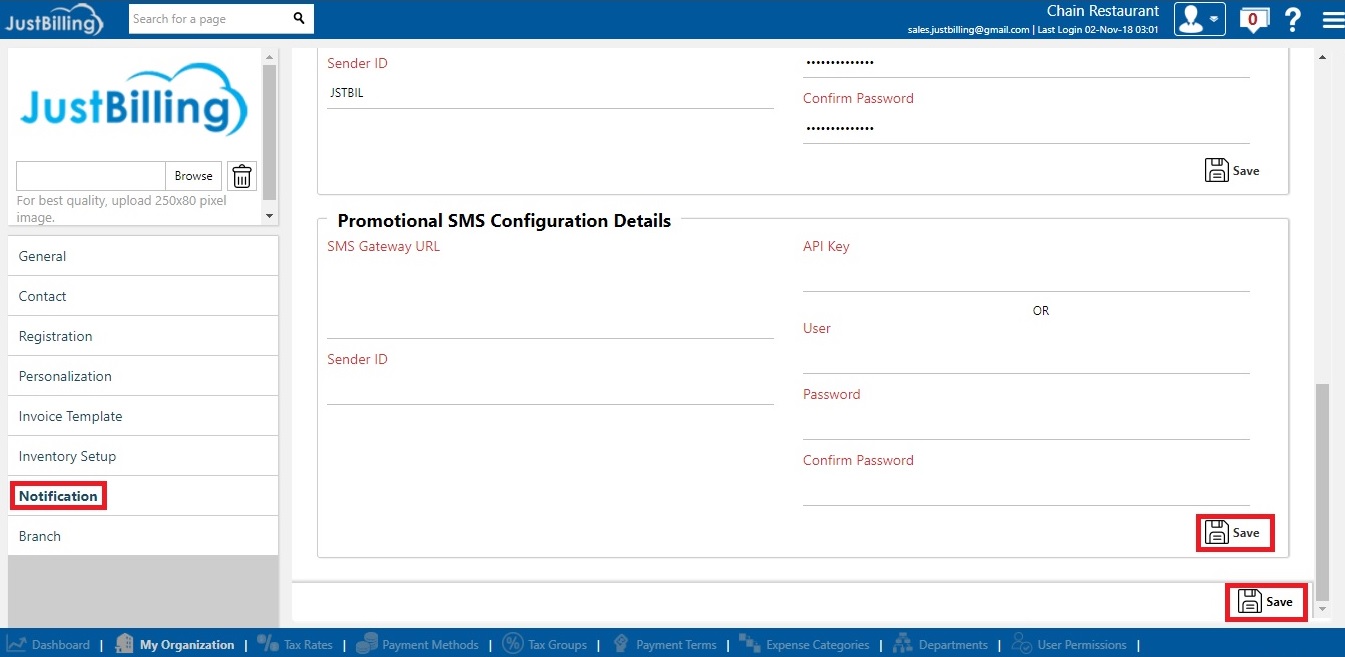
(Figure 7 - My Organization Notification Details page)
- Branch : From the Branch menu, you can add your company's new branch, inactivate/delete existing branches. At the time of configuring Just billing application, the branches configured here will be available for selection.
How to create a Branch ?
1. Navigate to Branch Page under My organisation
2. Click on Add Button, Enter the following details like Branch Name, Branch code, Address, Country, City, GSTIN Number etc.,
3. After entering the details click on save and then close
How to Edit a Branch ?
1. Navigate to Branch Page under My organisation
2. Click on Edit Button, Enter the following details like Branch Name,Email, Address, Country, City, GSTIN Number etc.,
3. After entering the details click on save and then close
Note : Branch code can not be changed once a Branch code is assigned to specific branch.
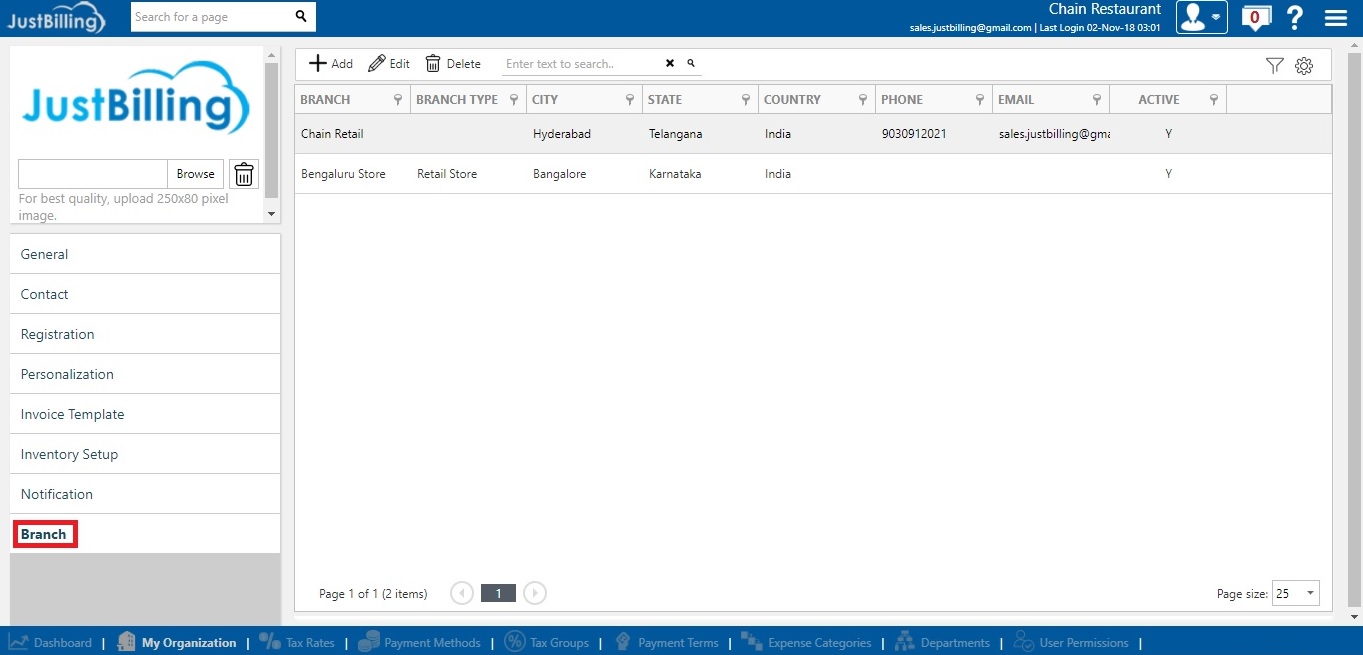
(Figure 8 - My Organization Branch Details page)
Note: Details entered from the pages under My Organization will show on JB Windows application after sync is done. For example, details from General and Contact page will show up in the Business Details page of JB Windows.