Clear and Import Data
Clear Data and Import Data
How to Clear Data :
Clear data functionality allows end users to dynamically clear data ( e.g Product, price list, customer, discount, transactional data from simple option.
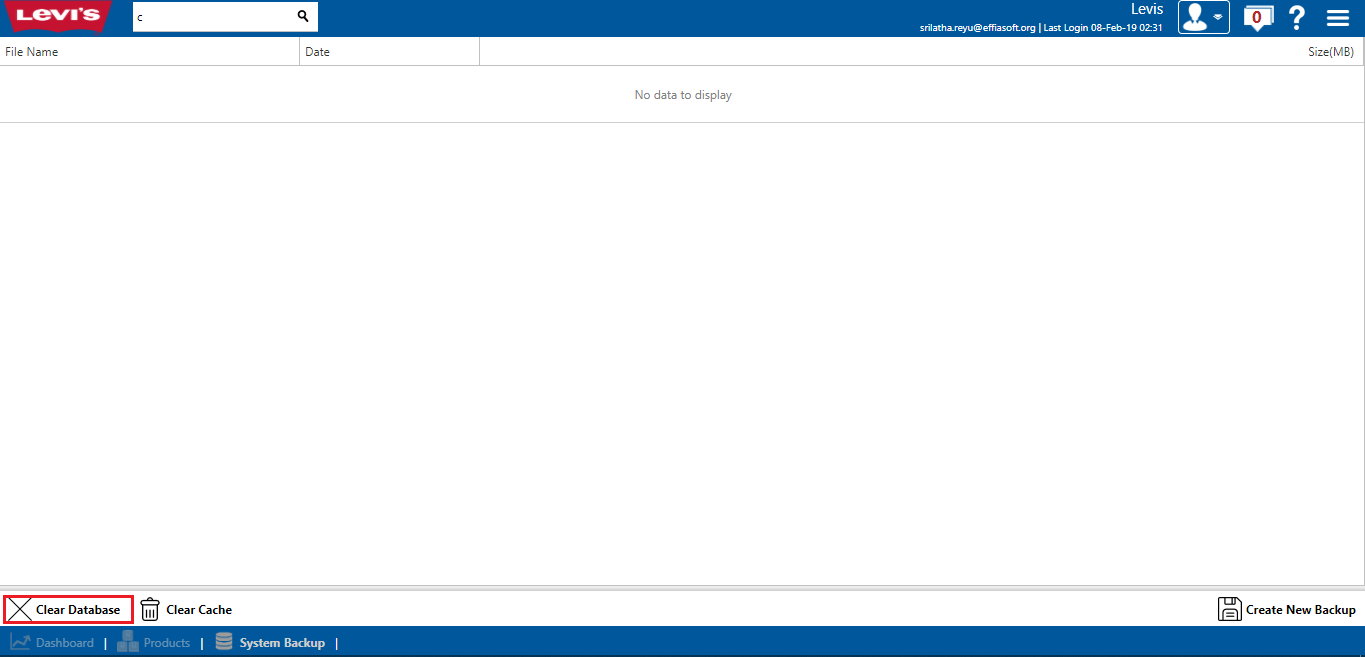
- To clear data from the Application you can simply navigate to System Backup page where you will find an option to clear data base.
- Click on clear data base.
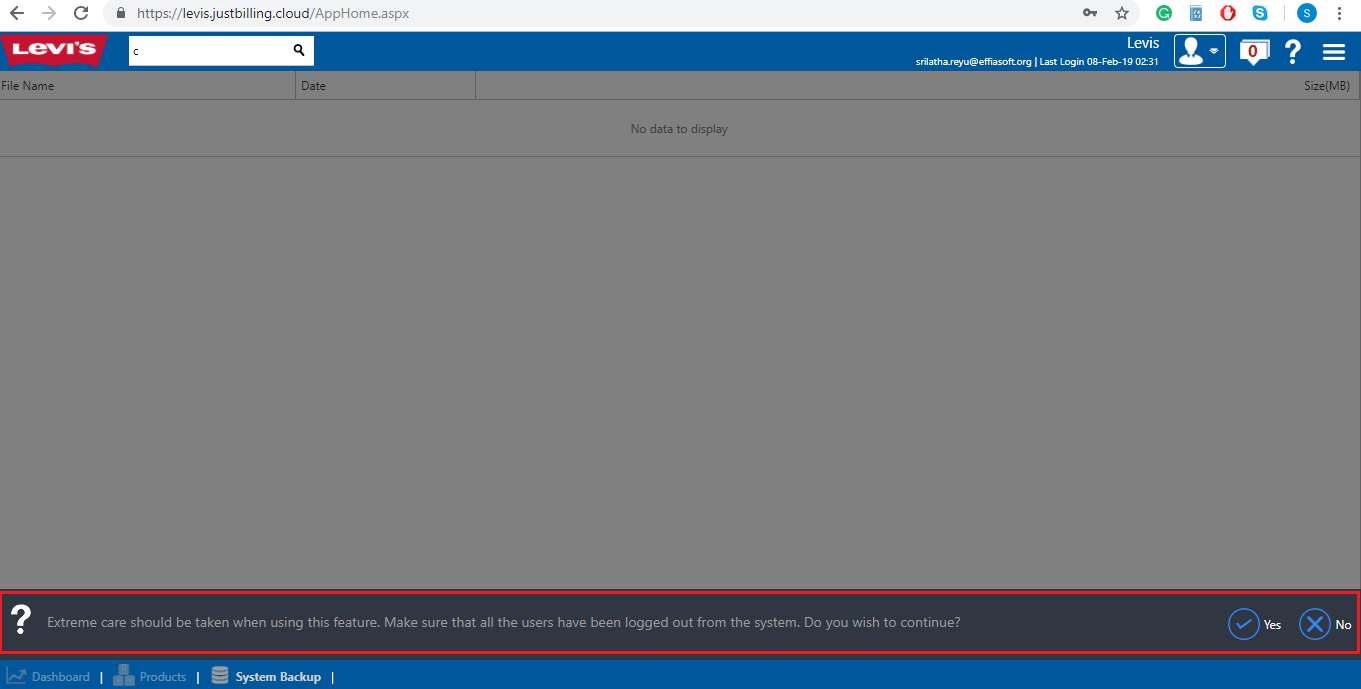
- It will ask " Extreme care should be taken using this feature. Make sure that all the users have been logged out from the system. Do you wish to continue? " Click on Yes.
- Then it will ask Type of Data base to clear from Clear all database and Clear transactional database.
- Select clear all database if you wanted to clear complete database from the cloud.
- Select clear transactional database if you wanted to clear only transactional data.
- It will take you to generate OTP to registered mobile number.
- Enter the OTP in the OTP column and click on Ok.
- In sometime all the data gets cleared from selected type of database.
(Figure 1A - Clear Data Portal)
(Figure 1B - Clear Data Portal)

(Figure 1C - Clear Data Portal)
How to Import Data :
Import Data functionality allows end users to dynamically import data (e.g product, price list, customer, discount etc) from excel into JustBilling application. This is especially useful during initial set up while implementing Just Billing. Importing data is like moving out to a new home. If you clean and organize your possessions before you move out, settling down in your new home would be much easier. So please take some time to prepare and clean your data before importing into the application :
e.g Remove leading, trailing, and multiple embedded spaces.
Remove non-printing characters.
Find and fix spelling and punctuation errors.
Remove duplicate rows or duplicate fields.
Below topic describes the over all steps to import data from Excel worksheets into Just Billing Back Office.
Steps:
- Log in to the back office portal.
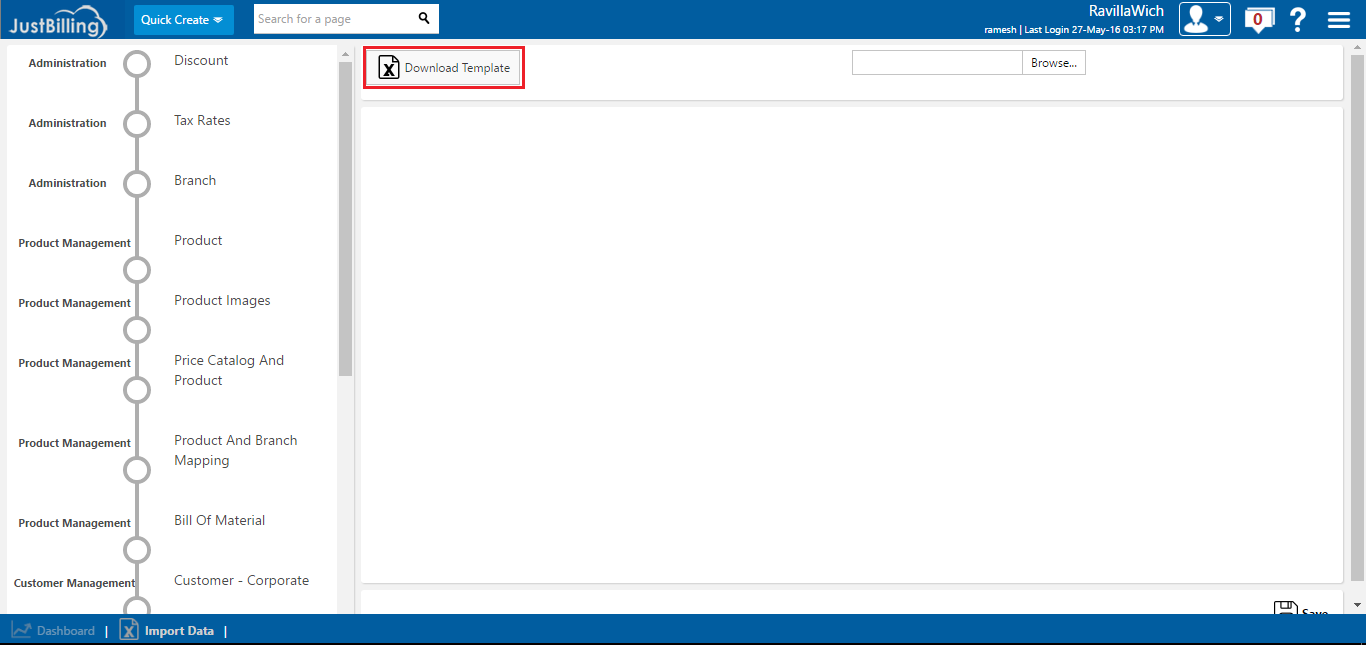
- Open Import Data"from Menu> Masters> Administration> Import Data.
- Download the Excel Template to enter the information in excel file.
Note : Import Data in can be done only by super admin in Distribution.
On clicking Download Template an excel sheet will be downloaded into the system.
(Figure 2 - Import Data Portal)
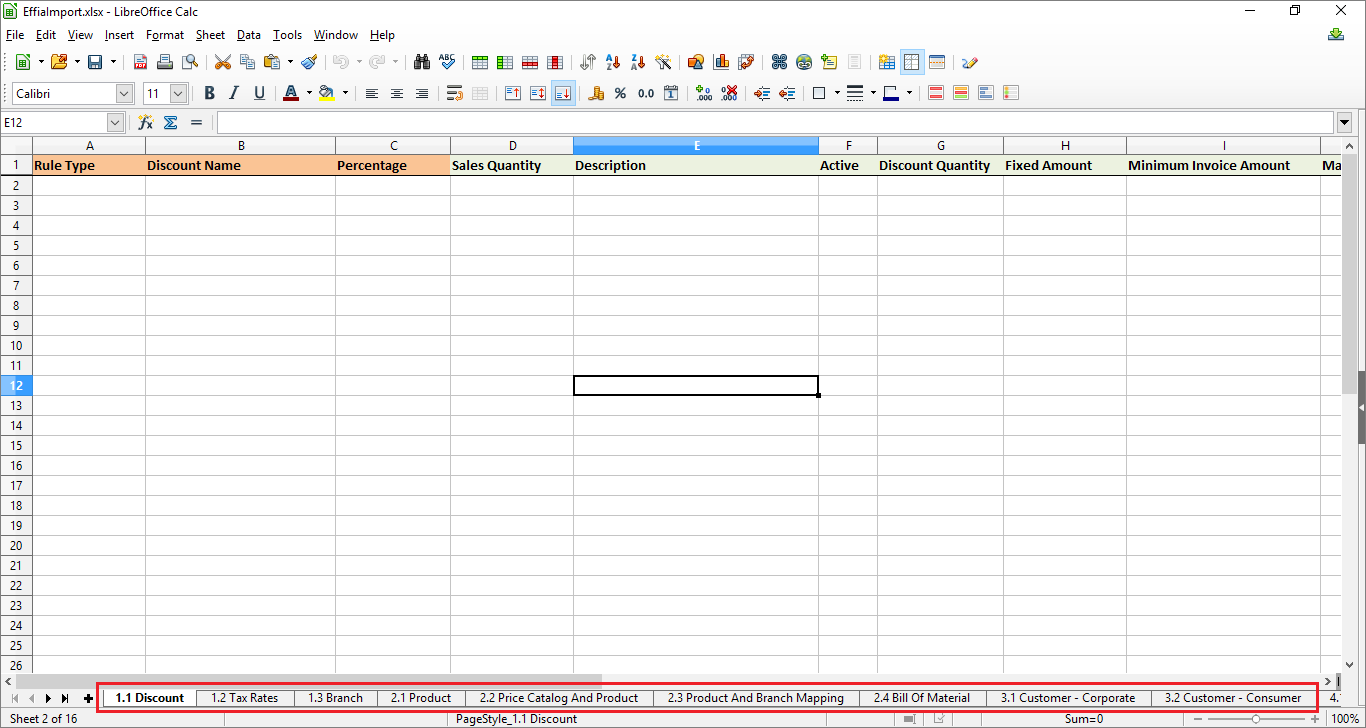
4. Open the excel and enter data.
For example, enter Discount details under Discount worksheet, Tax details under Tax worksheet, Product details under Product worksheet, Customer details in customer worksheet, Supplier details in supplier worksheet and so on. For more details on how to fill up the excel, please refer below topic:
a) Instructions to fill the excel template
b) Instructions for importing data into the application:
c) Excel Page details:
(Figure 3 - Import Data master Excel sheet)
5. Save the excel sheet after entering all the information.
6. Once again open the Import data page from Back office application.
7. Browse and select the excel file, which you have saved in step -5 above and upload it in the application.
Note: Please make sure the excel sheet is saved and closed before uploading.
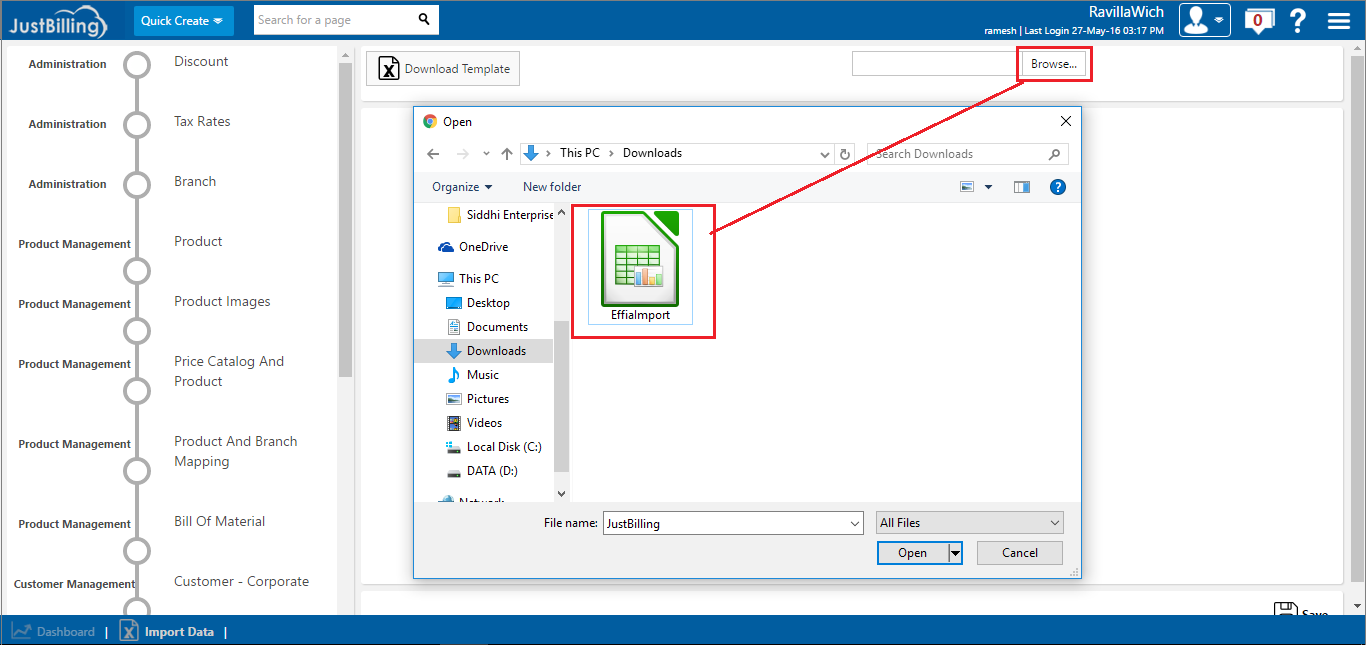
(Figure 4 - Import Data ExcelUpload from PC)
8. Once excel has been uploaded, from left hand side pane, select the appropriate option e.g Branch (see screen shot below) corresponding to that data you want to import in the application.
On selecting the page name, data entered in excel sheet will appear on the right side pane.
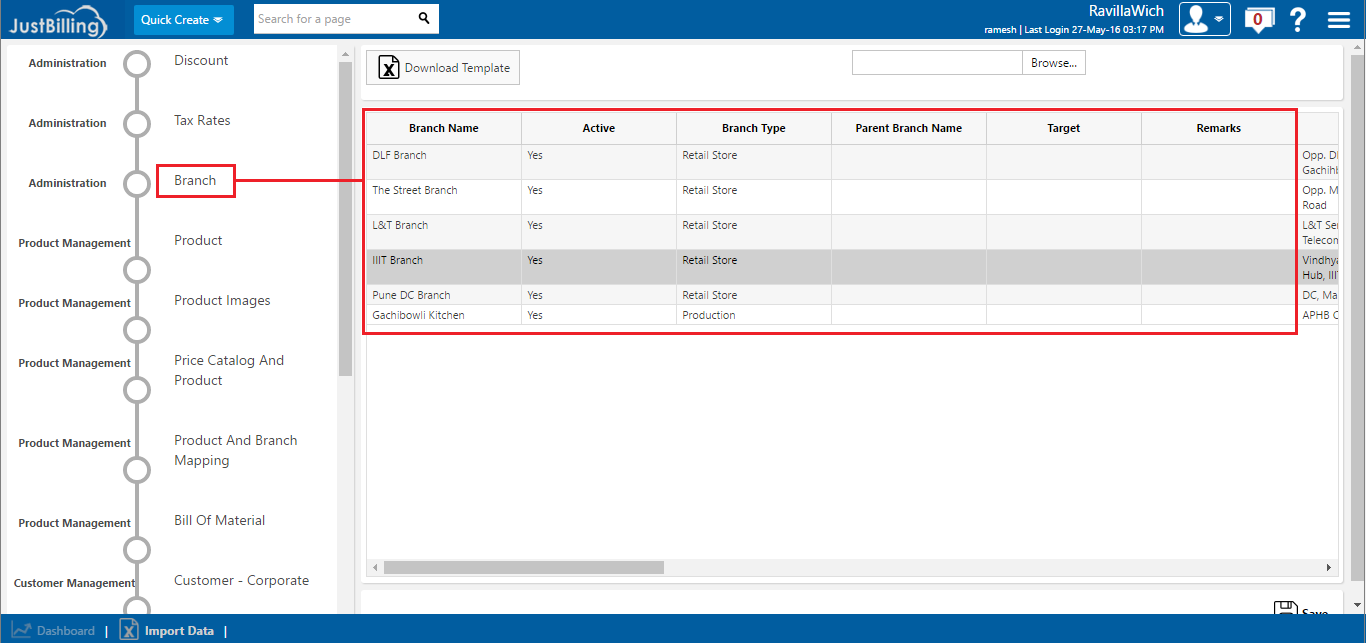
(Figure 5 - Uploading Data from Excel in to Cloud Portal)
9. Click on SAVE button. This will import the Branch data into application.
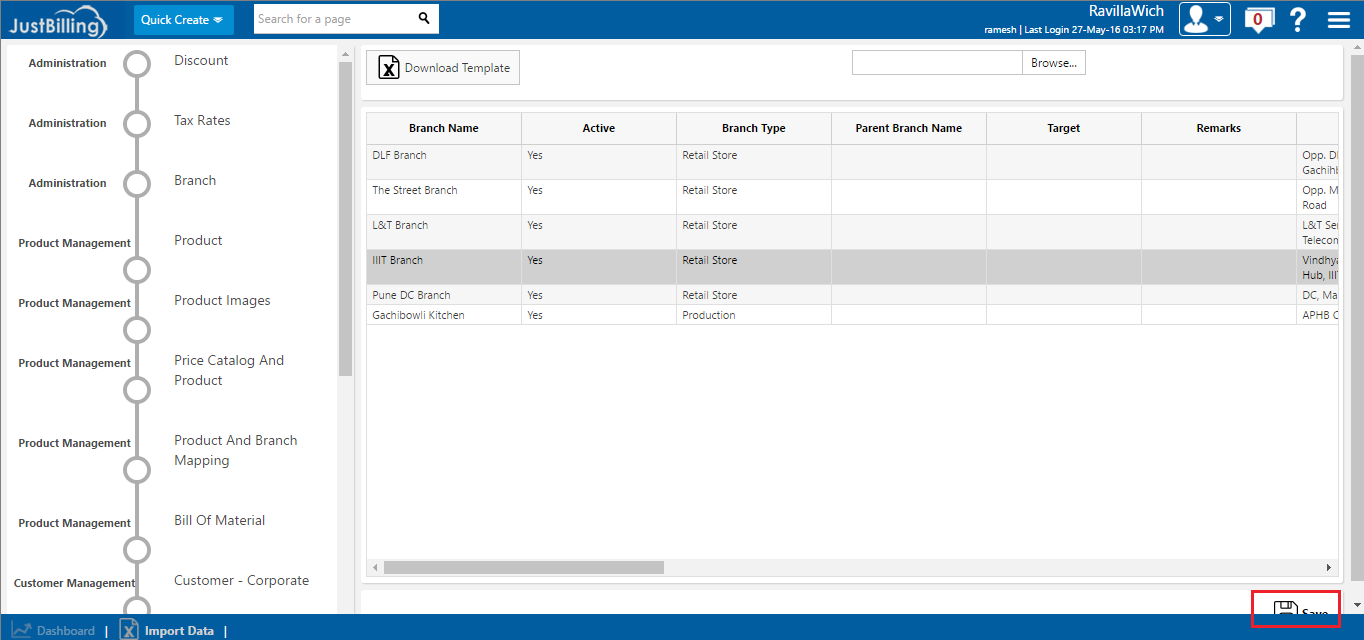
(Figure 6 - Validation of Data uploaded from Excel Sheet)
Repeat steps 8 & 9 for importing all data you entered into excel worksheet.
Note: For back office user, Supplier Individual, Employee management page is not available in the application.
a) Instructions to fill the excel template:
- Column in red color are mandatory. You need to fill the information in those columns. If you miss filling data in the mandatory columns, the complete row information will not be imported into the application.
- Please don't change any column name. On doing so, the import function will not work properly.
- Please don't delete any column from the excel template. On doing so, order of column gets mismatched and the import function will not work properly.
- Please don't change the order of column.
- Columns may come with drop-down value YES & NO (Irrespective of mandatory column). Here you need to select the value ‘NO’ if you want to proceed with No. If you leave this field blank, the application will proceed with ‘YES’. So please be careful here.
- Discount: No need to enter “%” sign in the percentage column. You simply need to enter the discount, for example 10. The application is intelligent enough to take % by itself.
- Customer Corporate: Entered phone number should be unique for all suppliers.
- Customer Consumer: Entered mobile number should be unique for all suppliers.
- Supplier: Entered phone number should be unique for all suppliers. This page captures the information of the corporate suppliers.
- Supplier Individual: Entered mobile number should be unique for all suppliers.
b) Instructions for importing data into the application:
- Make sure the excel sheet is saved and closed before uploading into application.
- After the excel has been uploaded into application, you need to select an option from left pane(Discount, Tax, Branch etc) , the corresponding data entered in the excel worksheet will appear in the right pane of the screen. Click on the Save button to import the data.
- After successful import of data, the screen (right pane) should become clear. If any records are still present, it means that particular record has some problem and was not imported into the application.
- To know the reason why the particular record was not imported, scroll right till the last column. Here the issue for not importing the record is shown.
- If the same record is imported multiple times, the application will keep updating the same record (will not create a new record) and override all the previous information. So, please be careful while importing any record repeatedly. (For more details see section condition for updating existing record via import.)
c) Excel Page details:
- Discount: This page helps define the discount rule for your business. Application has some set of predefined discount rules. You can see those from the Discount Rule page by logging into the back office.
- Tax: This page helps define the tax rules for your business. Application has some set of predefined tax rules. You can see those from the Tax Rates page by logging into the back office.
- Branch: You can define multiple branches for your business along with the type, address, email, phone and other information.
- Product: This is one of the most important pages because products are the basis of any business. Product can be of various types like: finished goods, raw materials, scrap, etc.. You can define all types of products required to run your business by selecting the proper product type option. You can also define them as Sales Item or Purchase Item.
Note:
The product code for any product has to be unique (one code should not be used more than one time even if the product has been deleted from the application).
If the entered value in Category & Brand column are not available in the application, then the application will automatically create them as new records in the respective pages.
- Price Catalog and Products: This page allows user to map the product with different price catalog. Price catalog can be of Sales type or Purchase type. Also, user can select the currency of the price catalog, which gives feasibility to use the price catalog to do business from other countries. User can enter with tax inclusive by selecting the option Tax inclusive Yes or No. Based on the selection of price catalog product pricing information will get change and user can continue with that for sales & purchase.
Note:
There are few price catalog which is already defined in the application. Those are:
- Default Price list
- Avg. Sales price
- Last sale price
- Avg. purchase price
- Last purchase price
- Standard sales price
- Standard purchase price
- Happy hours
Price catalog (Standard sales price, Standard purchase price & happy hours) are the only system defined price list in which user can manually add, edit & delete the products.
- Product & branch Mapping: This mapping helps user to filter the product based on the branch.
For e.g.: A company is having 2 branches and 100 products, but not all of the 100 products are sold in both the branches. In branch 1 they sell only 40 products and in branch 2 they sell 80 products. So accordingly user has to map the products with the respective branches. This configuration will help while downloading the data from back office to Just Billing system. Due to this configuration, user will be able to see only those products which were mapped with that branch, in the billing screen.
- Bill of Material: Bill of material helps user to define the process of making a product and with this configuration raw material gets automatically deducted from the inventory after making and selling the main product.
- Customer Corporate: This page helps user to capture corporate customer information.
- Customer Consumer: This page helps user to capture consumer customer information.
- Supplier: This page helps user to capture corporate supplier information.
- Supplier Individual: This page helps user to capture supplier individual information.
Note: this page is not available for back office users.
- Supplier Product Mapping: This section helps user to define which supplier is going to supply which material. While creating purchase order, GRN & Invoice, product list will get filtered based on selection of supplier product mapping.
Note: If user selects a supplier during purchase, who is not mapped with the product, the product list will not show and the user won't be bale to proceed.
- Update Physical Stock: This page helps user to enter branch wise physical stock of products, before starting the application for the first time.
- Opening Ledger balance: This page helps user to enter the ledger balance before starting the application for the first time.
- Employee management: This page helps user to enter the employee information along with their Grade and Designation before starting the application for the first time.
Note: This page is not available for back office users.
Condition to update the existing record in application via import feature:
- Discount: To update the existing discount rules you need to mention the same ‘Rule Type & Discount name’ in excel template.
- Tax: To update the existing tax rules you need to mention the same ‘Tax name’ in excel template.
- Branch: To update the existing branch you need to mention the same ‘Branch name’ in excel template.
- Products: To update the existing products you need to mention the same ‘Product code’ in excel template.
- Price catalog and products: To update the existing price catalog and products you need to mention the same ‘Price catalog name & Product code’ in excel template.
- Product and Branch mapping: To update the existing product and branch mapping you need to mention the same ‘Branch name & Product code’ in excel template.
- Bill of Material: To update the existing BOM you need to mention the same ‘Batch size, Version & Product code’ in excel template.
- Customer Corporate: To update the existing corporate customer, you need to mention the same Customer Corporate name in excel template.
- Customer Consumer: To update the existing consumer customer, you need to mention the same Customer Consumer name in excel template. Here customer name will be the combination of First name & Last name.
- Supplier: To update the existing supplier you need to mention the same ‘Organization name & phone number’ in excel template. Here supplier name will be the combination of First Name & Last Name.
- Supplier Individual: To update the existing supplier individual you need to mention the same ‘Supplier name & Mobile number’ in excel template.
- Supplier Product Mapping: To update existing supplier product mapping you need to mention the same ‘Supplier name (B2B or B2C) & Product code’ in excel template.
- Update physical stock: For this page, update feature option is not present. Each time new records will create the respective page.
- Opening Ledger balance: For this page, update feature option is not present. Each time new records will create the respective page.
- Employee management: For this page, update feature option is not present. Each time new records will create the respective page.